Whenever winter hits in Canada, I find myself craving red bean soup. Not only is it medicinal and warming — it's all of the food memories in Asia. We love them stuffed into buns and mooncakes, served over ginger sweet tofu in winter, and heaping bowls of shaved ice in summer. A signature ingredient for desserts across Asia.
Read MoreLentil Dal with Spinach and Tomato


India is by far one of the most memorable trips I’ve taken and a place I’d love to get back to. So naturally, it earns a section on the blog. India is life turned on its head — the scents, sights, and crowds that leave you a little stunned and possibly revolted. I can still recall traveling through Kerala and the taste of coconut sambar and mustard seeds on my tongue, heaped on fresh dosas I consumed daily.
One day, India will be a chapter in a cookbook I’m sure. For now, I cook through my favorite inspirational role model — Madhur Jaffrey — the Godmother of Indian cuisine. Her memoir “Under the Mango Trees” is a stunning read I highly recommend.
This Lentil Dal with Spinach and Tomato is a favorite of mine. Vegan, hearty, warming, and perfect with rice or naan. Made often to bring the smell of Indian cooking to my kitchen.


Lentil Dal with Spinach and Tomato
Serves, 2–3. I like to double this recipe and have leftovers over the week. Recipe adapted from Madhur Jaffrey’s Vegetarian India
Ingredients
11/2 cup red lentils (masoor dal), rinsed a few times until the water runs clear
1/2 tsp ground turmeric
11/2 tsp salt
3 tbsp olive oil, ghee, or peanut oil
1/2 tsp whole brown mustard seeds* see note
1/2 tsp whole cumin seeds
2 dried red chilies
7–8 curry leaves (I used bay leaves)
1 large onion (8 oz), peeled and diced
2 cloves garlic, peeled and minced
11/2 tsp fresh ginger, peeled and grated
2 medium-sized (10 oz) tomatoes, peeled and diced
5–6 oz spinach, washed and chopped into small pieces
1/4–1/2 tsp red chili powder, to taste (optional)
Freshly ground black pepper, to taste
Instructions
In a medium-sized pot, add the dal with 5 cups of water. Bring to a boil and skim off the bubbly froth as it rises to the top. Careful to not let it boil over! Stir in the turmeric, cover the pot partially with a lid and cook for 20-30 mins until soft. When done, add the salt to taste.
While the dal is cooking, heat the oil (or ghee) in a medium nonstick pan over medium-high heat. When hot, add the mustard seeds and fry for a few seconds until they start to pop. Immediately add the cumin seeds and fry for 5–6 seconds. Add the red chilies and fry until they darken in color. Add in the bay leaves(or curry leaves), stir once, and add the onions. Fry for 7–10 minutes until the onions are softened and browned.
Add the ginger, garlic and cook for another 2 minutes until golden and fragrant. Add the diced tomatoes and fry for 5–6 minutes until soft, mashing them slightly with the spoon as you cook. Add the spinach with 1/2 cup water. Stir and bring to a simmer until the spinach softens and shrinks in size, around 10 minutes.
When the dal has finished cooking, add the spinach mixture and stir well. Add red chili powder, salt to taste with freshly ground pepper. Serve hot with naan or rice and a generous dollop of yogurt. The leftovers keep in the fridge for 2–3 days. If it thickens over time, add a few spoonfuls of water.
Cooking notes:
If the mustard seeds pop crazily, cover the frying pan loosely with a lid.
The original recipe called for 1/2 ground asafetida, which you fry for a few seconds before the mustard seeds. I have omitted it since it’s not an ingredient I can find easily in western shops.
Caramelized Onions with Soy Sauce
I have searched long and hard for an Asian-inspired caramelized onion recipe and I’m quite happy with this one. I love to make a batch of these soy sauce caramelized onions. They go with anything — toast, focaccia, sandwiches. These last for a week or so in the fridge so I like to make a big batch and have them handy. A great way to level up a quick lunch or snack on the go.

Caramelized onions served over toast, cream cheese with a dash of pepper and green onions
Caramelized Onions with Soy Sauce
Ingredients
2 large onions, halved and sliced into thin rings
4 tbsp vegetable oil, for frying
1/2 tbsp sugar
2 tbsp soy sauce
Instructions
In a medium-large pan, heat the vegetable oil over medium-high heat until hot. Add the onions and fry for 2-3 minutes. Lower the heat to medium-low and fry until onions are browned, caramelized, and soft. Around 20-25 minutes. If the onions start to burn, lower the heat.
Add the soy sauce, sugar and cook for another 5 minutes. Taste and adjust seasoning if need. Serve warm or store in a container. These last in the fridge for a week or so.
Stir-fried Tomato and Egg / 番茄炒蛋
Amongst all my memories of delicious childhood dishes — this is by far my favorite + most classic of all. Everything Chinese family has a version. My dad makes it, my grandma makes it, all the lunch bento spots we ate at as students make it. It’s ridiculously comforting and easy to make with minimal ingredients. The sweet-sour tang of tomatoes makes the dish so full of umami flavor and brings depth to a simple egg dish. A classic away-from-home dish to make during my years as a college student and while living abroad.
Ripe juicy tomatoes, a handful of eggs, green onions and cornstarch is all you need. Let’s get cooking
Note: If I am making this dish for one— I halve the recipe.


Tomato Fried Egg
Serves 2–3, recipe adapted from Adam Liaw
Ingredients
3 ripe medium-sized tomatoes, roughly chopped
1/2 cup water
2 tbsp vegetable oil
½ tsp salt
¼ tsp sugar
2 spring onions, cut into 5cm lengths
½ tsp cornstarch, mixed with a little cold water
5 eggs, beaten
Instructions
Heat a medium pan over medium-high heat and add a tablespoon of oil. When the oil is hot, add the tomatoes and fry until they are soft around 2 minutes.
Add the salt, sugar, 1/2 cup water, and green onions. When the green onions soften, slowly add the cornstarch mixture, stirring as you go. The tomato mixture will thicken into a saucy slurry. Taste and add more salt or sugar as desired. Remove the tomato mixture from the pan and rinse the pan.
Return the pan to heat and add the remaining tablespoon of oil. Add the beaten eggs and stir every 15 seconds until the eggs resemble the texture of a loose omelet. Add the tomato mixture to the eggs and stir to combine. Taste and adjust seasoning, garnish with more green onions if desired. Serve immediately.
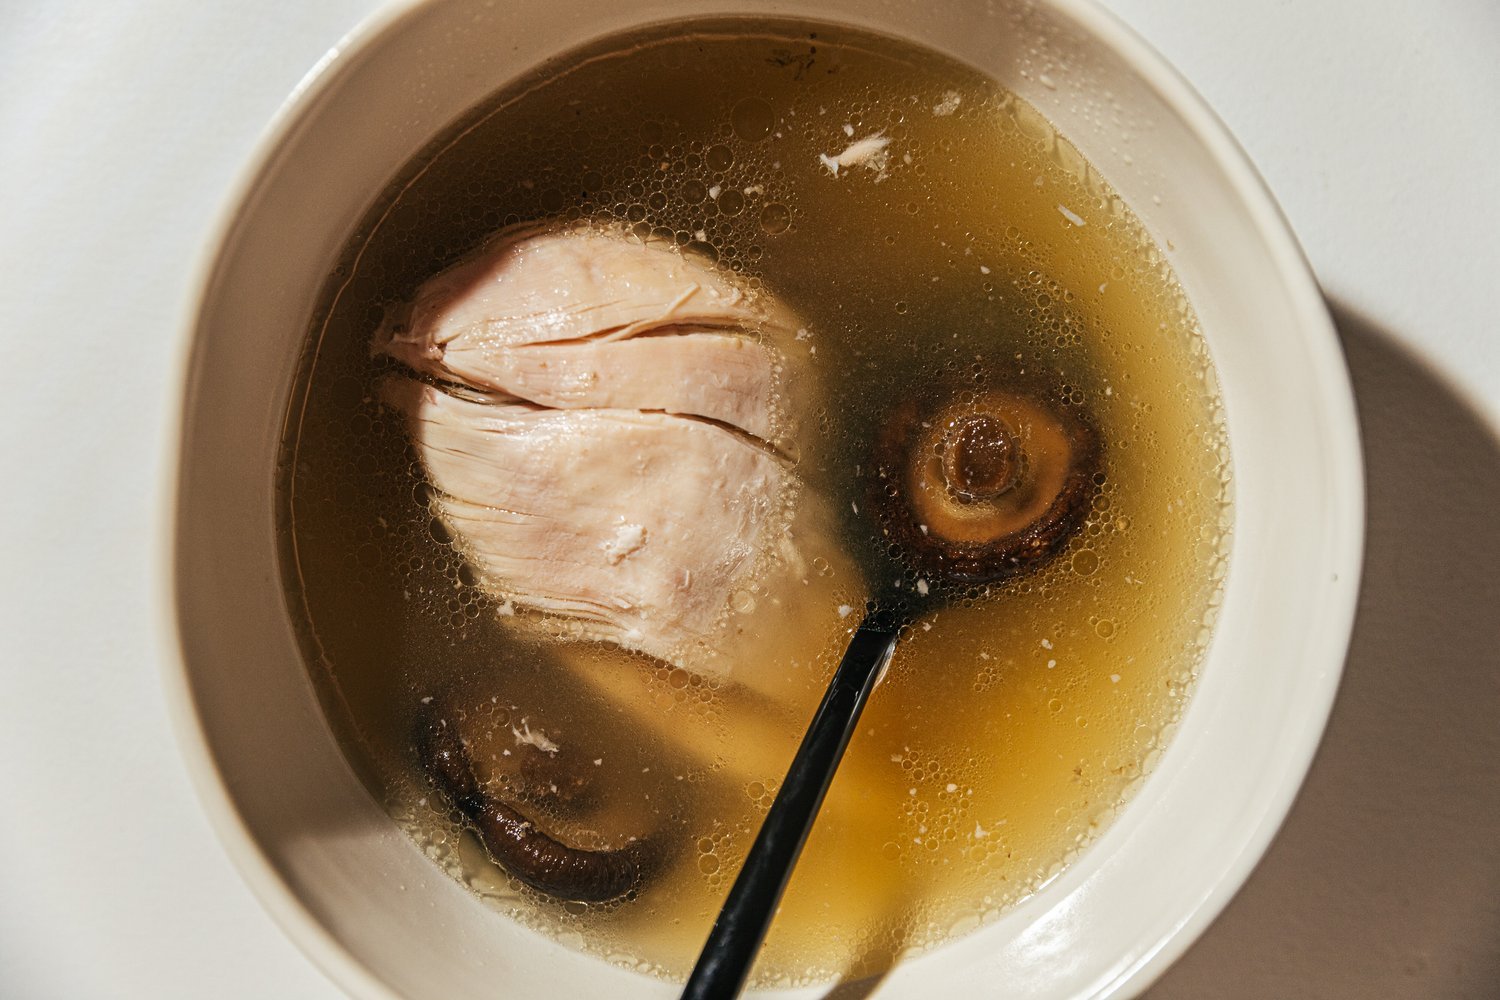
Easy Whole Chicken Mushroom Soup 全雞香菇湯
This chicken mushroom soup with 4-ingredients is deliciously simple and tastes like a warm hug. My dad made it for me with his pressure cooker and I was able to recreate the recipe with a slow cooker. If you’re into the fragrant flavor of shiitake mushrooms — this hearty and light soup is something you don’t’ want to miss. Dad used only two ingredients — chicken and mushrooms, I’ve adapted it to include ginger and a splash of rice wine.
I used a slow cooker for this recipe but it can be made with a pressure cooker, instant pot, or stovetop. Though you’ll get the soup to gel and that tasty bone broth with longer cooking hours.
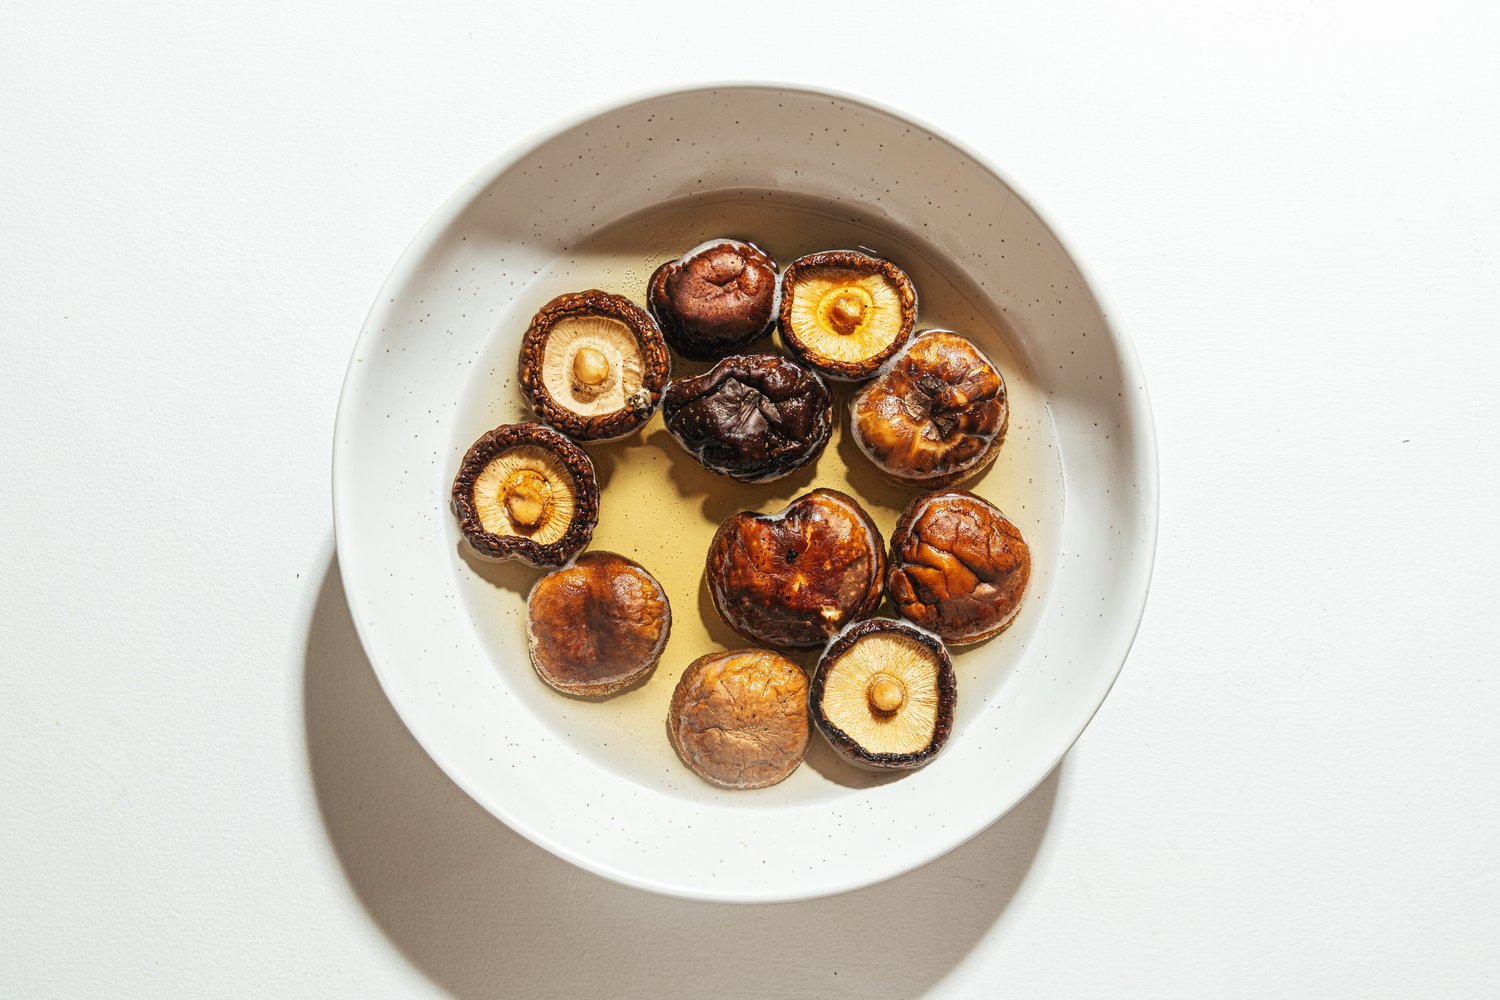
Shiitake mushrooms soaking in all their glory
Flavourful and hearty and light with simple ingredients. My favourite kind of cooking
Shiitake mushrooms soaking in all their glory

Flavourful and hearty and light with simple ingredients. My favourite kind of cooking
Whole Chicken Mushroom Soup
Ingredients
1 whole organic chicken (buy the best quality chicken you can get)
8–10 dried shiitake mushrooms
3-inch knob of organic ginger, sliced into thin pieces
1/4 cup rice wine (Mijiu / Chinese cooking wine)
5 Chinese red dates (optional)
Salt, to taste
Slow Cooker Instructions
Soak the shiitake mushrooms in water until soft. If you’re in a time pinch, soak the mushrooms in hot water. Reserve the mushroom water for the broth.
Take the chicken out of the package. Rinse it thoroughly and pat dry. Using both hands, generously rub salt all over the chicken — under the wings, and inside the cavity. Let sit for 10 minutes and rinse again.
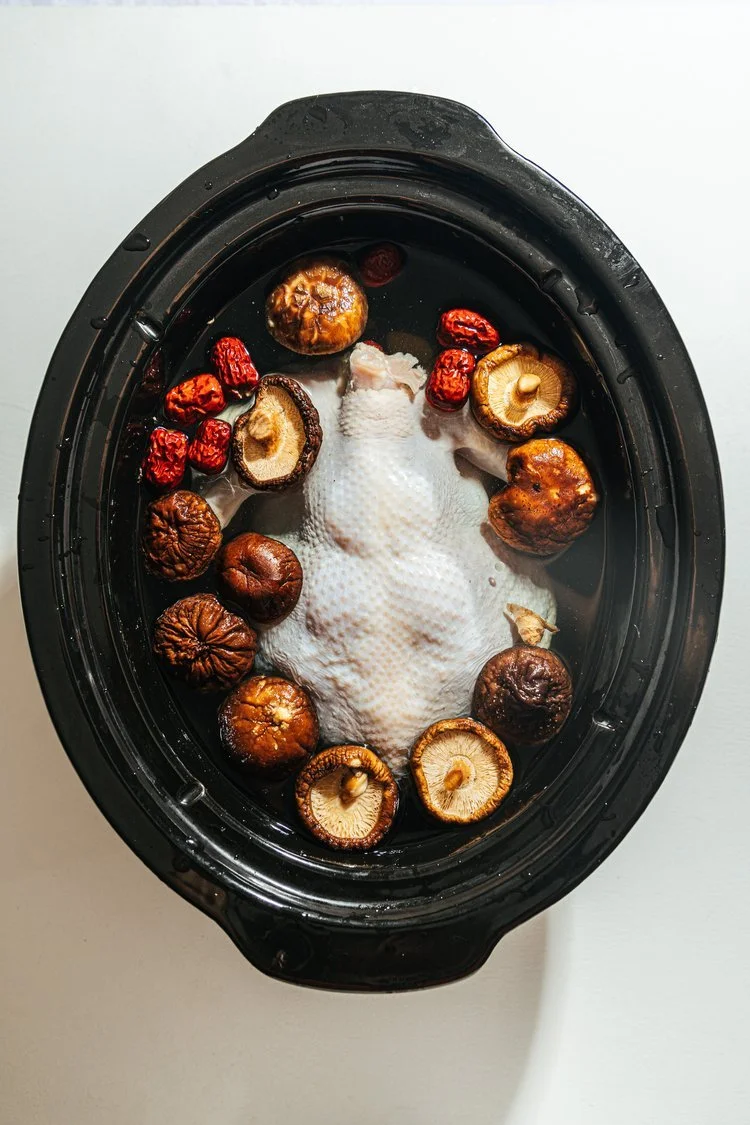
Add the brined chicken to the pot along with shiitake mushrooms, mushroom water, ginger, and dates (if using). Fill the pot with water until the chicken is submerged (around 10 cups of water).
Cook on low for 8-hours. Add the rice wine, taste, and salt if needed. You can take the chicken out, debone before serving, or serve straight from the pot. Enjoy!
Cooking notes:
Some recipes suggest boiling the chicken in hot water before adding the soup but you’ll lose a lot of flavors that way. If you prefer a clearer broth — strain the finished soup before serving.
Red dates are optional in this recipe, the flavor is subtle but it’s really good for you.
This soup can be made with a pressure cooker, instant pot, or stovetop. Though you’ll get the soup to gel and that tasty bone broth with longer cooking hours. Let me know how it goes if you do.
If you enjoyed making this recipe, tag it with #sophiahsinkitchen. I’d love to see it and reshare it ❥
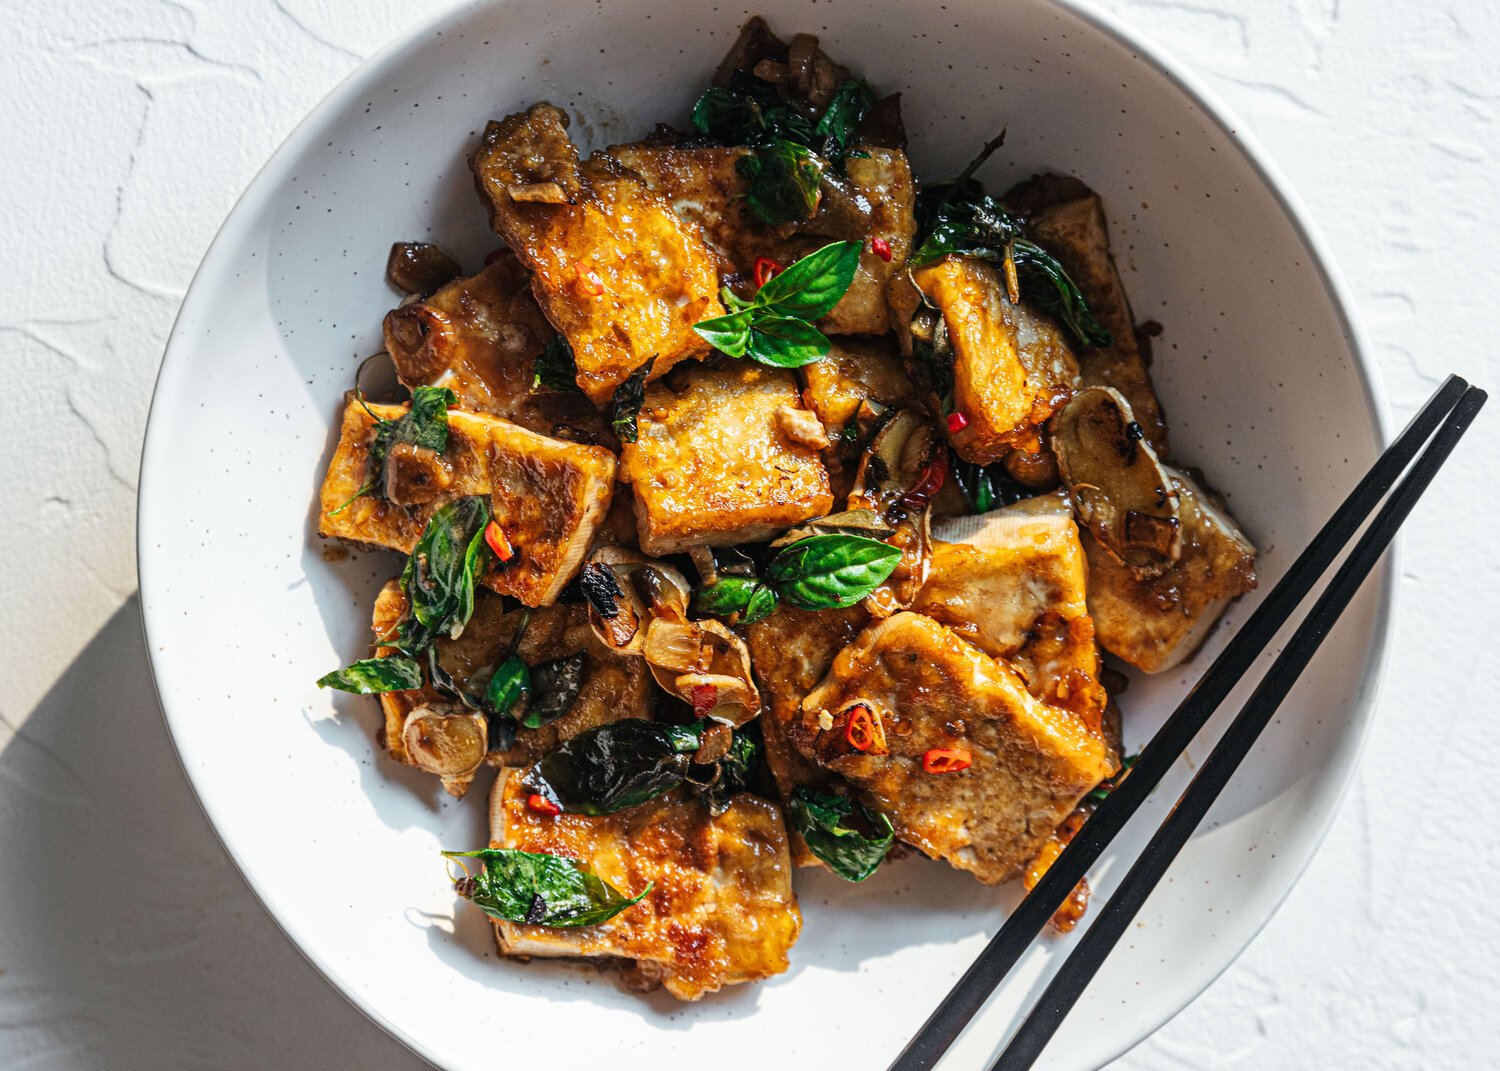
Three Cup (Sanbei) Tofu
A plant-based dish with intensely good flavors.
If you have ever been to Asia — you’ll know what I am talking about when you eat at those hole-in-the-wall street restaurants. A gathering place where all levels of society come together and order enough food to cover several tables. You don’t go there for fine dining but for the clatter of smoky woks, clinks of Taiwanese beer bottles (guava juice for the kids), scooters lined out the door, and the non-stop motion of the city.
Traditionally, this dish is made with chicken that I’ve adapted with tofu for plant-based cooking. The name three-cup refers to the equal ratio of rice wine, soy sauce, and sesame oil. The ingredients have evolved and been adapted over time to suit different regions in Taiwan and China.
This is a dish that is healthy enough to be a household staple, though it doesn’t guarantee any leftovers based on experience. The generous amounts of ginger, garlic, basil, and sesame oil create flavors that are intense and captivating to the taste buds.
If you are new to Taiwanese cooking wine/Mijiu 米酒 — I recommend you pick up a bottle at your local Asian grocery (I get mine from T & T in Vancouver). There are substitutes you can use like Chinese rice wine, sake, dry sherry, or plain vegetable stock but you’ll get the best results from Taiwanese cooking wine. It’s what I grew up with.

This is the brand I get from my local Asian store. Made in Taiwan.

Three Cup Tofu
Serves 2,
Ingredients
14 oz (1 package) medium-firm tofu, drained and patted dry
3-inch knob of ginger, sliced into thin pieces*
5 cloves garlic, sliced
1 Thai red chili, chopped into pieces
1 packed cup of fresh Thai basil, roughly chopped
1/3 cup cornstarch
oil for cooking
Sauce
3 tbsp Taiwanese cooking wine 米酒 (sub rice wine/sake/vegetable broth if you must)*
3 tbsp soy sauce or Tamari
3 tbsp sesame oil
1 tbsp sugar
⅓ cup [80g] water
Instructions
1. Dry the tofu with paper towels (I let mine drain on a paper towel while I prep). Slice the tofu in half lengthwise and cut each half into 1cm-thick slices or cubes.
2. Place the cornstarch in a large bowl and coat the tofu slices one by one, on all sides. Add more cornstarch if needed. Lay the coated tofu slices on a large plate for frying, making sure not to overcrowd them.
3. Heat a large frying pan over medium-high heat and add 2 tablespoons of oil. When the oil is hot, fry the tofu until golden and crispy, flipping every 3–5 minutes. This will take around 10 minutes. If the tofu cooks too quickly, lower the heat to medium.
4. While the tofu is frying. Add all the sauce ingredients into a bowl. Stir to dissolve the sugar.
5. Remove tofu from the pan and set it aside in a bowl. In the same pan over medium-high heat, add 2 tablespoons of oil and fry the ginger pieces until brown and golden, around 1 minute. Add the garlic and chili until they are crispy and become incredibly fragrant. Making sure the aromatics do not burn.
6. Pour in the sauce and stir until the sugar has completely dissolved. Add the tofu slices and toss to combine. Lower the heat to medium, add the Thai basil and cook until the sauce has reduced to a syrupy state. Turn off the heat and serve warm with rice.
Cooking Notes:
Ginger: Make sure to fry the pieces until golden brown on all sides. Ginger, unlike garlic — lasts a lot longer in hot oil. Make sure to separate their cooking processes.
Taiwanese Cooking Wine/Rice Wine: See the photo here for the brand I use.
Garnish: Serve with Thai basil, cilantro, or green onions.
Taro coconut sago
This is one of my favorite summer desserts. It’s also a good recipe for winter when served warm. If you never had the chance to try taro — it has a nuttier, starchy texture compared to sweet potatoes. It’s also less sweet and is used in a variety of Asian desserts.
When I lived with grandma on her tea farm in Taiwan, I would accompany her in the field every day and dig for baby taro. Dessert was simply steamed taro, peeled, and sometimes dipped in sugar. A nostalgic ingredient for me.

Taro coconut sago
Ingredients:
1/2 medium-sized taro (400 grams), peeled and diced into 1-inch cubes
1 can (14 oz) full-fat coconut cream
1/2 cup sago pearls (100 grams)
1/3 cups sugar (80 grams) or preferred sweetener to taste
A pinch of salt
Water
Instructions
In a pot & steamer, bring water to a boil and steam taro for 15 minutes. If you prefer mushier taro like me, steam for 3 minutes longer. Turn off the heat and let sit while you cook the sago.
In a separate pot, bring 6 cups of water to a boil and add the sago pearls. Cook for 10 minutes, stirring constantly so they don’t stick to the bottom of the pot. Turn off the heat and let sit for 20 minutes. The residual heat will cook the pearls and they should turn from white to translucent.
Pour the pot of sago pearls into a large sieve and run cold water through it, stirring with a fork. This will stop the cooking process and prevent your sago from getting too gluggy. Set the sago aside.
In a clean pot, bring the can of coconut cream to a low simmer. While you are waiting — mash half of the taro in a bowl with a fork. Add all of the taro, 1/2 cup water (or more to achieve desired consistency), salt to the coconut cream and bring to a simmer. Add the sago pearls last and give it a good stir. Serve hot or chilled in the fridge.
Notes:
Consistency: The soup will become thicker the longer it sits, simply add water and adjust to the desired consistency.
Fresh Taro: Taro can be found fresh in most Asian markets. In the case you can’t find any, try some from the frozen section, though you can’t beat the fragrance of freshly cooked taro.
Over-stirring: Avoid over-stirring after everything is added together. This will ensure you get all the lovely textures from your ingredients.
Basic Chinese Congee

This is a basic Stovetop recipe for Chinese congee. One thing to remember is the 1:10 rice to water ratio. For a thicker consistency — use 8 cups of water. For runnier congee, use 12 cups. I like something in between :)
Ingredients
1 cup white rice (I prefer jasmine, but any short grain rice will do), rinsed until the water runs clear
10 cups water, chicken, or vegetable stock
1/2 teaspoon kosher or sea salt, plus more for seasoning
One-inch knob of ginger, peeled and sliced thin
Two whole cloves of garlic, peeled
Instructions
In a large pot over medium heat — add stock, rice, and ginger. Bring the mixture to a boil, then reduce the heat to a low simmer. Stirring occasionally so that the rice doesn’t burn at the bottom.
Simmer the congee for about 1 hour or until the congee is thickened and creamy. Add salt to taste. Serve straight from the pot.
Note: Congee thickens as it cools. If not consuming all at once, add additional stock or water to create the desired consistency.
Topping ideas
I like mine with a simple fried egg in the mornings. Soy sauce, pickled vegetables, savoury dishes. Sliced green onions are also great.
Stir-fried Anchovy with Mushrooms (Myeolchi bokkeum)
Have you noticed that some of the best conversations occur around a dinner table? I am convinced that there is magic in food that melts barriers and form bridges. It truly is the most approachable and simple form of art.
I had the pleasure of inviting chef Taeyoung Chang over for dinner. Over jook (the Korean word for congee) — we discussed our Asian upbringing, the challenges, the dual-identities we re-embrace as adults, and the heritage we are able to express through cooking.
This dish is inspired by the anchovy banchan dish Myeolchi bokkeum (멸지 볶음 ). Banchan is a collective name for small side dishes served along with cooked rice in Korean cuisine. I love how a bowl of congee is like a canvas where you can add your dishes of choice. It can be as simple as a fried egg with soy sauce or elaborate with fried puffed kombu, anchovies, and garlic oil.


Stir-fried Anchovy with Mushrooms
Serves 2-3. Recipe by Taeyoung
Ingredients
1.5 cups shimeji mushrooms, ends removed and separated into pieces
2 tbsp dried anchovy (12–15 pieces)
A handful of Dasima kombu (8 pieces) *See note
1 tbsp butter
1 tbsp oil
Juice from half a lemon
TT Black Pepper
TT kosher salt
Instructions
Over medium-high heat, pan-fry the kelp in canola oil until bubbles appear. Remove from pan and set aside.
In the same pan and oil, sear the mushrooms — keep in a single layer and be sure to not overcrowd the pan.
Add in your butter and toss in your anchovies, add 2–3 cracks of black pepper.
When golden brown, remove from heat, season with salt, and a squeeze of lemon. Serve with Basic Chinese Congee or Sweet Potato Congee.
*Note: The correct type of kombu to use here is Dasima, not just soup kombu. If you have trouble finding Dasima kombu, omit it from the recipe.
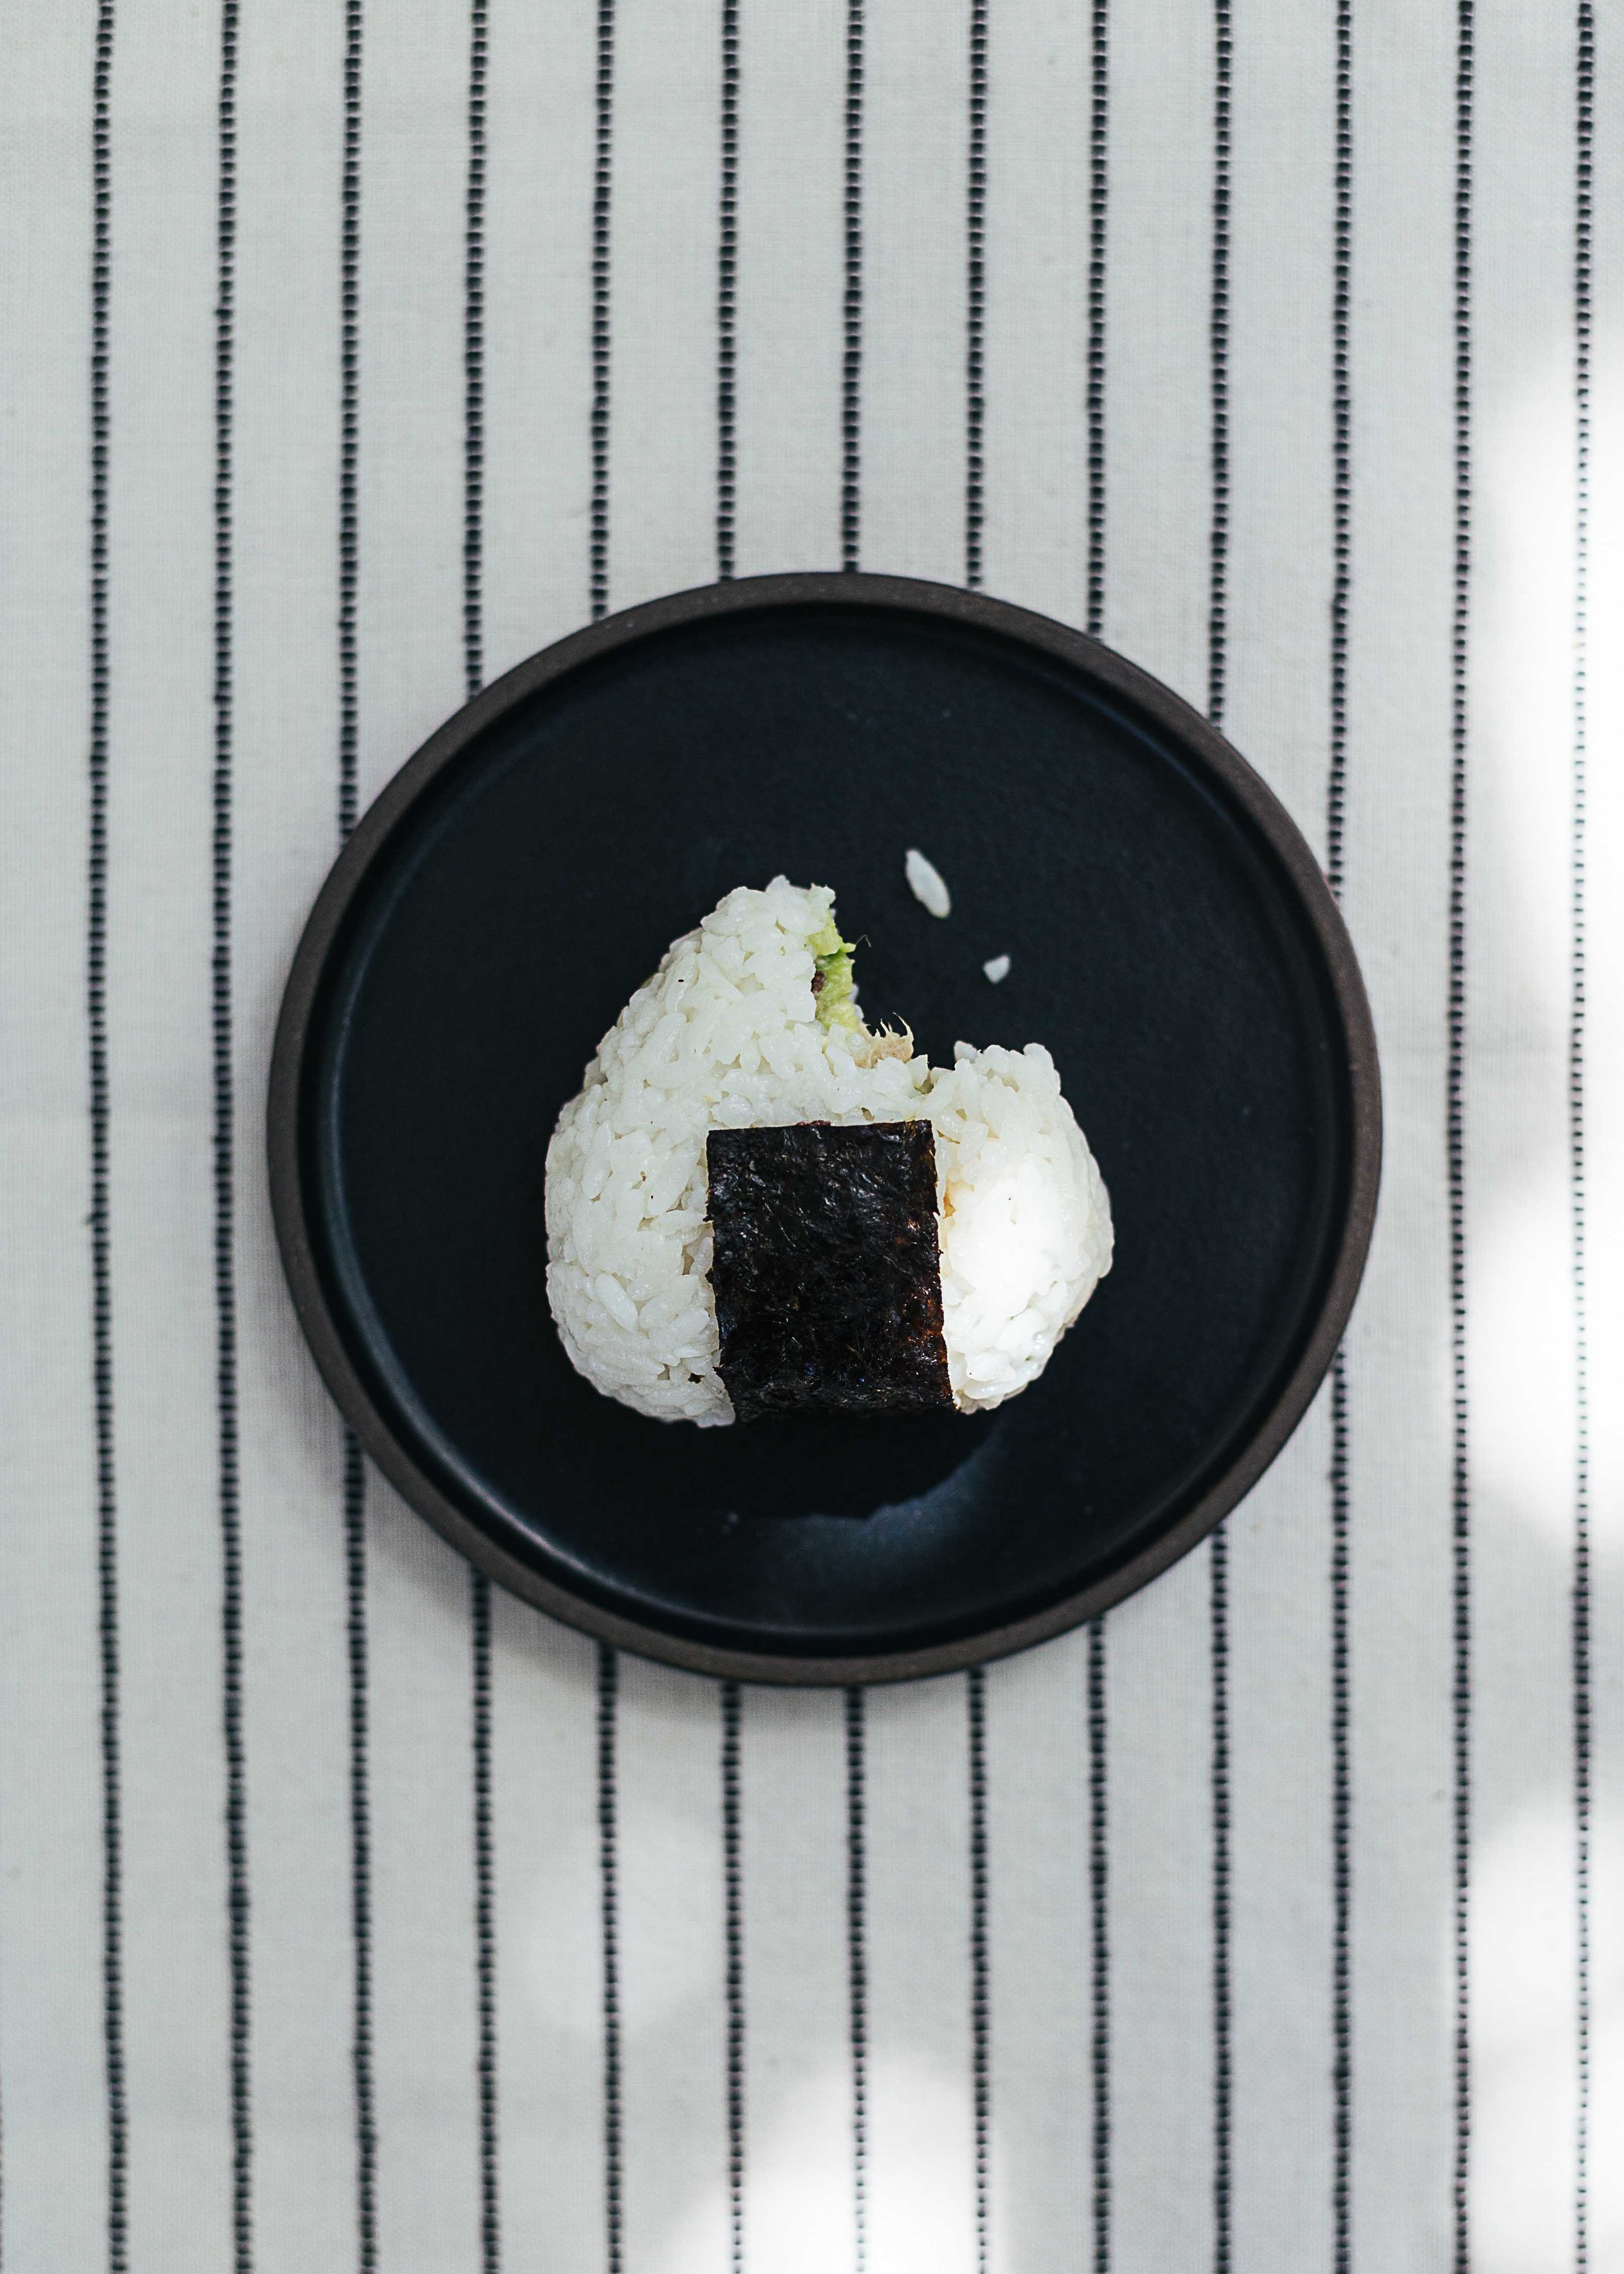
Tuna Onigiri Rice Ball Recipe

Onigiri! This is a recipe for a little snack that accompanied my childhood years in Taiwan. Found in all of the 7–11 or convenience stores, these triangle-shaped rice balls were many of my breakfast, lunch and late-night snacks.
Even though I have never been to Japan, Taiwanese culture is a culture that is greatly influenced by Japan — who ruled over Taiwan in the 1800s. Some of the influence can be found in old Japanese buildings that are now tea houses or galleries, neat lines at the MRT, my grandpa who spoke Japanese, and a millennial generation that is all about Japanese culture.
These onigiri’s! I remember standing in my school uniform (white collared shirt, pleated skirt, bright orange hat), eagerly choosing my flavour of the day. My favourites — pork floss with mayo, egg, salmon, or chicken teriyaki. Sometimes I would opt out of onigiri’s and go for the traditional Taiwanese rice balls. A heavier version made with sticky rice, fried salty donut, radish pickles, stuffed with pork floss and sprinkled with peanut sugar. They were heavy enough to fill you for hours and go down your tummy very well with a cup of soy milk.
There is something about rolling and shaping warm rice together in your palms. I don’t know if it is the scent of warm rice or act of making onigiri’s that make me want to eat them immediately after. These are great as snacks on the go, picnics, a light meal, or give away and impress your friends.

Tuna Onigiri Rice Balls
Ingredients
1 cup uncooked sushi rice
2 tbs rice wine vinegar
1 tsp sugar
1/2 tsp salt
1 green onion stem, thinly sliced (you can also use cucumber)
1 can of tuna in salted water
1/2 avocado, diced
2 tbs greek yogurt (or mayo)
1 nori sheet, cut into small rectangles
Instructions
Wash rice in a sieve until water is clear. Add 1 cup of water (or refer to amount on rice packaging) and cook until rice is tender. About 15 mins. Let cool.
While rice is cooking, mix can of tuna (squeeze saltwater out with lid when you open the can), avocado, green onions and greek yogurt. Mash and add salt and pepper to taste
Gently fluff rice with a fork. Fold in sugar, rice wine vinegar and salt with a spatula. Don’t over mix.
Place a piece of saran wrap on your hand and measure 1/3 cup of seasoned rice into the wrap. Flatten rice into a flat shape and create an indent in the centre. Spoon in tuna filling and gently form rice into a ball using the saran wrap.
Using your hands, form the rice ball into a triangle. Take off the plastic wrap and wrap a piece of nori around the bottom.
The trick to a good onigiri to use rice that is freshly cooked and slightly warm. I felt very Japanese waking up at 7 am to make these for lunch. They will keep for a while in a sealed box in the fridge.
The original recipe called for cucumber but I found the green onions to be a nice change.
I made these again and mixed in a few spoonfuls of furikake. They were delicious and disappeared very fast at the potluck I brought them to. Enjoy!

Sweet Potato Congee

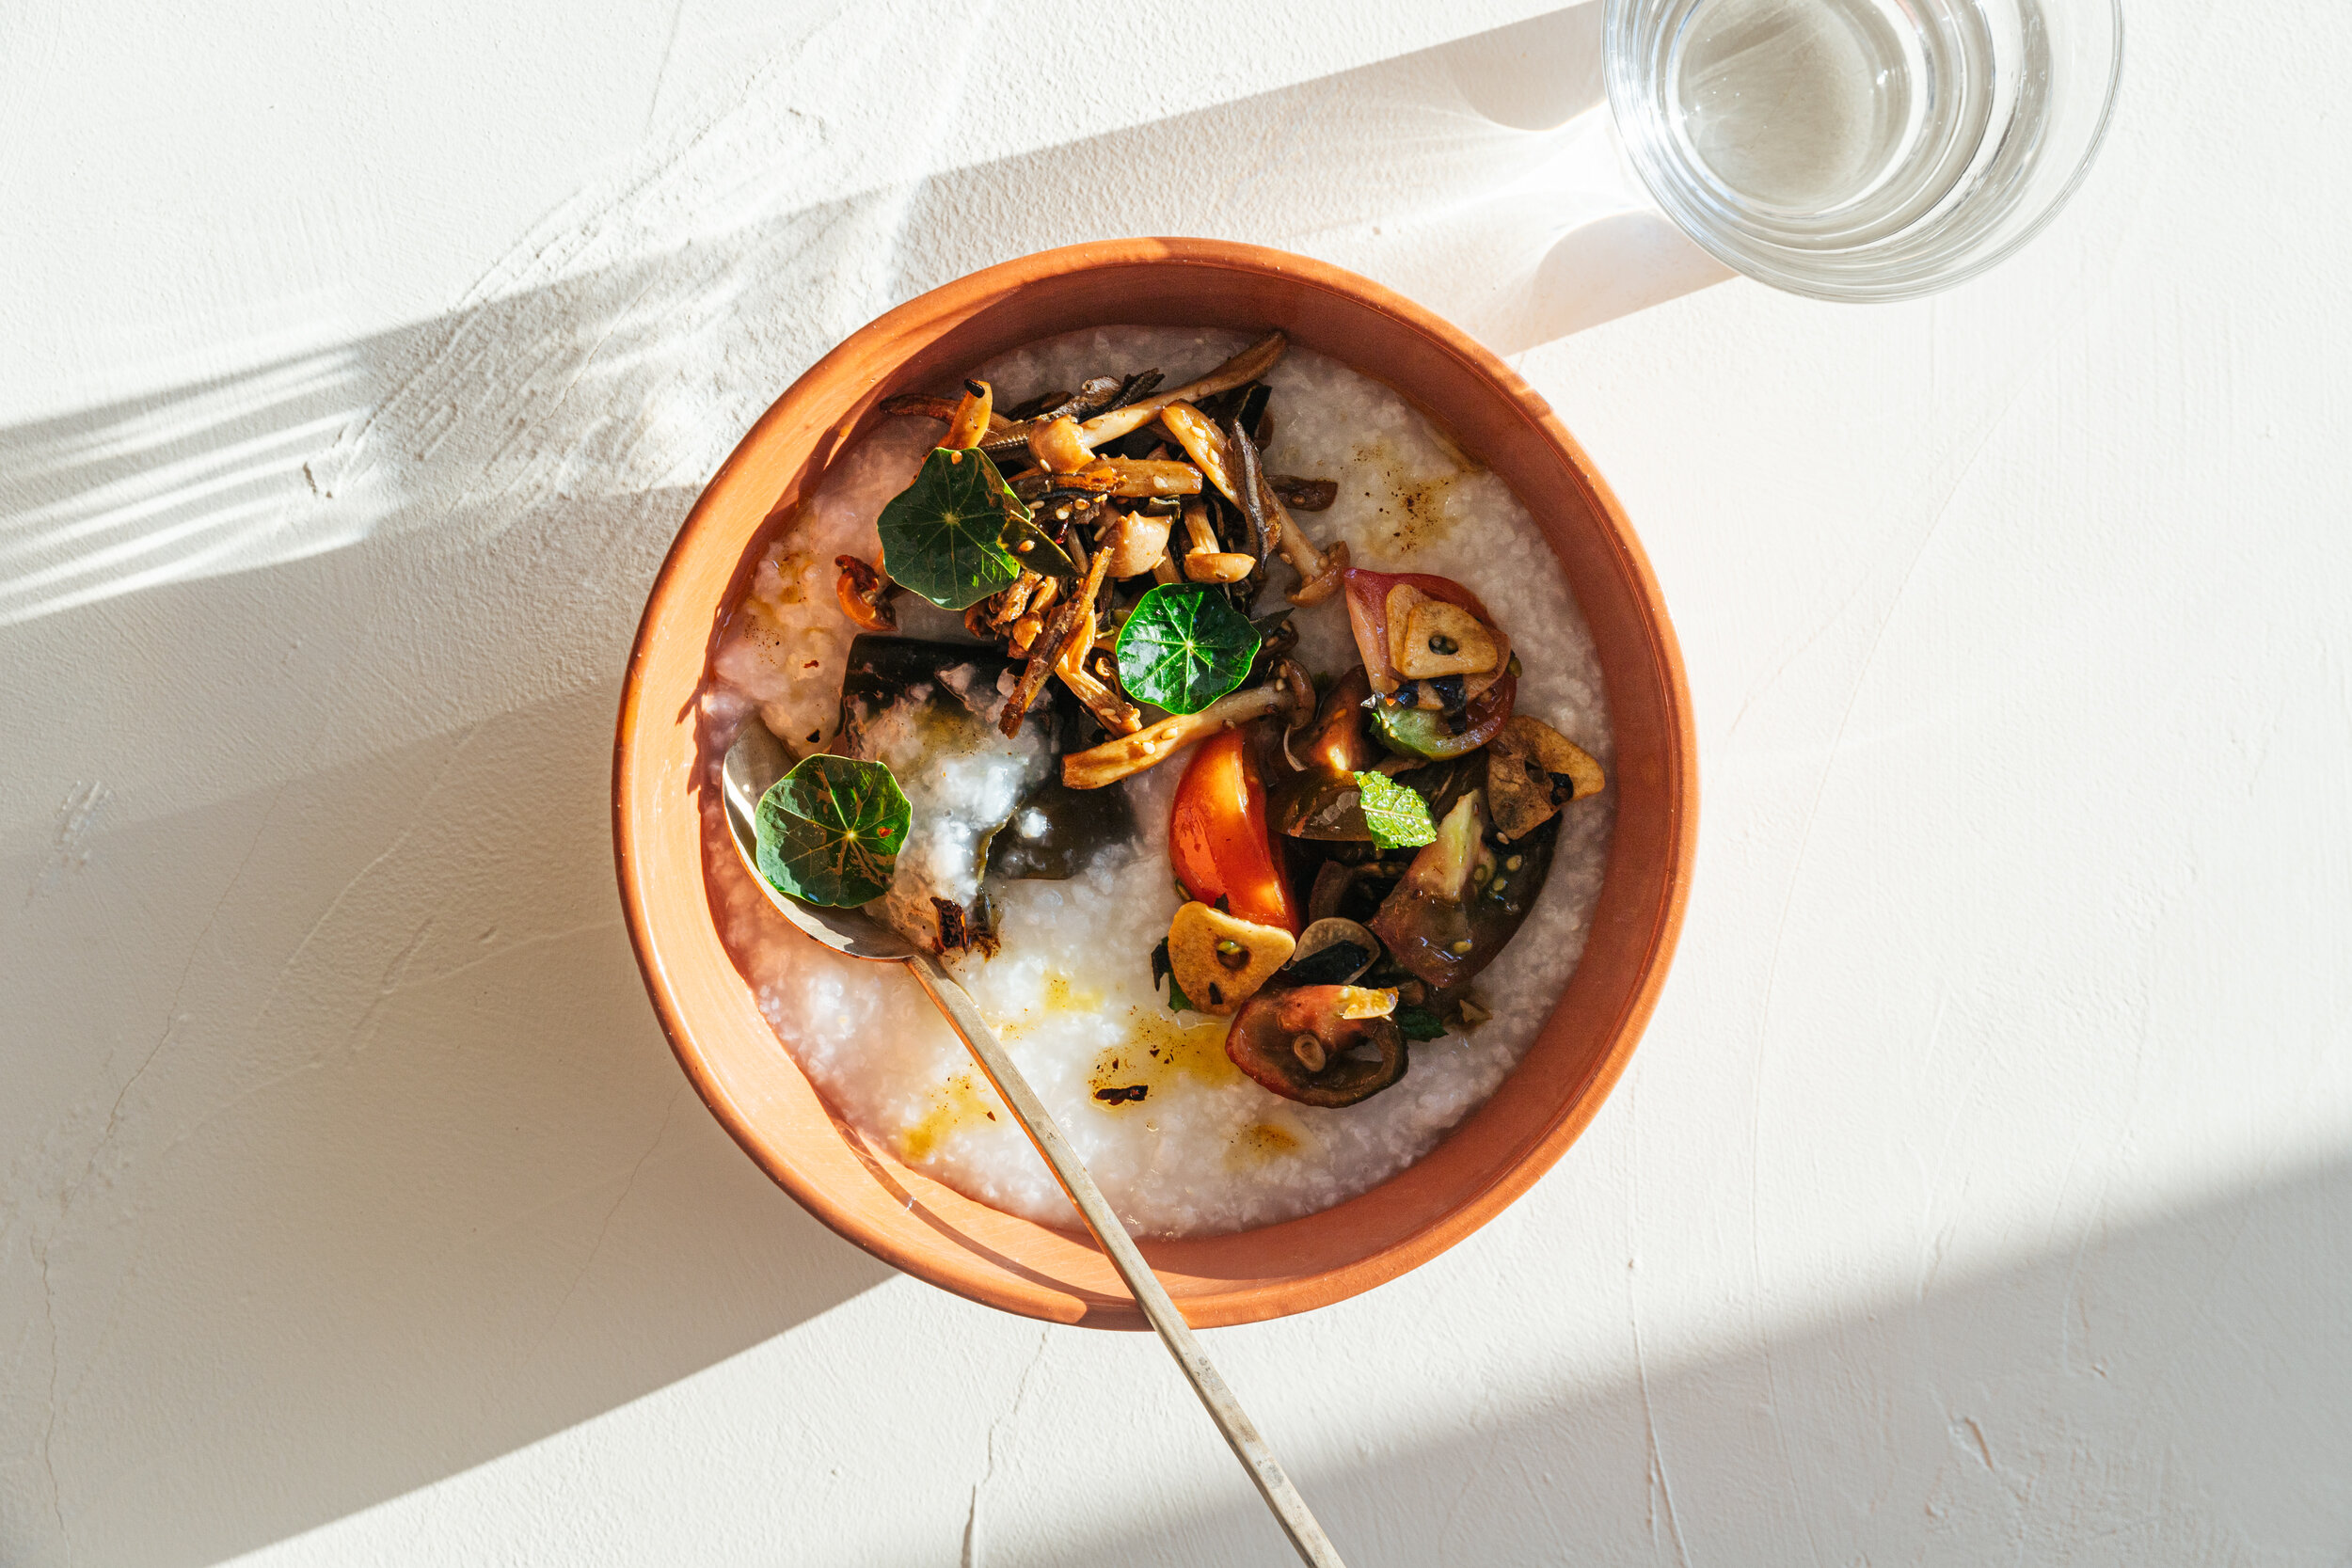
sweet potato congee with house edible flowers
I hope it’s been a good June for everyone. It’s been particularly cold in Vancouver so I have been firing up the stove for a lot of congee. For those who are new to congee — congee is the Asian version of chicken soup, for the soul, and so much more. A warm and nourishing meal known to boost your chi — congee is the remedy food for colds, flu, stomach aches, and bad days. It’s also a popular breakfast food for all ages and served in multiple flavors at congee noodle restaurants in Vancouver.
This sweet potato congee is sentiment to Taiwan — the beautiful island I call home. Geographically shaped like a sweet potato — the Taiwanese take pride in what we call a “sweet potato spirit / 番薯精神”. A spirit determined to take root and bear fruit wherever we are planted, even in the harshest environments. A life force that propelled the island to prosperity in the early farming days.
In Taiwanese, one of the few words I know is “Muai” which means congee — a breakfast item I would request every time I visited grandma in South Taiwan. Cooked from leftover rice and served with a humble fried egg, soy sauce, and pickled vegetables — it was a breakfast to wake up to.
In Taiwan, there are plenty of restaurants that serve plain congee with a wide selection of dishes known as “清粥小菜” meaning “light congee, little dishes”. To make a congee spread — top with anything you like to eat. The possibilities are endless.
Ideas for congee toppings:
Fried eggs, or eggs any way
Stir-fried vegetables
Furikake
Pork floss
Braised tofu and vegetables in soy sauce
Pickled cucumbers(I like 金蘭 Kamlan brand from T&T)

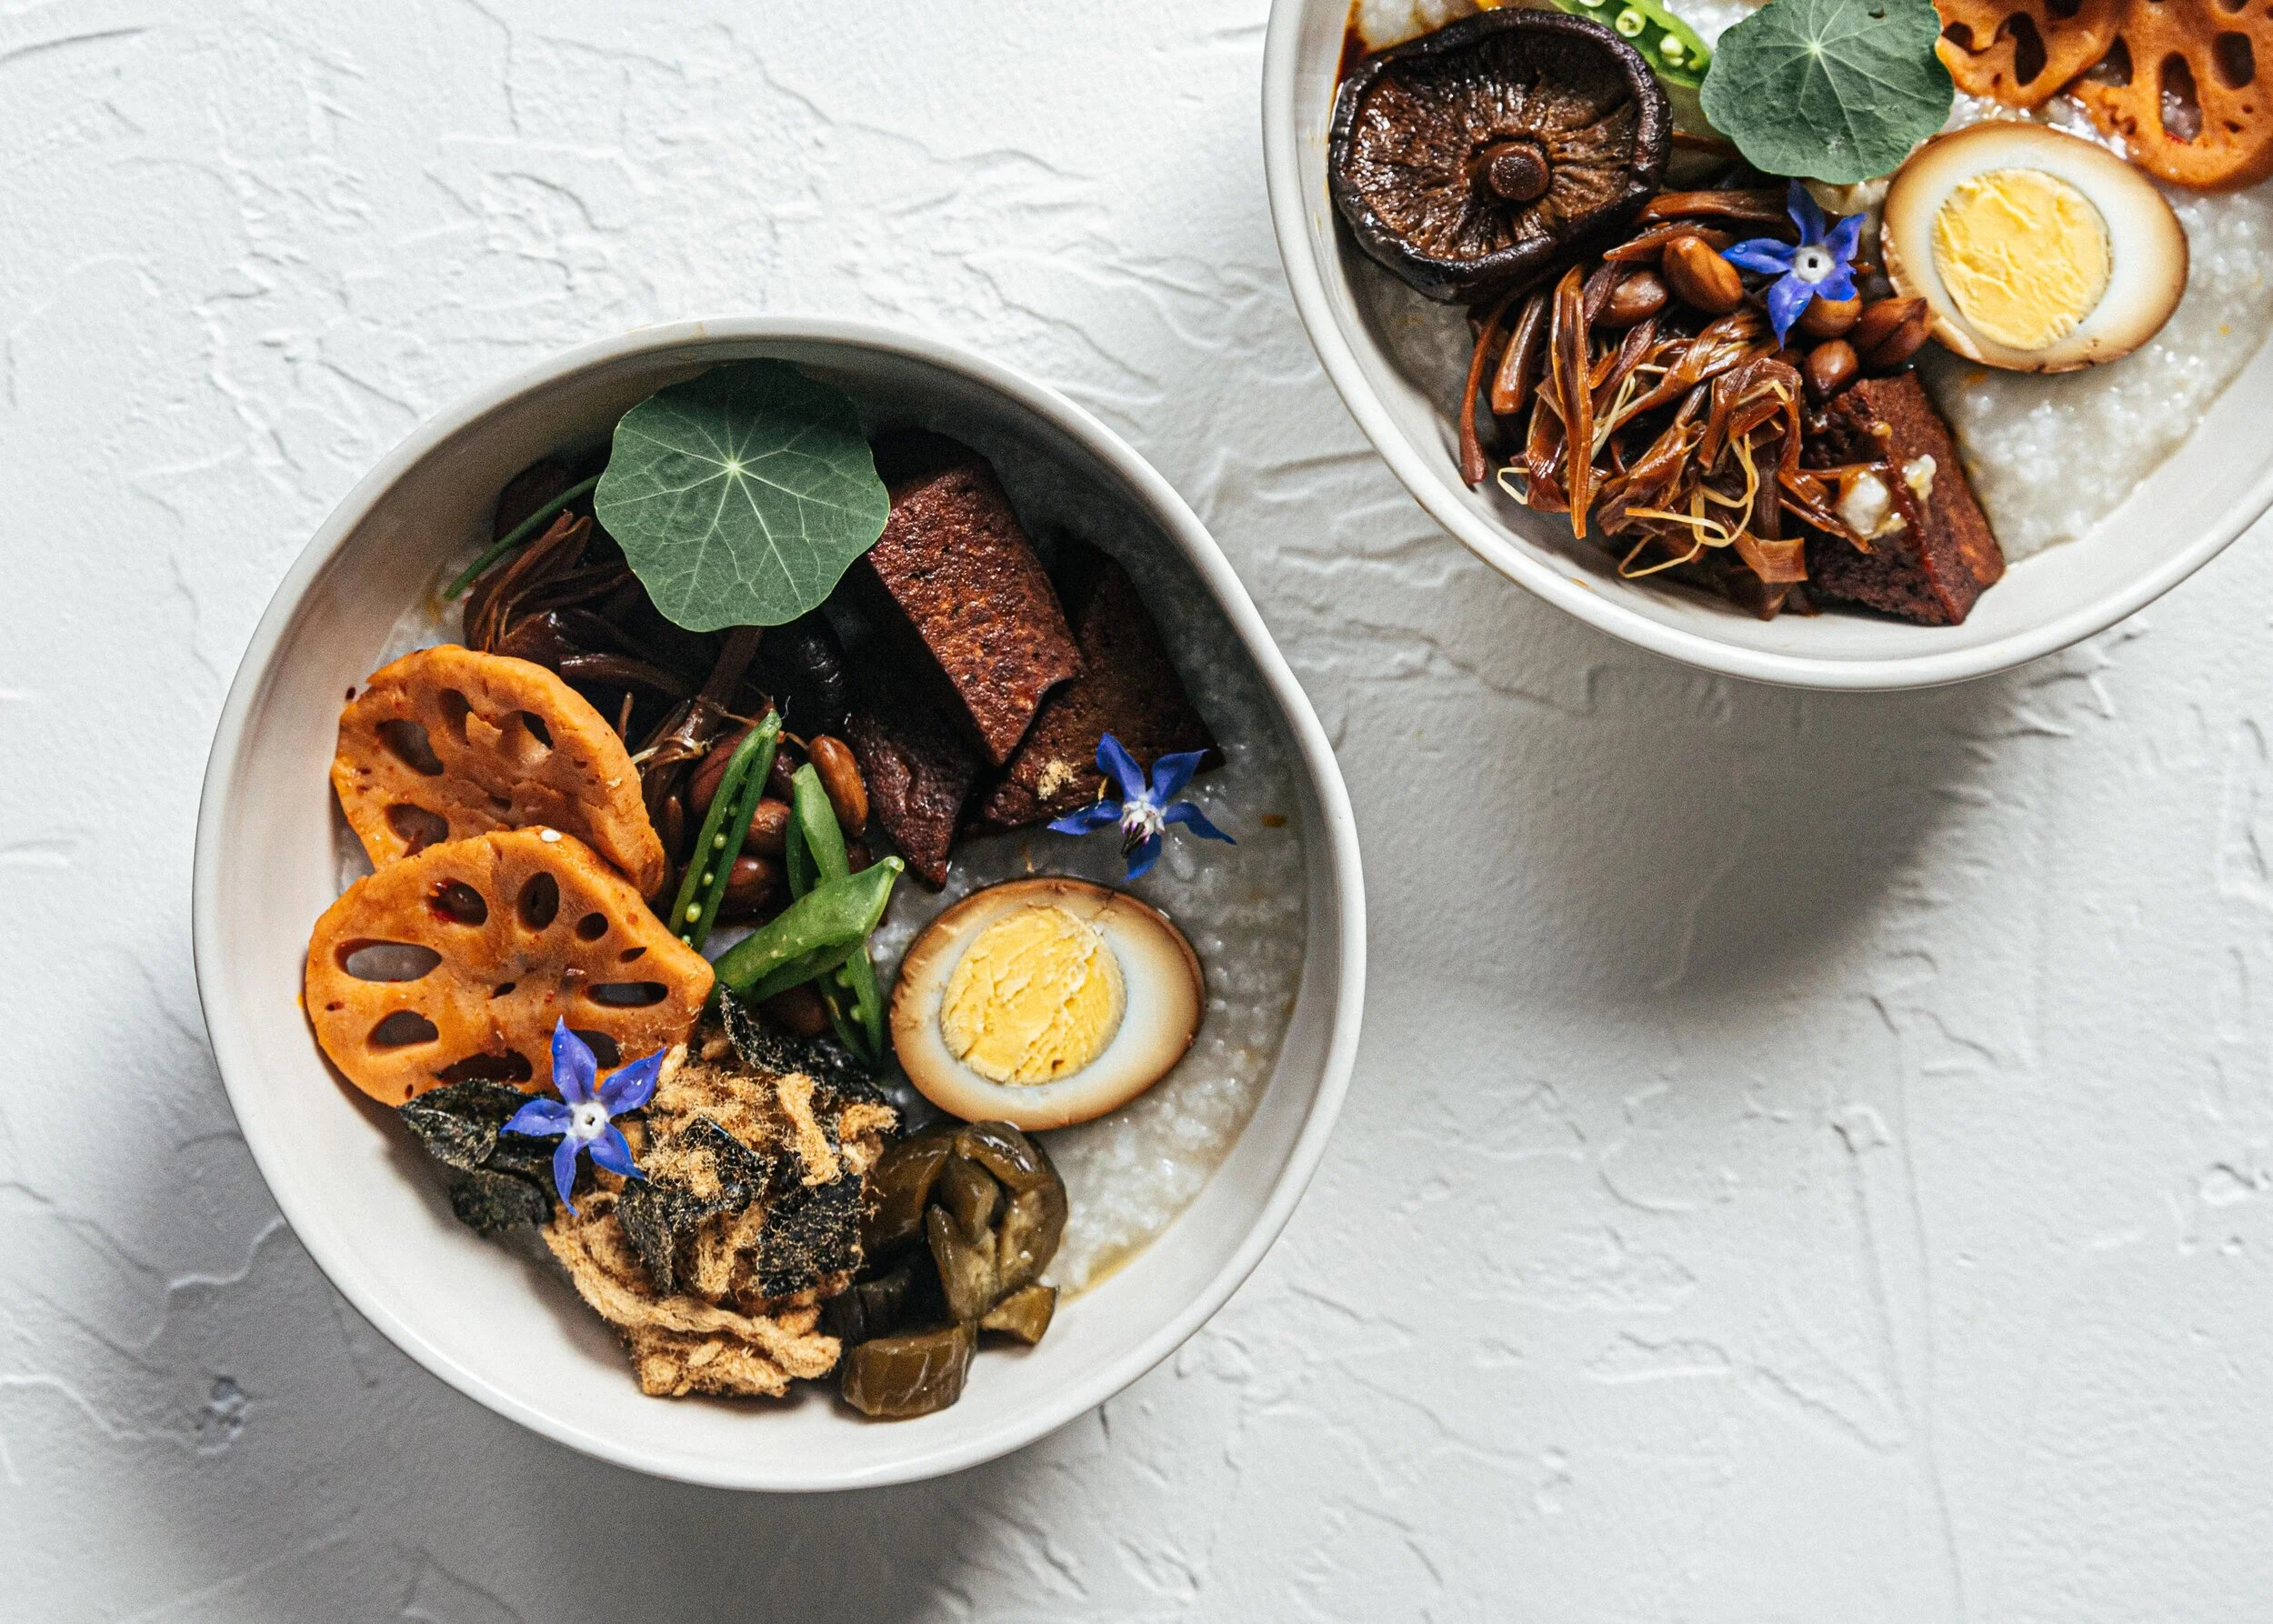
Congee bowl topped with everything I like to eat — spicy lotus root, braised tofu, egg and vegetables in soy sauce, pickled cucumbers and fresh greens

My idea of a congee feast — furikake, pork floss(for the meat-eaters), pickled watermelon radish, fried egg, stir-fried vegetables, and tofu
Sweet Potato Congee Recipe
Serves 2 to 3 people
Ingredients
1 cup rice (short grain rice or jasmine rice for extra flavor)
10 cups water
1 medium-sized sweet potato, peeled and chopped into 1-inch pieces.
Instructions
Rinse 1 cup of rice until the water runs clear. Soak for 1-hour or overnight. Drain and set aside. Peel and chop 1 medium sweet potato into 1-inch pieces. Set aside.
Bring 10 cups of water to a boil, add the rice, cook and bring to a boil again. Adjust the heat to simmer and cook for 45 mins to 1-hour. Stirring the bottom of the pot constantly. Cook until the rice is mushy, softened, but still retains its shape.
Add the sweet potato and bring it to a boil for 5 mins. Cover the pot with a lid, turn off the heat and let sit for 20 minutes. The heat from the rice will cook the sweet potato while keeping its shape, we don’t want it to get mushy here.
Serve and enjoy the congee while it’s hot. This sweet potato congee keeps in the fridge for 2–3 days.
Homemade Ginger Ale

I have been cooking for the masses this past week. I just realized I have styled and photographed over 400 recipes in this past year. To live a day without making/cooking something leaves me feeling strangely empty. I read in Gay Hendricks's book The Joy of Genius this week on creativity as a gift and something to appreciate every day. I am taking this period of isolation time to be thankful for creativity. and for ginger ale :)
One cannot shoot on set without getting thirsty. My go-to — bubbly water. Sparkling water if I feel fancy. I just found a way to make it fancier with homemade ginger ale syrup. It is also great for your immune system. I drink a cup of ginger lemon tea every morning and have made a commitment to using organic ginger root. It is a commitment one cannot go back on. Organic ginger is extremely pungent, spicy and comes in smaller delicate knobs. You have to soak them and scrub harder. The flavour is every bit worth it. This is a refreshing drink for every day and for summer days. I hope you enjoy it.
Immunity Ginger Ale
Ingredients
*Makes 1 1/2 cup ginger ale syrup, I make double and it lasts me a few weeks.
1/4 pound (112g) organic ginger
1 cup (200 g) organic cane sugar
2 cups water
1/4 tsp sea salt
Sparkling water*
Lime wedges
Instructions
Soak the ginger root in water for a bit. It loosens the residue dirt. Scrub ginger thoroughly, between the knobs and through the crevices. No need to peel. Slice thinly with a knife and chop into small pieces. Alternatively, pop the ginger into your blender or food processor. Aim for 2-millimetre pieces and make sure it does not turn into a puree.
Transfer ginger into a medium-sized pot along with sugar, salt and 2 cups water. Bring to a boil then simmer for 45 minutes. Let cool, strain and store the syrup in a jar in the fridge.
To serve, fill a glass with ice. Add 2 tablespoons of syrup to 2/3 cup of water. Add a dash of lime juice and stir with a spoon. Serve immediately.
* For a fancy cream soda, add a drop of pure vanilla extract into your drink.
Recipe adapted from Nancy Singleton Hachisu.
Dried Pineapple Flowers
Dried Pineapple Flowers. A recipe with one ingredient — pineapple, slow-roasted in the oven. Delicious with morning oats, as a snack or top on frosted cakes.
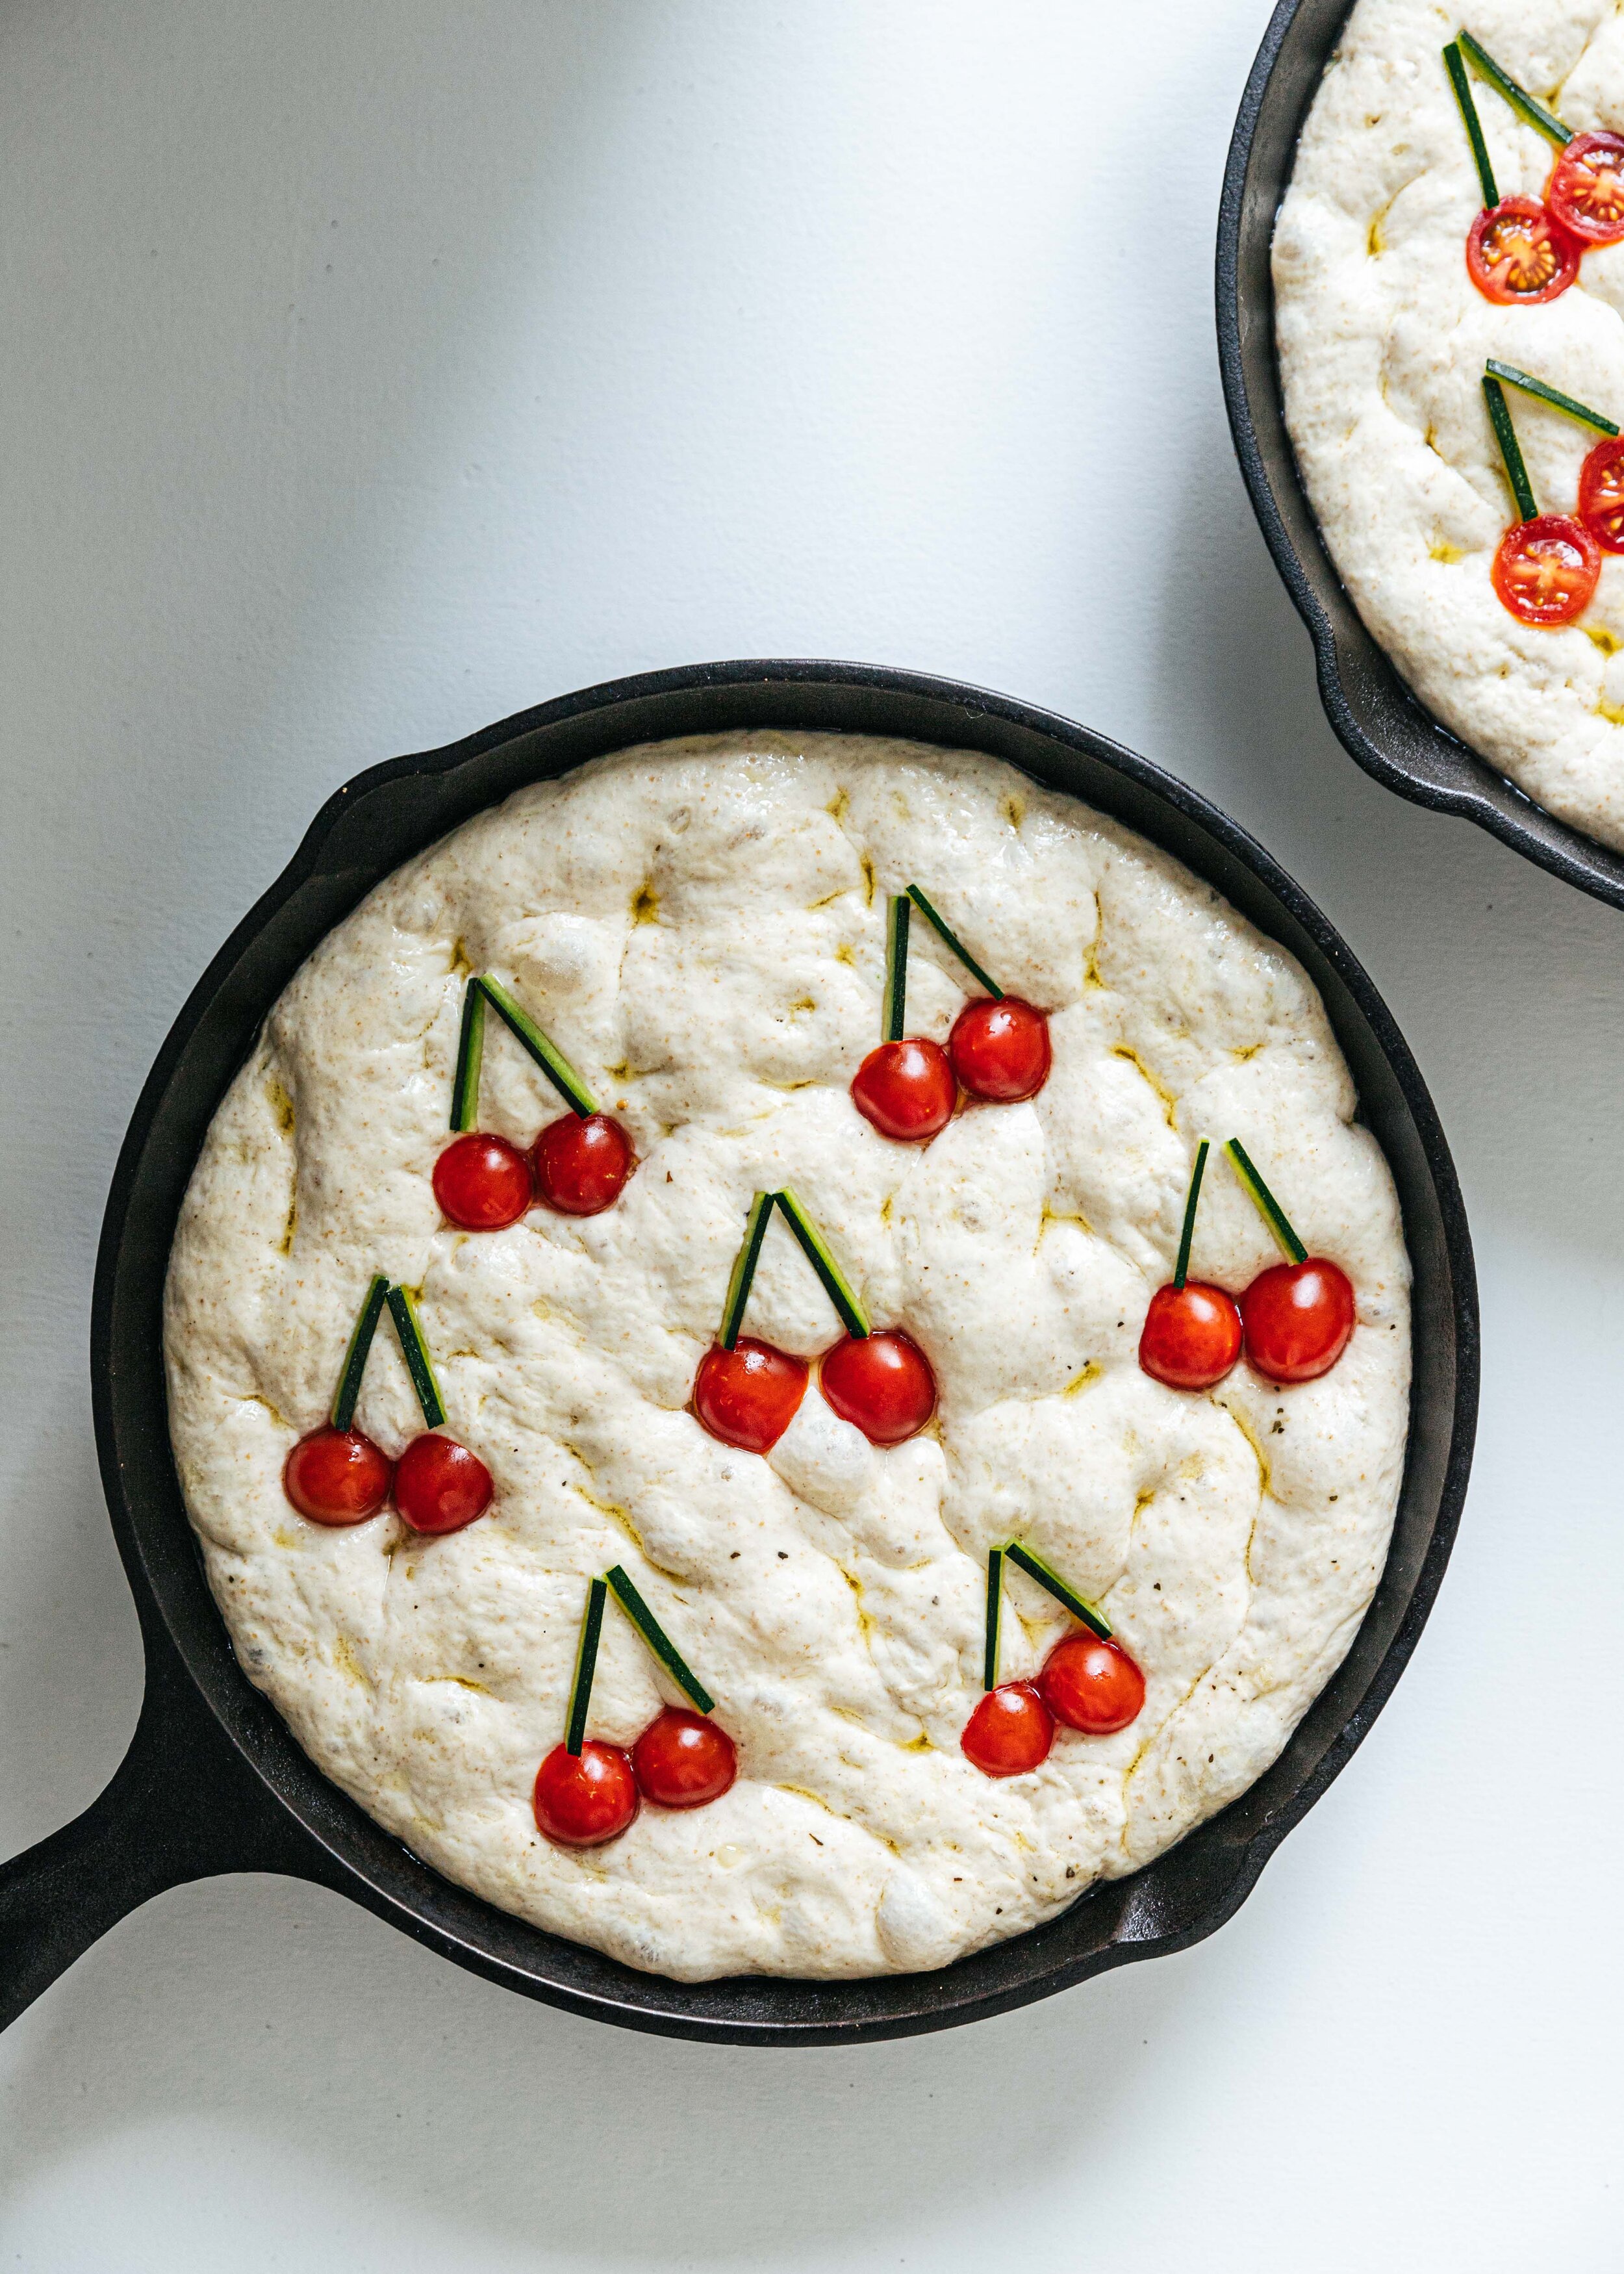
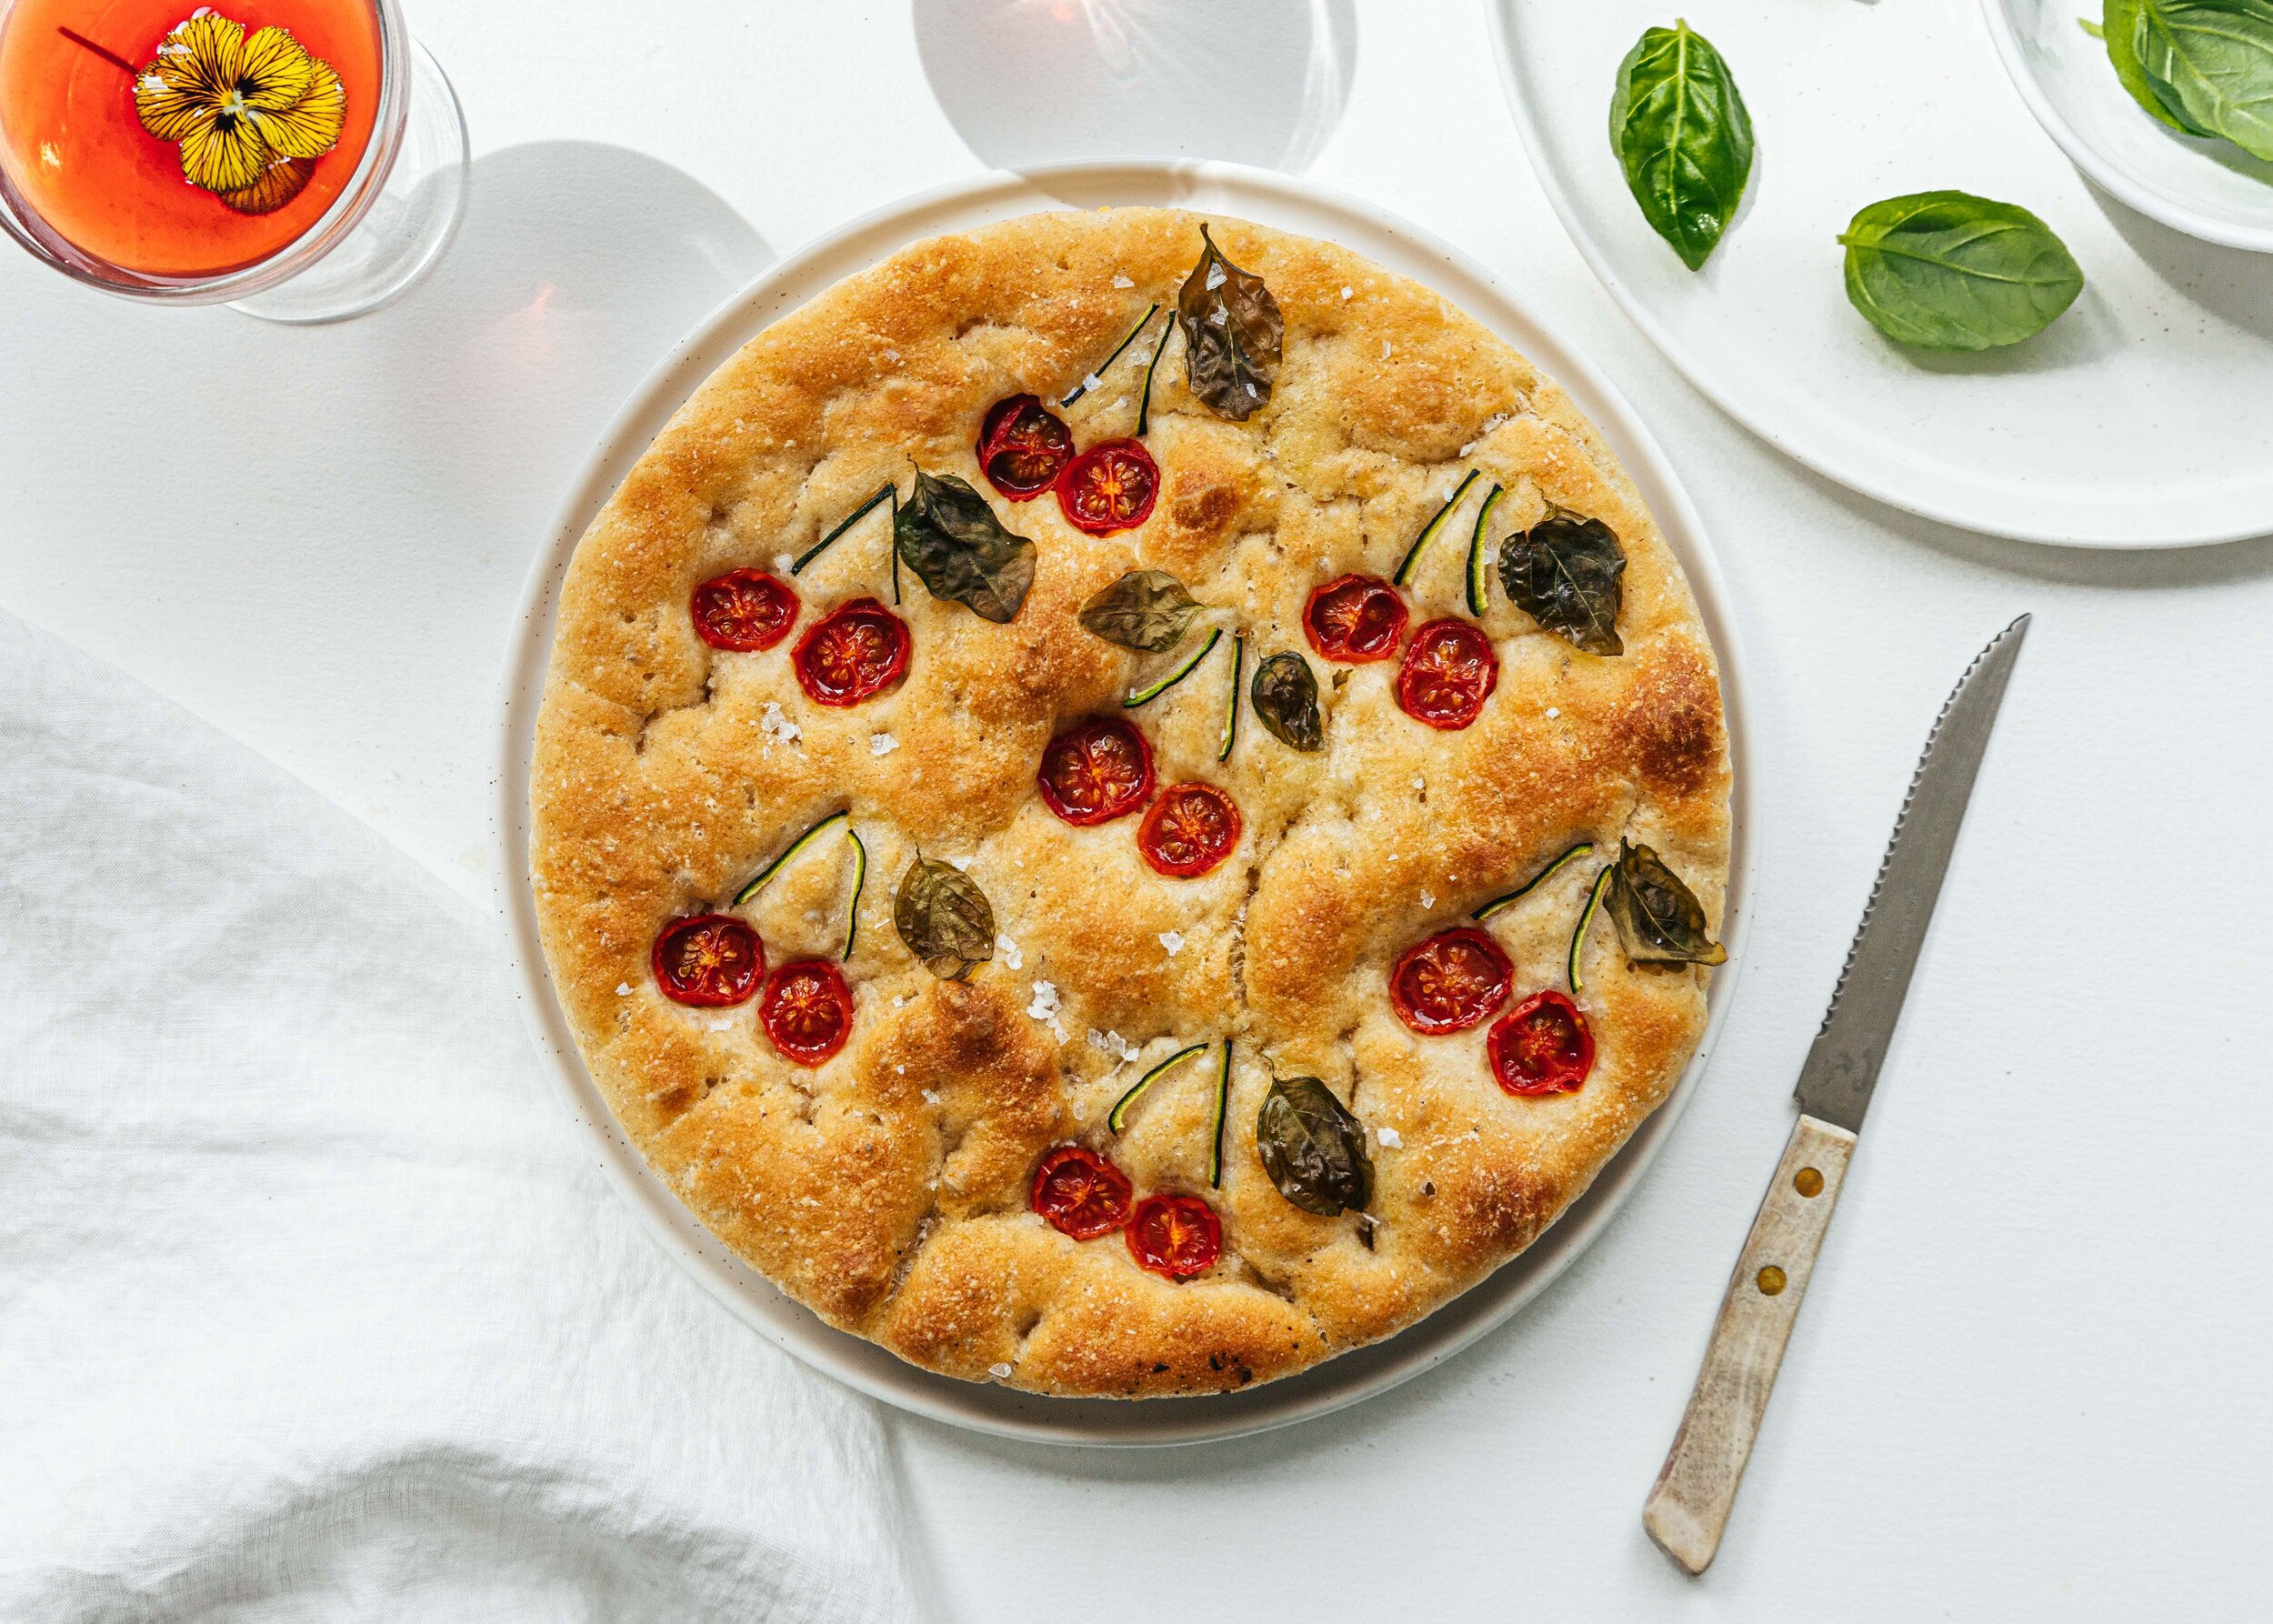
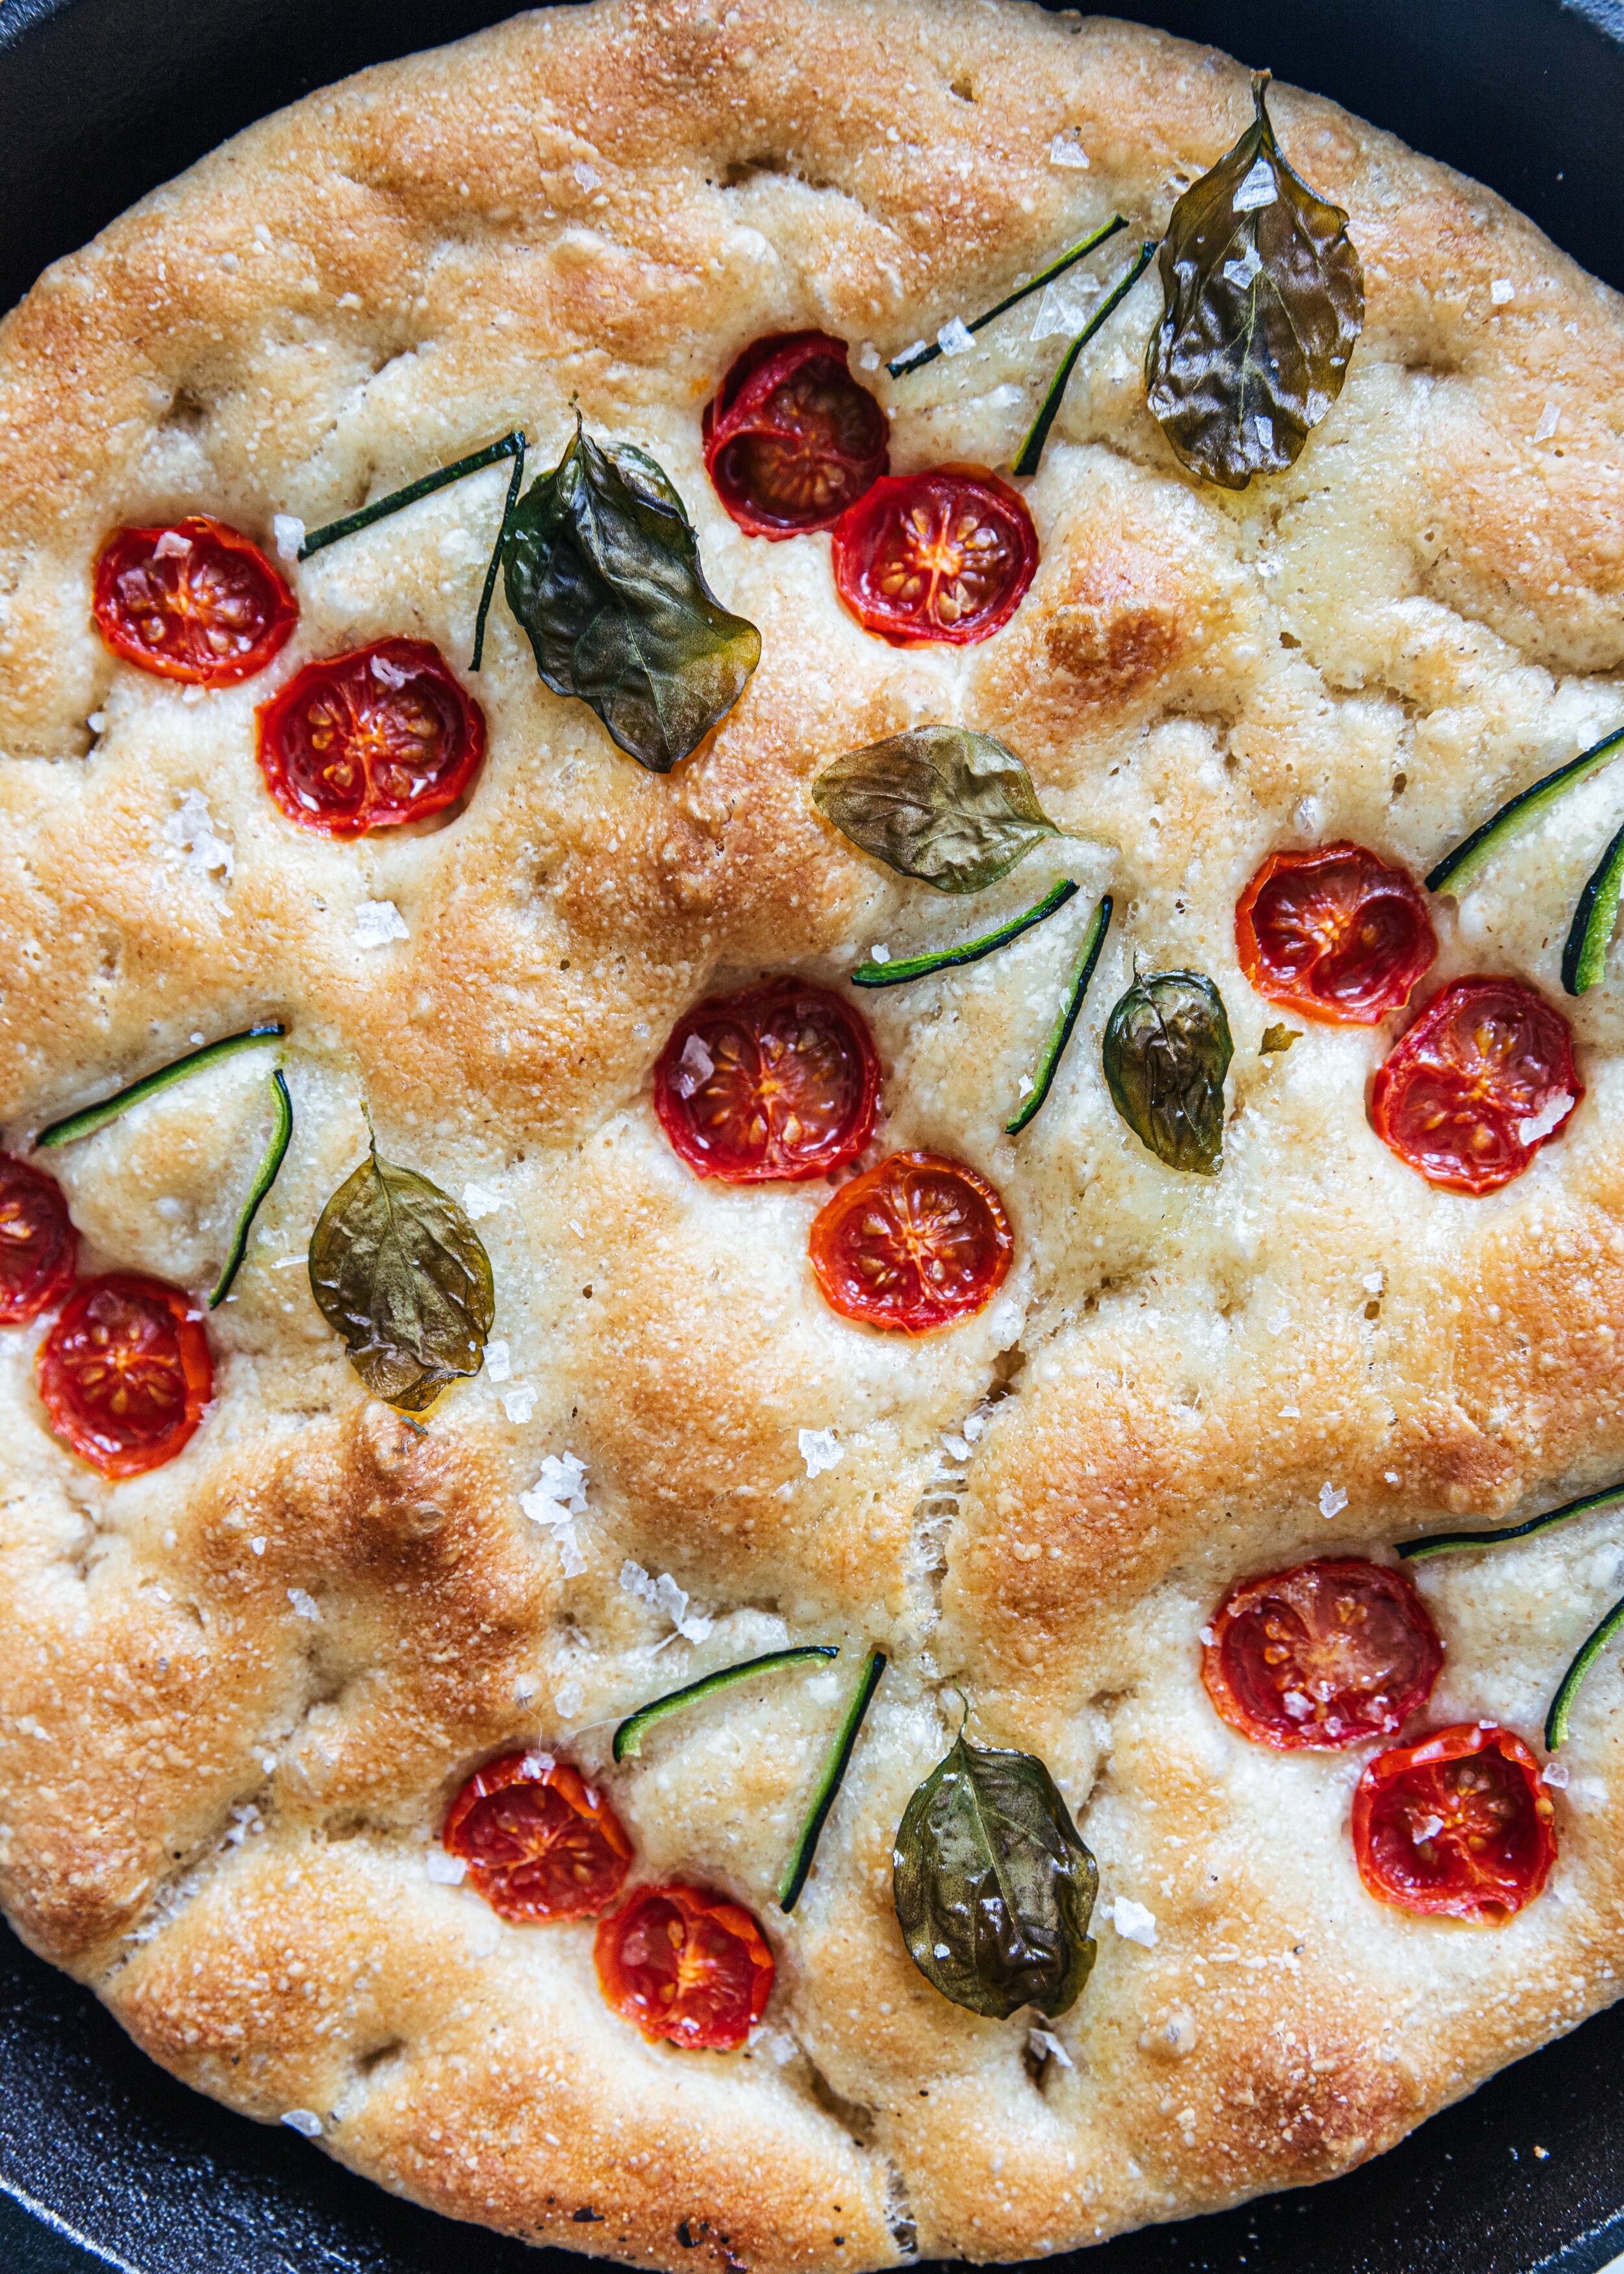
Read MoreCherry Tomato Focaccia

There is something about making your own bread that makes you feel inherently good about life. For me — it’s a process that drowns out the noise and creates a bubble of contentment around me. If you, like me, are yet to get into sourdough, here is an easier alternative to get those bread-baking endorphins flowing.
This is a recipe I’ve perfected over the last year. It’s a great way to give away warm bread, use herbs and veggies from my garden, and feel very accomplished throughout the process.
Notes for the Cherry Tomato Focaccia:
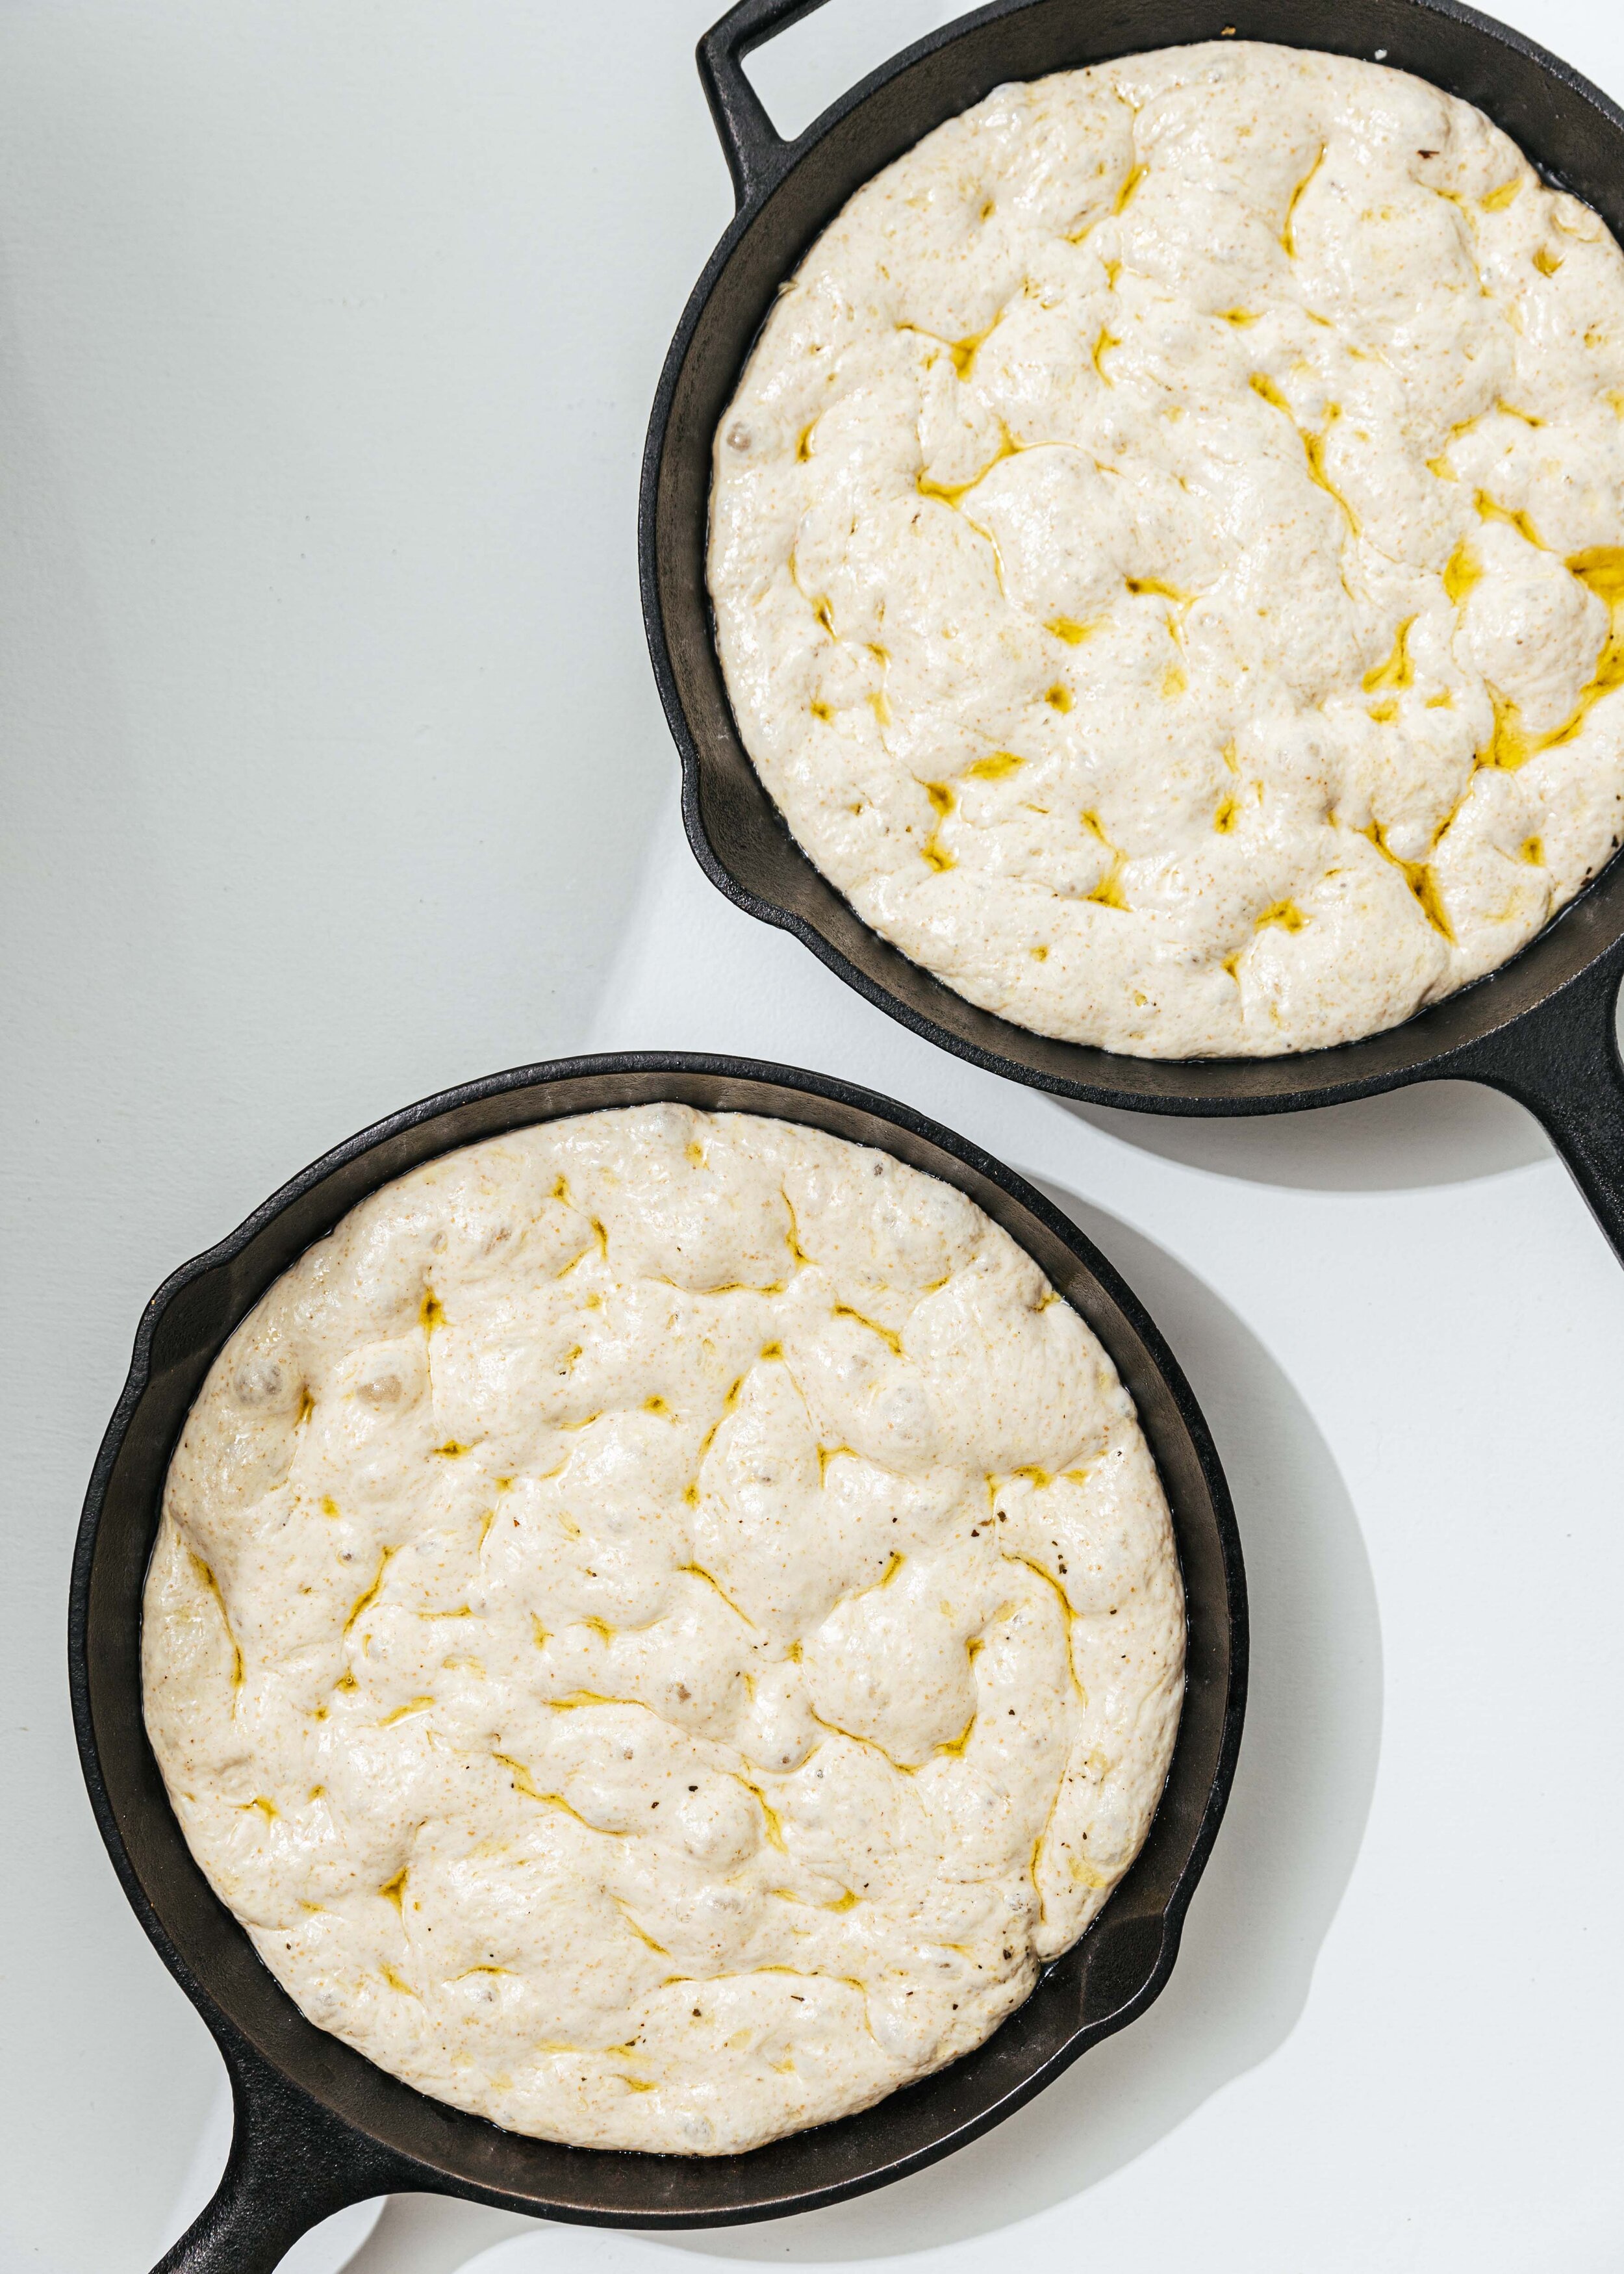
• For the round loaf — I split the dough in half and baked them using two 10-inch cast-iron pans. Alternatively, you can bake it in a 9x13 inch pan, or any other pan you have on hand. The smaller. the pan, the thicker the focaccia. The thicker the focaccia, the better for sandwiches.
• Toppings can be substituted with anything you fancy. Vegetables, chili flakes, Italian herbs, and edible flowers. I added herbs and garlic on the bottom for flavor without taking away from the topping.
• For mini basil leaves — I used this opportunity to get myself a leafy basil plant. Much easier than digging through basil packages at the market!


Cherry Tomato Focaccia
Ingredients
Focaccia
1 ¼-oz. envelope active dry yeast (about 2¼ tsp.)
2 tsp. honey
5 cups (625 g) all-purpose flour
5 tsp. Diamond Crystal or 1 Tbsp kosher salt
6 Tbsp. olive oil, divided, plus more for hands
4Tbsp unsalted butter, plus more for pan
Flaky sea salt, to taste
4 garlic cloves, minced
Cherry tomato Topping
Small tub of red cherry tomatoes, halved
14–20 leaves of basil
Zucchini, a thin peel from the top-down, sliced into batons
Instructions
1. In a medium-sized bowl, whisk one envelope of active dry yeast (2¼ tsp), 2 tsp honey, and 2½ cups lukewarm water. Let sit for 5 minutes. The mixture should foam or at least get creamy. If not, your yeast is probably dead and you’ll need to get a new pack and start over again.
2. In a large bowl that fits into your fridge, measure 5 cups (625 grams) of all-purpose flour, 5 tsp Diamond Crystal salt, or 1 Tbsp kosher salt. Mix with a rubber spatula, scraping the sides and bottoms constantly until the dough comes together and no dry areas remain.
3. Pour 4 tbsp olive oil over the dough. Using the spatula, lift the sides and coat the dough in oil. Cover with a silicone lid or plastic wrap and chill until dough is doubled in size (the dough should look bubbly and alive). Chill for at least 8-hours, overnight or up to a day. If you are short on time, let it rise in a warm spot until doubled in size, 3–4 hours.
4. Generously butter two 10 inch cast irons or a 13x9 inch pan. Alternatively, use a baking pan of your choice. The larger the pan, the thinner and crispier the focaccia. To the buttered pans, add the minced garlic and spread evenly on the bottom. Pour another tbsp of olive oil in the center of the pan.
Step 5 instructions
5. Holding the bowl of dough in one hand and a fork in the other. Gather up edges of dough farthest away from you, lift up and over into the center of the bowl. Turning the bowl as you go and repeat the process a couple of times. The goal is to deflate the dough and form it into a rough ball. Transfer the dough to the prepared pans. Pour any leftover oil in the bowl over the dough and turn it over to coat in coal. Let rise, uncovered, in a dry warm spot for at least 1 hour and up to 4 hours.
6. Preheat the oven to 450°. To see if the dough is ready, poke it and it should spring back slowly, leaving a small indent. If it springs back too quickly, the dough isn’t ready and needs to sit a bit longer. Lightly oil your hands and stretch out the dough to fill the pan(s). Dimple the focaccia dough all over with your fingers, like playing the piano, creating deep depressions in the dough. Drizzle with remaining 1 Tbsp. extra-virgin olive oil and sprinkle with flaky sea salt.
7. At this point, you can decorate the focaccia with whatever topping you are using. Place focaccia in the middle rack and bake until puffed and golden brown all over, 20–30 minutes. Let cool slightly, slice, and serve.
* Focaccia is best eaten fresh but keeps well in the freezer. Slice it into pieces, store it in a freezer-safe container, then reheat it on a baking sheet or in the toaster.
Roasted Sichuan Peppercorn Salt
This is yet another recipe from the cookbook China Moon by Barbora Tropp. According to an interview, peppercorn salt was one of the condiments Barbara craved during the last few months of her life battling cancer. I am ever so grateful to discover her work during this period of time. Such is the power of food to bring back memories of adventure in china — eating coloured dumplings in famous dumpling houses, and discovering hole-in-the-wall baozi shops that I would revisit if I were to visit Northern China again.
Read MoreYunan Spicy Potato Pancakes

Most days, after long hours of cooking and photographing food — there are few things I look forward to than potatoes with a dash of olive oil, salt and pepper. The comfort of carbs and refreshment for the over-stimulated taste buds.
This potato pancake requires a fair bit of arm work, a trusty grater, and a passion for spicy Chinese food. In this case — cuisine from the mountainous province of Yunnan. All at once, Yunnan is known for its scenic views, mountains and rivers that run throughout the province. Mushrooms, flowers, fresh river fish, rice noodles (Mi Xian) are key to Yunnan cuisine.
My memories of Yunnan cuisine consist of sensational hot pots I had in Beijing — a visual meal filled with mushrooms of every kind, carnation petals, sesame sauce, jasmine flowers marinated in vinegar and rice wine served in bamboo flasks. Then there was my auntie’s Yunnan restaurant in Taipei — I can still recall the array of fresh fish, red chilis and fungi served with every meal. In Vancouver — the closest conversations I have around Yunnan food are with my designer friend Lisa, whose family hails from the rivers and mountains of Yunnan.
These potato pancakes are an adaptation to a local snack served at street markets in Yunnan. The egg in this recipe was added by Lisa’s grandmother for nutritional purposes. The potato starch that seeps from salted potatoes acts as a natural binding agent. It’s a great side dish for dinner and something I look forward to eating for breakfast. The recipe is adapted (and tested four times) by yours truly, with Lisa suggesting to dip it in a sauce made of vinegar, soy sauce and Yunnan chilli flakes.

Lisa and a potato pancake feast

Potato starch separating from potato water.

The only spicy, sweet and sour dipping sauce you need. Recipe here

Yunnan Potato Pancakes
Serves 2 (1 potato makes one pancake)
You will need a box grater or mandolin, two large mixing bowls, and a nonstick frying pan
Ingredients
2 medium-large russet potatoes
1 1/2 teaspoon salt
1/4 teaspoon black pepper
1 teaspoon soy sauce
1 teaspoon sesame oil
1/2 teaspoon chili flakes
2 eggs
Green onions, sliced (optional)
Instructions
1. Grate the potatoes into a large mixing bowl. Add 1 1/2 teaspoons of salt and mix thoroughly. Allow the potatoes to sit for 15 mins (or as long as 30 mins) for the water to separate out from the potatoes. Squeeze as much water as you can out of the potatoes into the bowl and transfer the potatoes to a second bowl. Leave the residue water in the original bowl.
2. Let the residue water sit until the potato starch sets in a layer at the bottom, 1-3 minutes. Discard the water on top, using hands or a spoon, and transfer the potato starch into the grated potatoes. This will help bind the pancake together.
3. Create a well in the potato mixture and crack in the eggs. Gently beat until the whites and yolk are mixed. Add the black pepper, soy sauce, and sesame oil to the egg and mix thoroughly.
4. Heat a medium frying pan until medium-high heat. Using a spatula, transfer a quarter of the potato mixture onto the frying pan and press gently to form a pancake. Turn the heat down to medium-low and fry for 4–5 minutes per side.
5. Serve straight from the pan with sweet & spicy dipping sauce. Garnish with green onions. Bon Appétit!
Cooking Tips
*Turning the heat down once potatoes are in the pan will ensure thorough cooking and a crispy outer layer without burning the pancake.
Japanese Fruit Jellies
Agar-agar is the powder I used to gelatinize these beauties. Also known as Kanten/寒天 — this is a favourite treat from dessert shops in Japan and Taiwan.
Read MoreStrawberry Clafoutis
I hope you all have been keeping well. Given the current state of affairs in the world, I have been finding solace in the home, in harvesting my first two strawberries in my pot, feeding myself with good films and cooking inspiration.
I stumbled across the wonderful film The Hundred-Foot Journey this week. I watched it two times, read every article about it on Google and am now reading the book. The film features an Indian family immigrating from Mumbai to Europe after suffering the loss of their mother and home. They travel over Europe and settle in a small town in France, opening a restaurant across the street from a Michelin restaurant run by the fierce Madame Mallory. The story is a battle and coming together of flavour, cinematic beauty, family and tradition. It’s heartwarming and has everything I love about food, bridging culture, French and Indian cuisine. Personally, any film that features the main actor crying over home-cooked food is one worth watching. The book is beautifully written, I have lost much sleep over it and highly recommend both.
The Clafoutis is a recipe from the movie — one the chef stumbled across while studying his cookbooks. A French recipe I can now say I have made. I hesitate to delve into French cuisine, especially after reading the book of the movie and Julia Child’s memoir — My Life in France. French cuisine feels like such a classic yet complex cuisine to master. It takes a lot to keep things simple and master the technique to coax flavour out of the simplest, quality ingredients. I’m happy to start with this one.
This is a very versatile recipe made with staple ingredients milk, eggs, butter, sugar. You can substitute different kinds of fruit — berries, stone fruit, rhubarb (see note below). The texture is similar to that between a flan or a thick pancake. It's filling, but not too sweet so you won’t tire of it.


Aim for a silky smooth, lump-free batter here.

Strawberry Clafoutis
Ingredients
*Makes a 10-inch cake, serves 8
Butter, for buttering the pan
2 cups (226 grams) strawberries, hulled and halved lengthwise*
3 eggs
1 cup milk
2/3 cup flour
1/4 cup granulated sugar, plus more for sprinkling
1 1/2 teaspoons vanilla
Pinch of salt
Powdered sugar for dusting
Instructions
Preheat the oven to 350 F. Butter the bottom and sides of a pan with butter. Sprinkle one tablespoon of sugar all over the bottom of the pan. This will help release the cake without sticking and provide a crunchy bottom.
In a large mixing bowl, add the eggs, milk, sugar, vanilla. Mix until incorporated. Gradually add the flour and mix until silky to the touch. Pour the batter over a strainer to remove any lumps and into the pan. Arrange the strawberries over the top and bake until a skewer inserted into the batter comes out clean. Around 30 minutes. A golden crust will have formed on the sides. Dust with powdered sugar and serve warm.
* The strawberries bled into the batter. Next time, I will toss them in cornstarch (2 teaspoons) before adding over the batter.
* If you do not have powdered sugar, blitz white sugar in the blender till superfine.
* If using rhubarb, dice into pieces, macerate in 2 tbsps of sugar for 5 minutes and roast at 400F for 10 mins or until soft and bubbly. Let cool and add to the recipe like any other fruit.