These sweet sesame buns are a nostalgic delight that appears in bakeries, dim sum restaurants, and street food vendors. There is something hearty and fulfilling about molten sesame paste, oozing out of a fresh-steamed bun. These make great breakfasts, a sweet to wrap up a meal, or a snack on the go. I make these by the batch and stock them in the freezer for cravings such as the above.

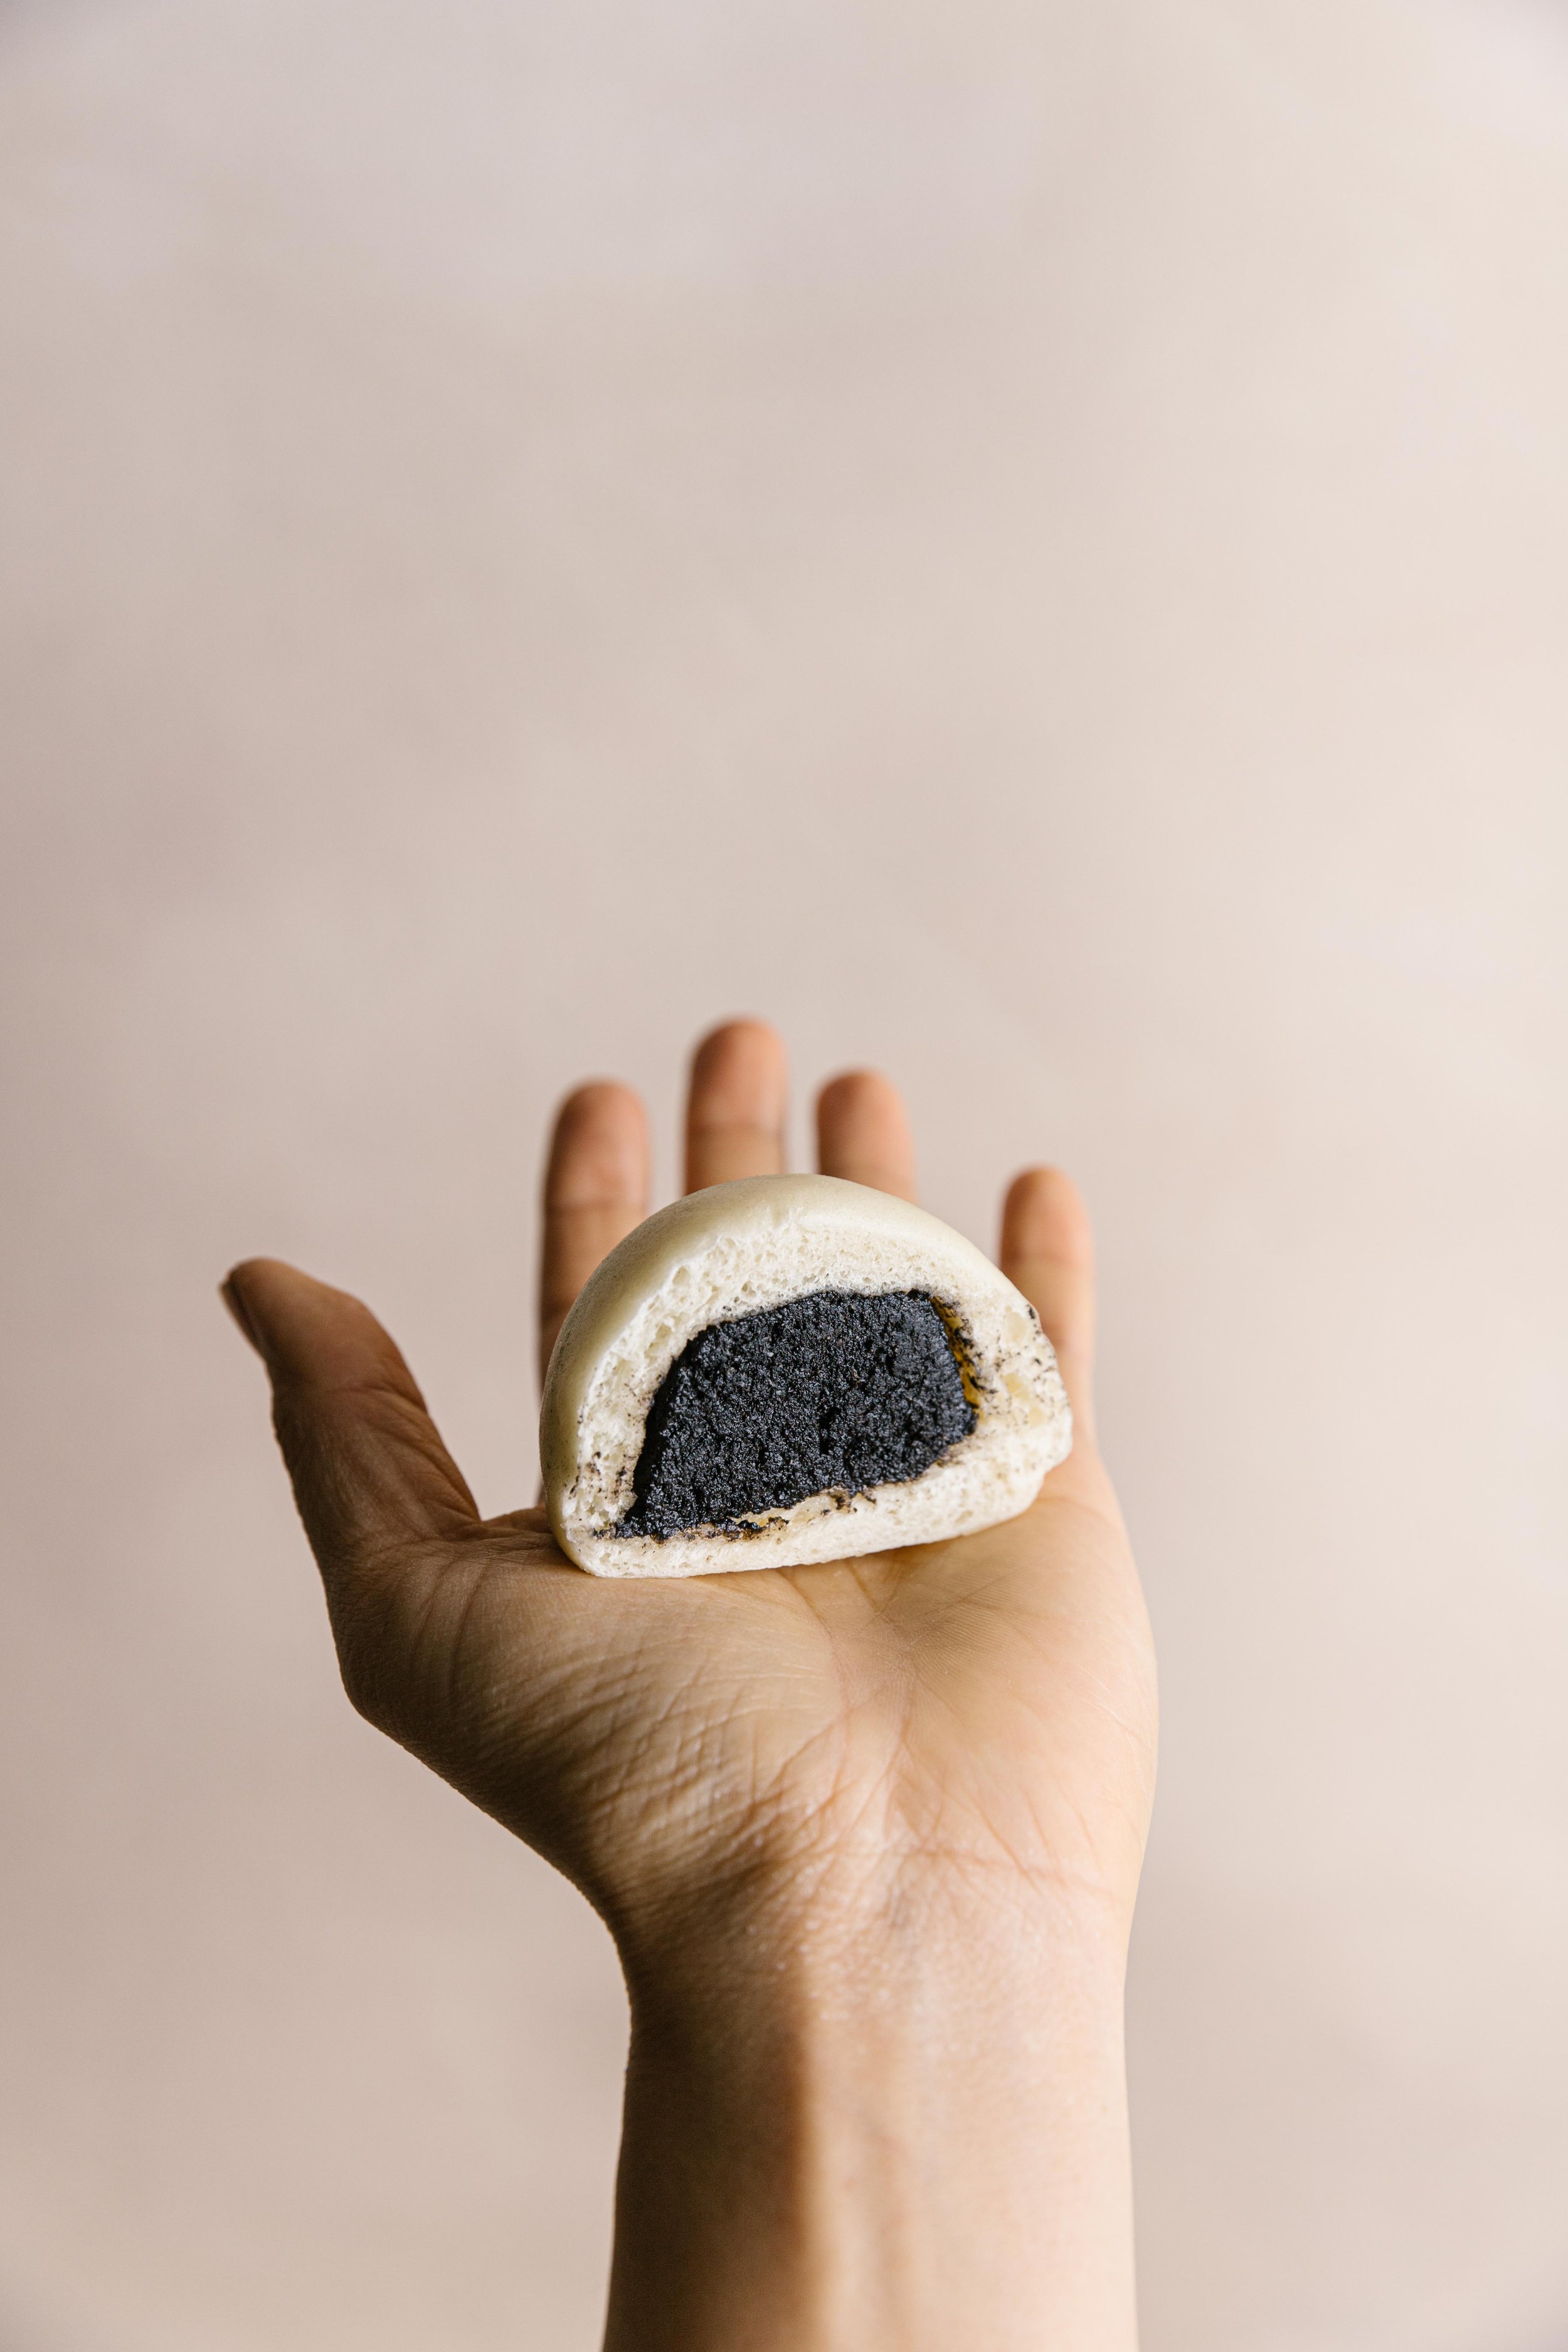
Black Sesame Steamed Buns
Makes 12 buns
INGREDIENTS
Black sesame filling
110 grams of cane sugar
180 grams, black sesame seeds, toasted
100 grams of butter, warmed and melted in the microwave
A pinch of salt
1 Portion of Steamed Bun Dough
INSTRUCTIONS
Make your dough: Refer to this steamed bun dough recipe. I like to make the filling while I wait for the dough to rise. Alternatively, you can prep the filling ahead to save time.
Make the sesame filling: Add the sugar to a powerful blender or food processor. Blitz until the sugar turns to powder. Add the sesame seeds and blitz again until finely processed. Add the melted butter, salt and blend again until evenly combined. The paste should be thick and molten. Cool the filling until it’s firm enough to handle, then scoop it directly onto a steamed bun wrapper. If your paste is too firm, warm it for a few seconds in the microwave.
Pleating the Bun: Line your steamers with steamer paper.* Place the wrapper in one hand and scoop a heading tablespoon of filling into the center. The filling should weigh around 30-40 grams. For beginners, start with a minimal amount of filling to help the pleating process. Flatten the filling with a spoon and follow the steps below. Swap hands if you are left-handed.
- With your right forefinger and thumb, firmly pinch an edge of the wrapper to make the first fold.
- Continue pinching folds with your right index finger and thumb. Rotate the wrapper with your left hand as you go, pinching until the whole bun is pleated. While pleating, use your left thumb to press down the filling so the dough comes over the filling. Your right thumb should never leave the bun.
- Seal the bun with a series of pinches to form the pointy top of the bun. Repeat with the remaining dough and filling. Place all pleated buns in the steamer.Second Rising*: Transfer your buns to the steamer, leaving 1-2 inches of space between the buns. Cover, and let them sit for 15-20 minutes. The 2nd rising will allow the buns to be pillowy and soft. You’ll know the buns are ready when they have expanded in size and are fluffy and light to the touch.
Steaming the bun: Over high heat, bring a pot of water to boil. Place the steamer on top and immediately turn the heat to medium. Steam for 12 minutes and let sit for 5 minutes before taking the lid off. This will ensure your buns do not deflate with the quick temperature change. Serve immediately, or let cool and refrigerate.
Cooking tips:
I like to place pleated buns directly into the steamer. That way, you won’t have to move them after the second rising.
You can find steamer liners at Asian shops. To make your own steamer liner — measure and cut a round parchment paper to fit inside your steamer. Cut holes in the parchment paper that are 1½ inches apart to allow steam to rise through.
Place the buns over a warm pot of water to speed up the second rising. 10-15 minutes.