Kimchi Almonds

I started making my own kimchi this year and it’s an absolutely laborious + satisfying process. Here’s an excellent way to use up all the kimchi brine.

These kimchi almonds are salty, umami, and full of flavor. Perfect as snacks on the go or add as a decent salad topping. I multiply this recipe and make them in batches for holiday gifts.

Kimchi Brine Almonds

Ingredients 

2 cups (300g) raw almonds or nut of choice 

6 tbsp kimchi brine

Instructions

  1. Preheat the oven to 325 F. In a mixing bowl, measure out the almonds and add the kimchi brine. Stir to combine.

  2. Line a large baking pan with parchment and bake the almonds in a single layer (don’t overcrowd the pan) for 15-20 mins.* Stirring halfway to ensure even baking. Roast until golden and crispy around the edges.

  3. I like to leave the almonds to cool in the oven to dry them out further. Store in an airtight container.

Cooking notes:

Baking time really depends on the strength of your oven. Check often so you don’t end up with a tray of burnt almonds.

For additional spiciness— sprinkle the almonds lightly with cayenne pepper while they are still warm.

Cherry Tomato Focaccia

cherry-tomato-focaccia-recipe-6.jpg

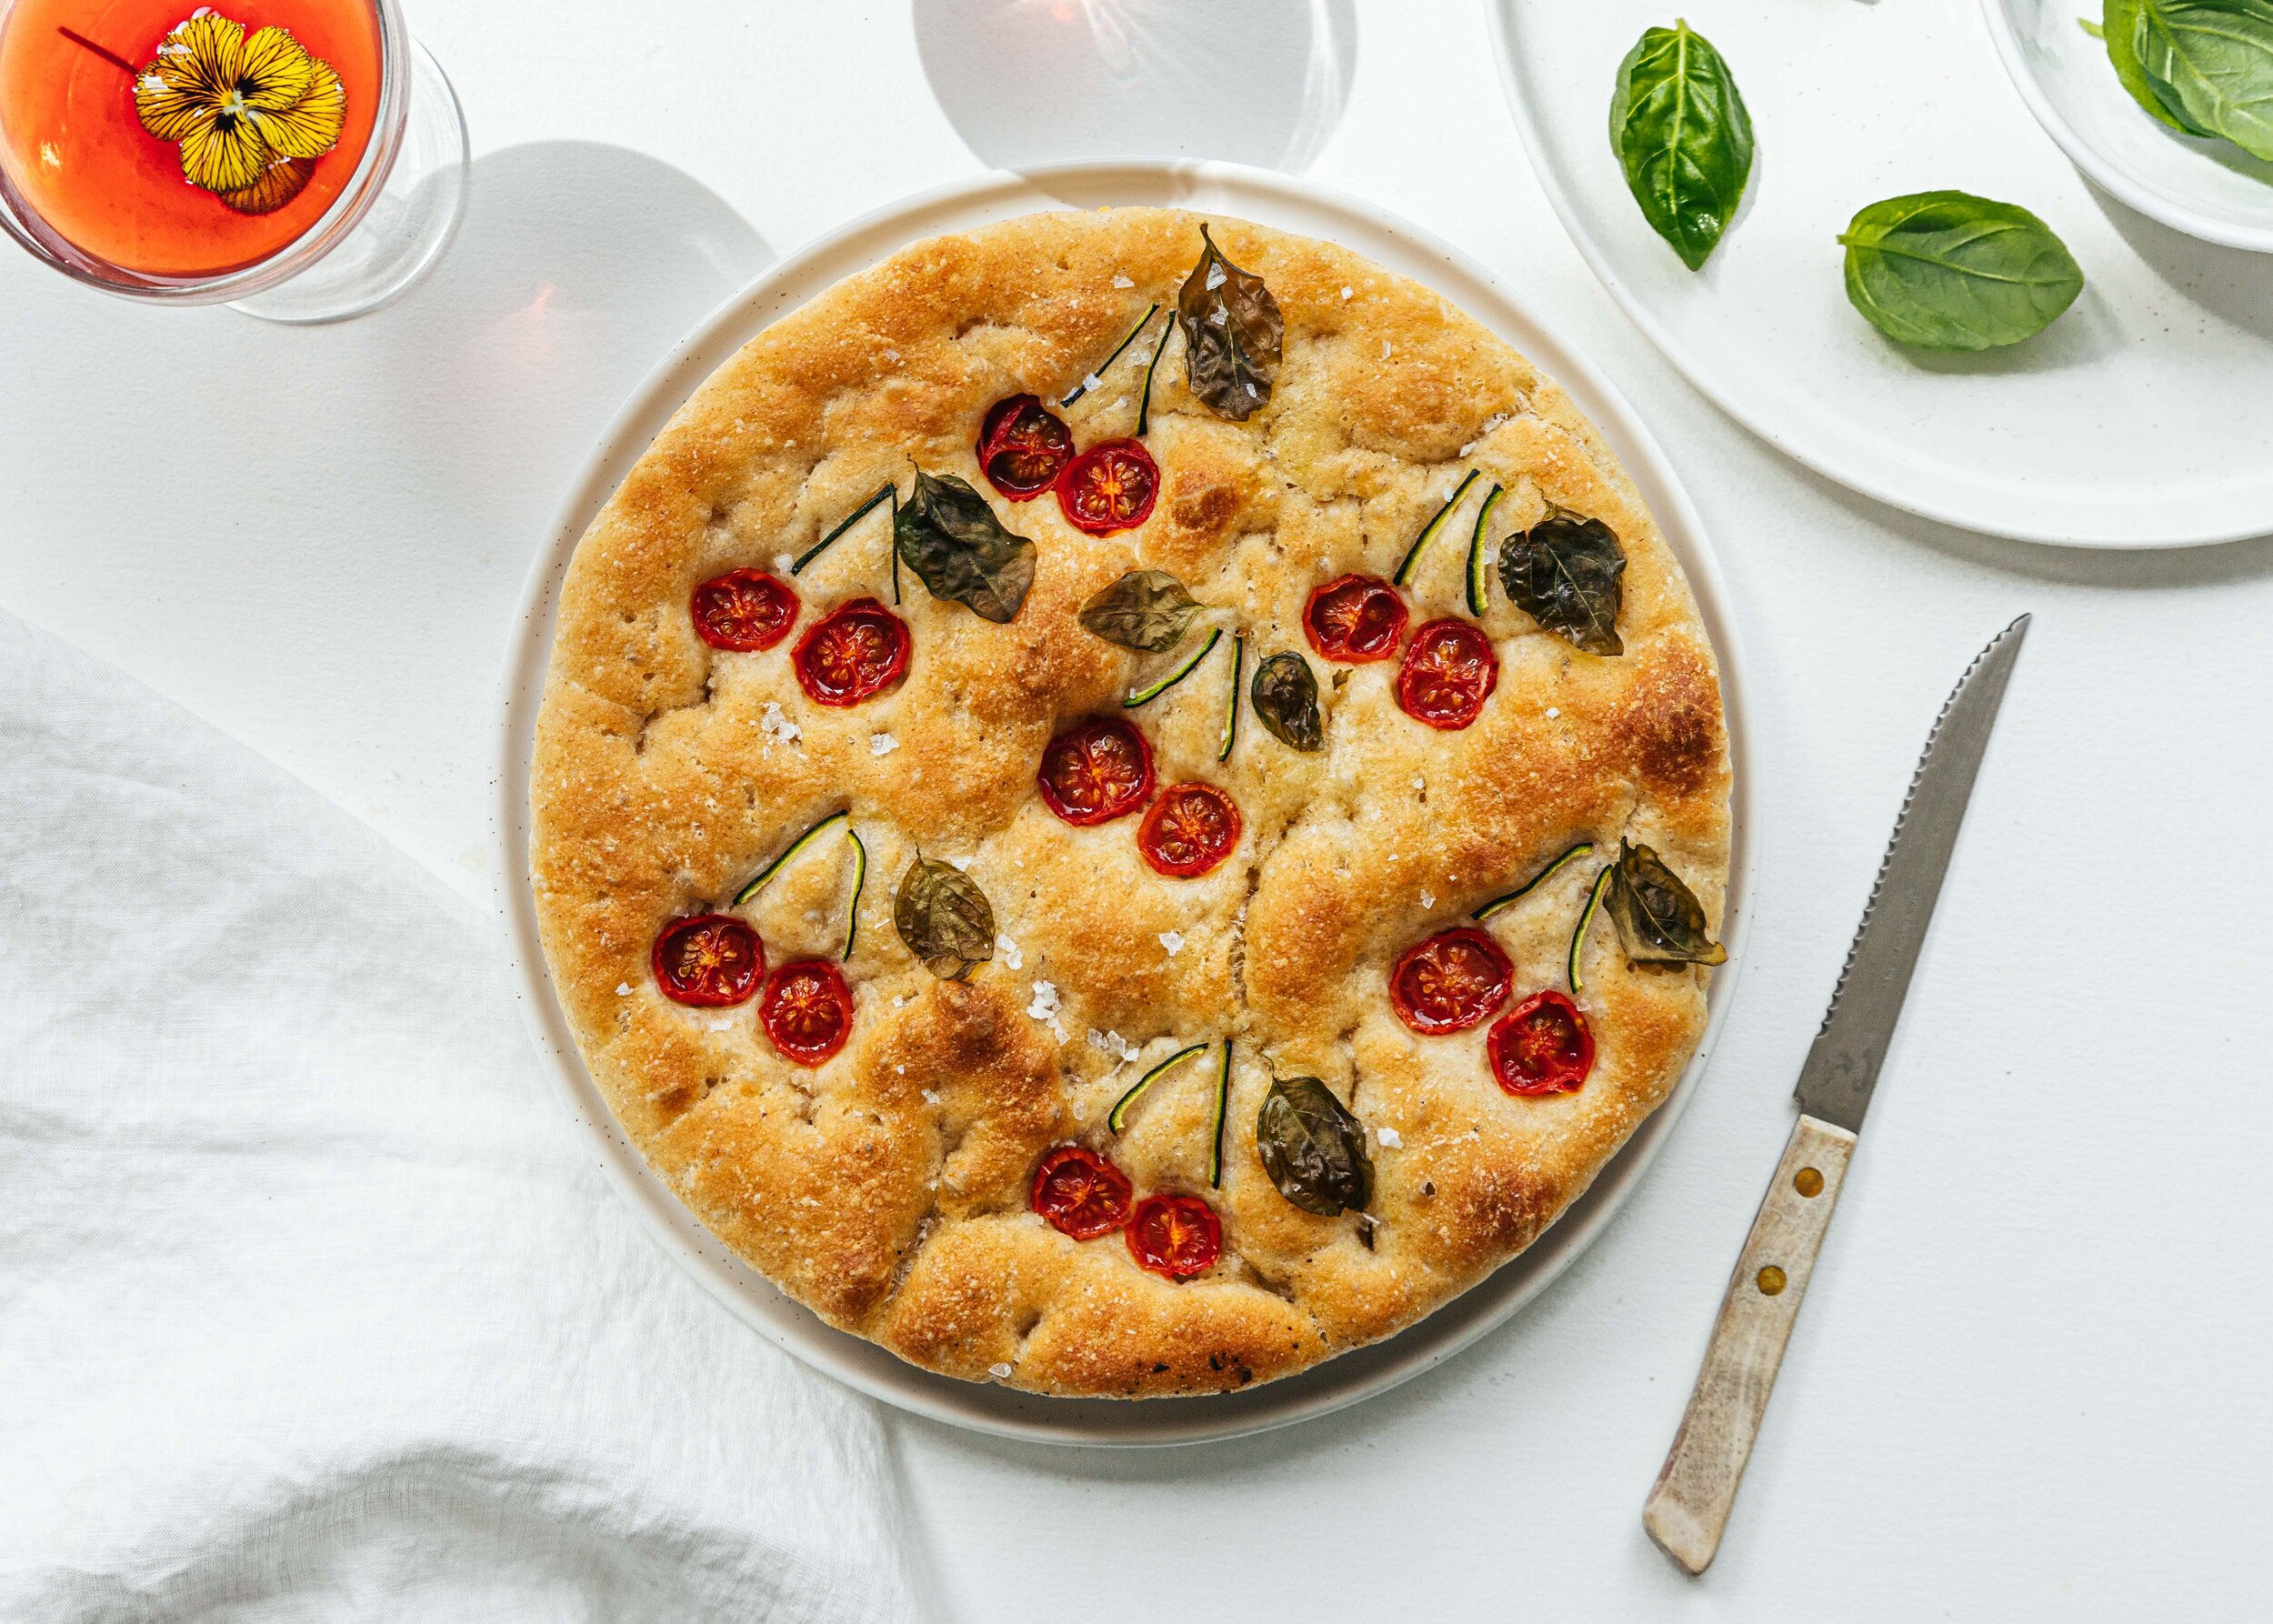
There is something about making your own bread that makes you feel inherently good about life. For me — it’s a process that drowns out the noise and creates a bubble of contentment around me. If you, like me, are yet to get into sourdough, here is an easier alternative to get those bread-baking endorphins flowing.

This is a recipe I’ve perfected over the last year. It’s a great way to give away warm bread, use herbs and veggies from my garden, and feel very accomplished throughout the process.

Notes for the Cherry Tomato Focaccia:

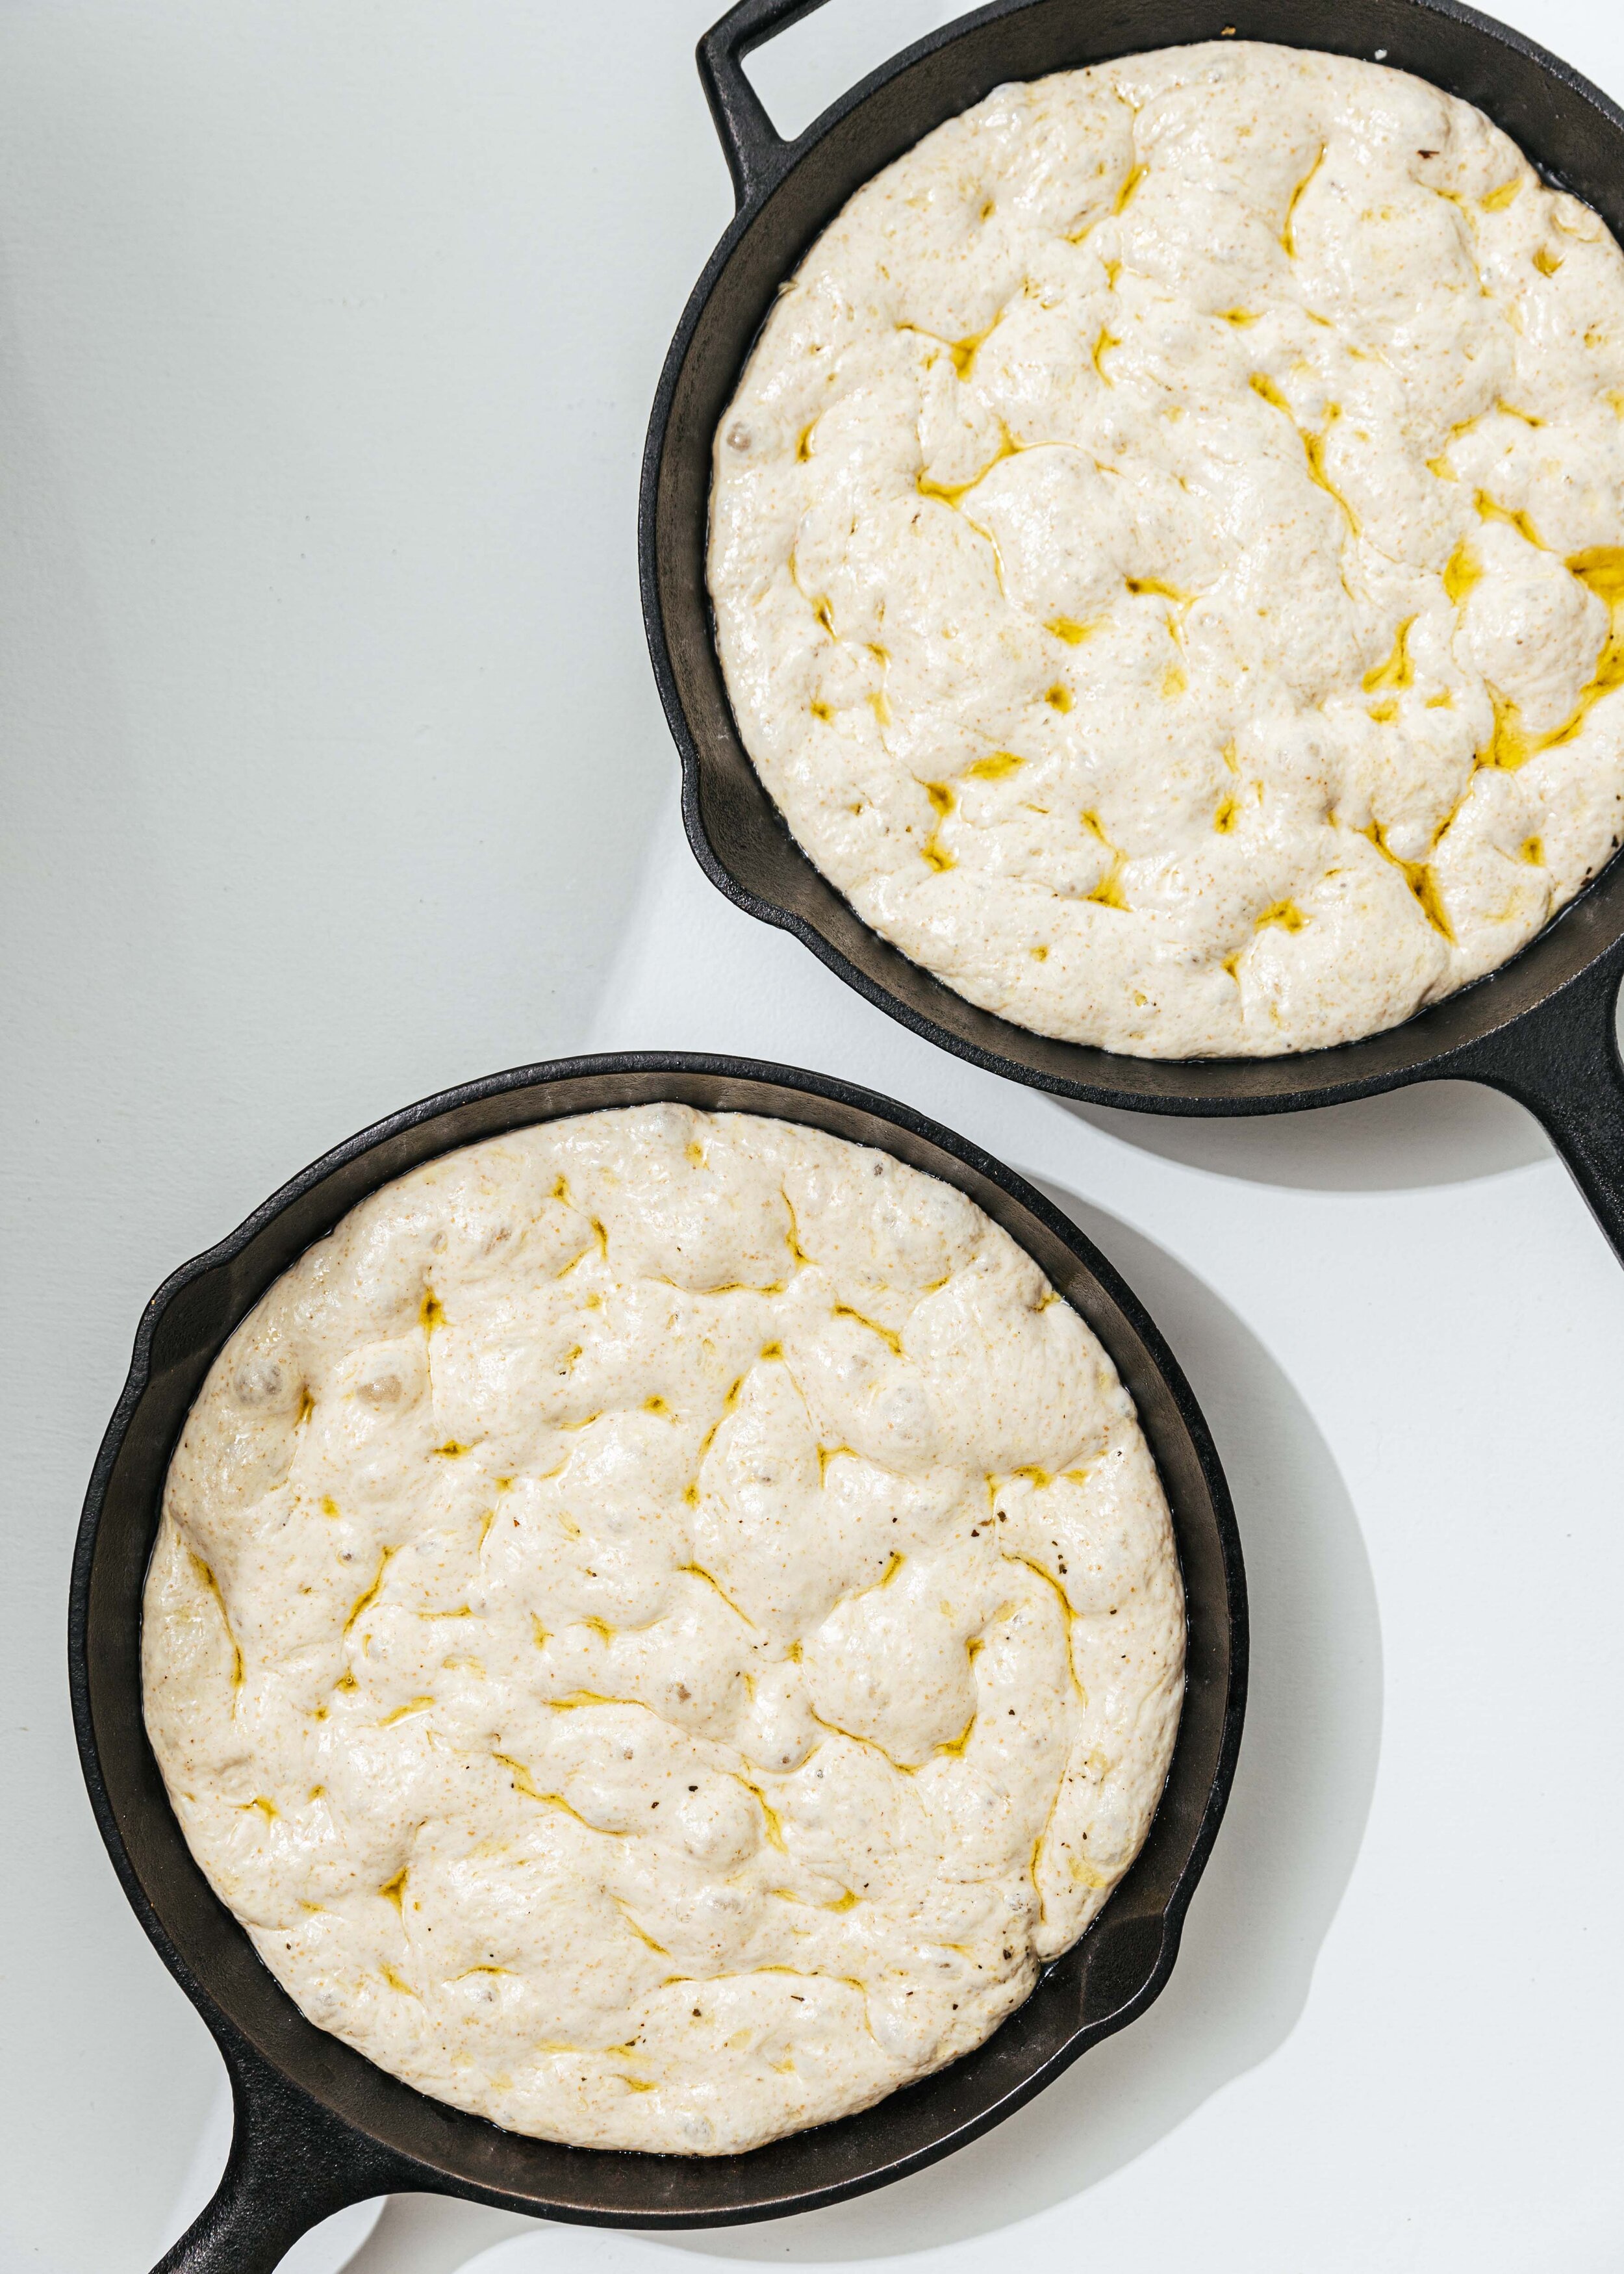
• For the round loaf — I split the dough in half and baked them using two 10-inch cast-iron pans. Alternatively, you can bake it in a 9x13 inch pan, or any other pan you have on hand. The smaller. the pan, the thicker the focaccia. The thicker the focaccia, the better for sandwiches.

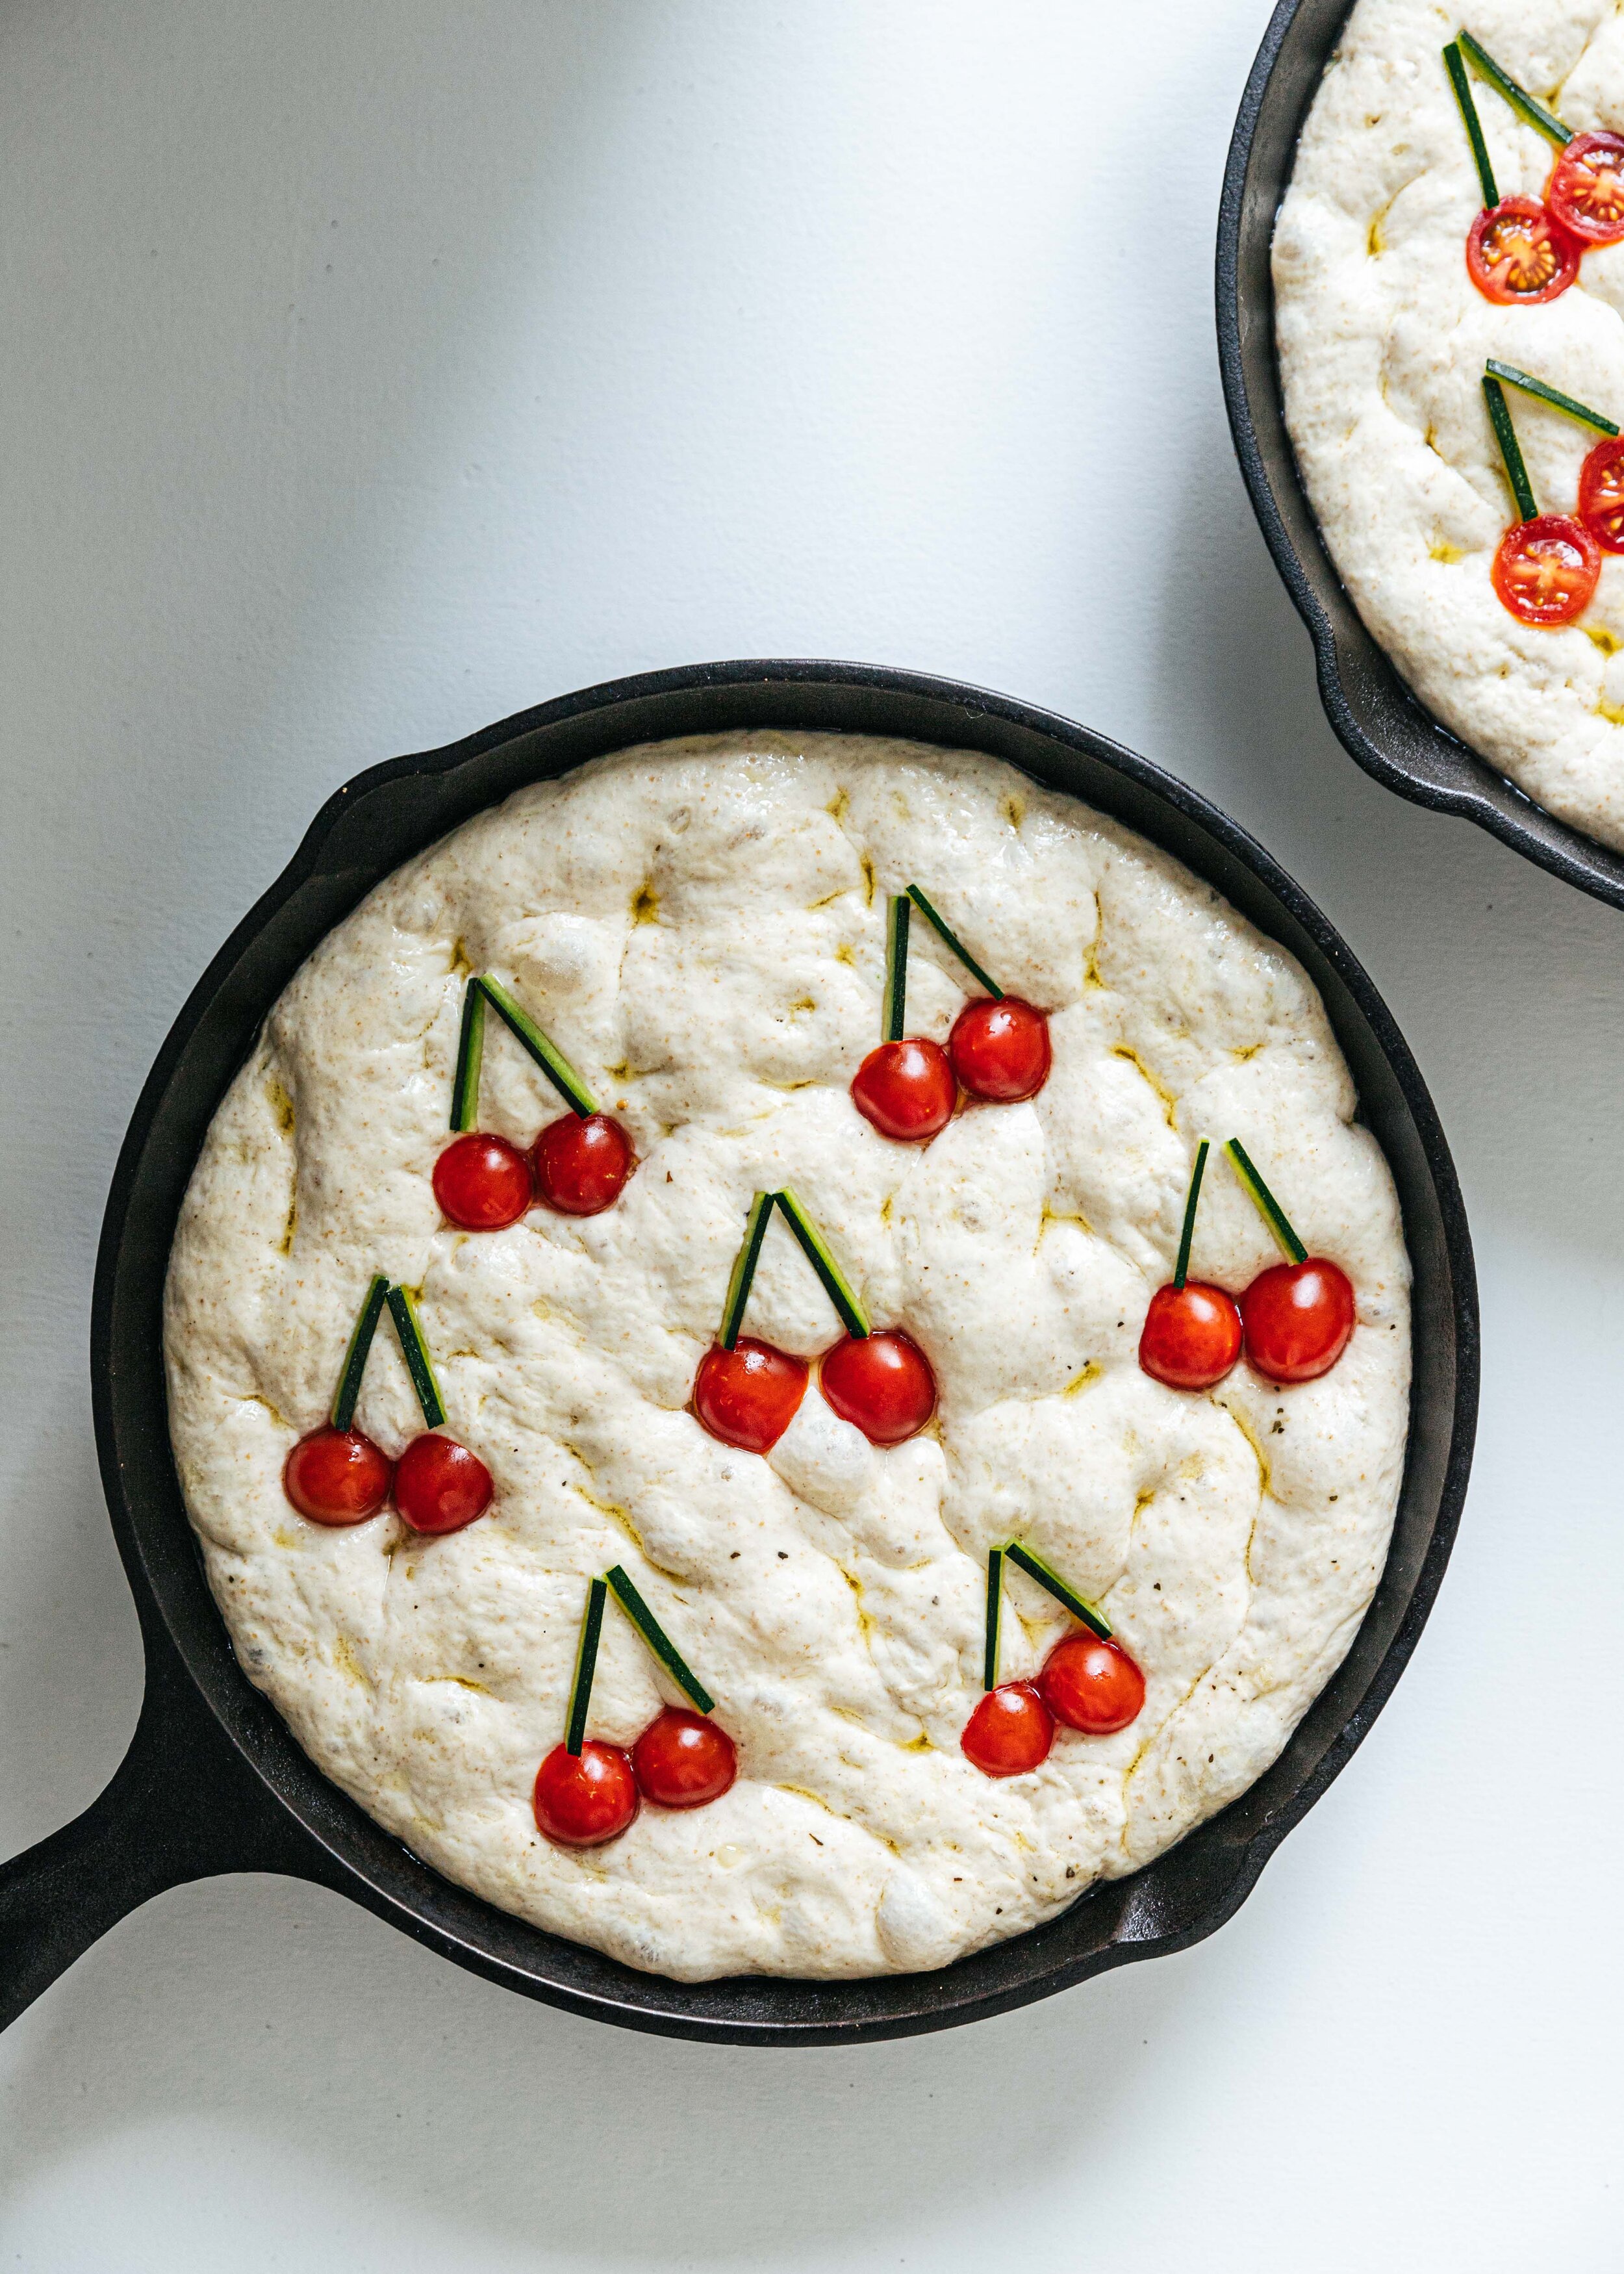
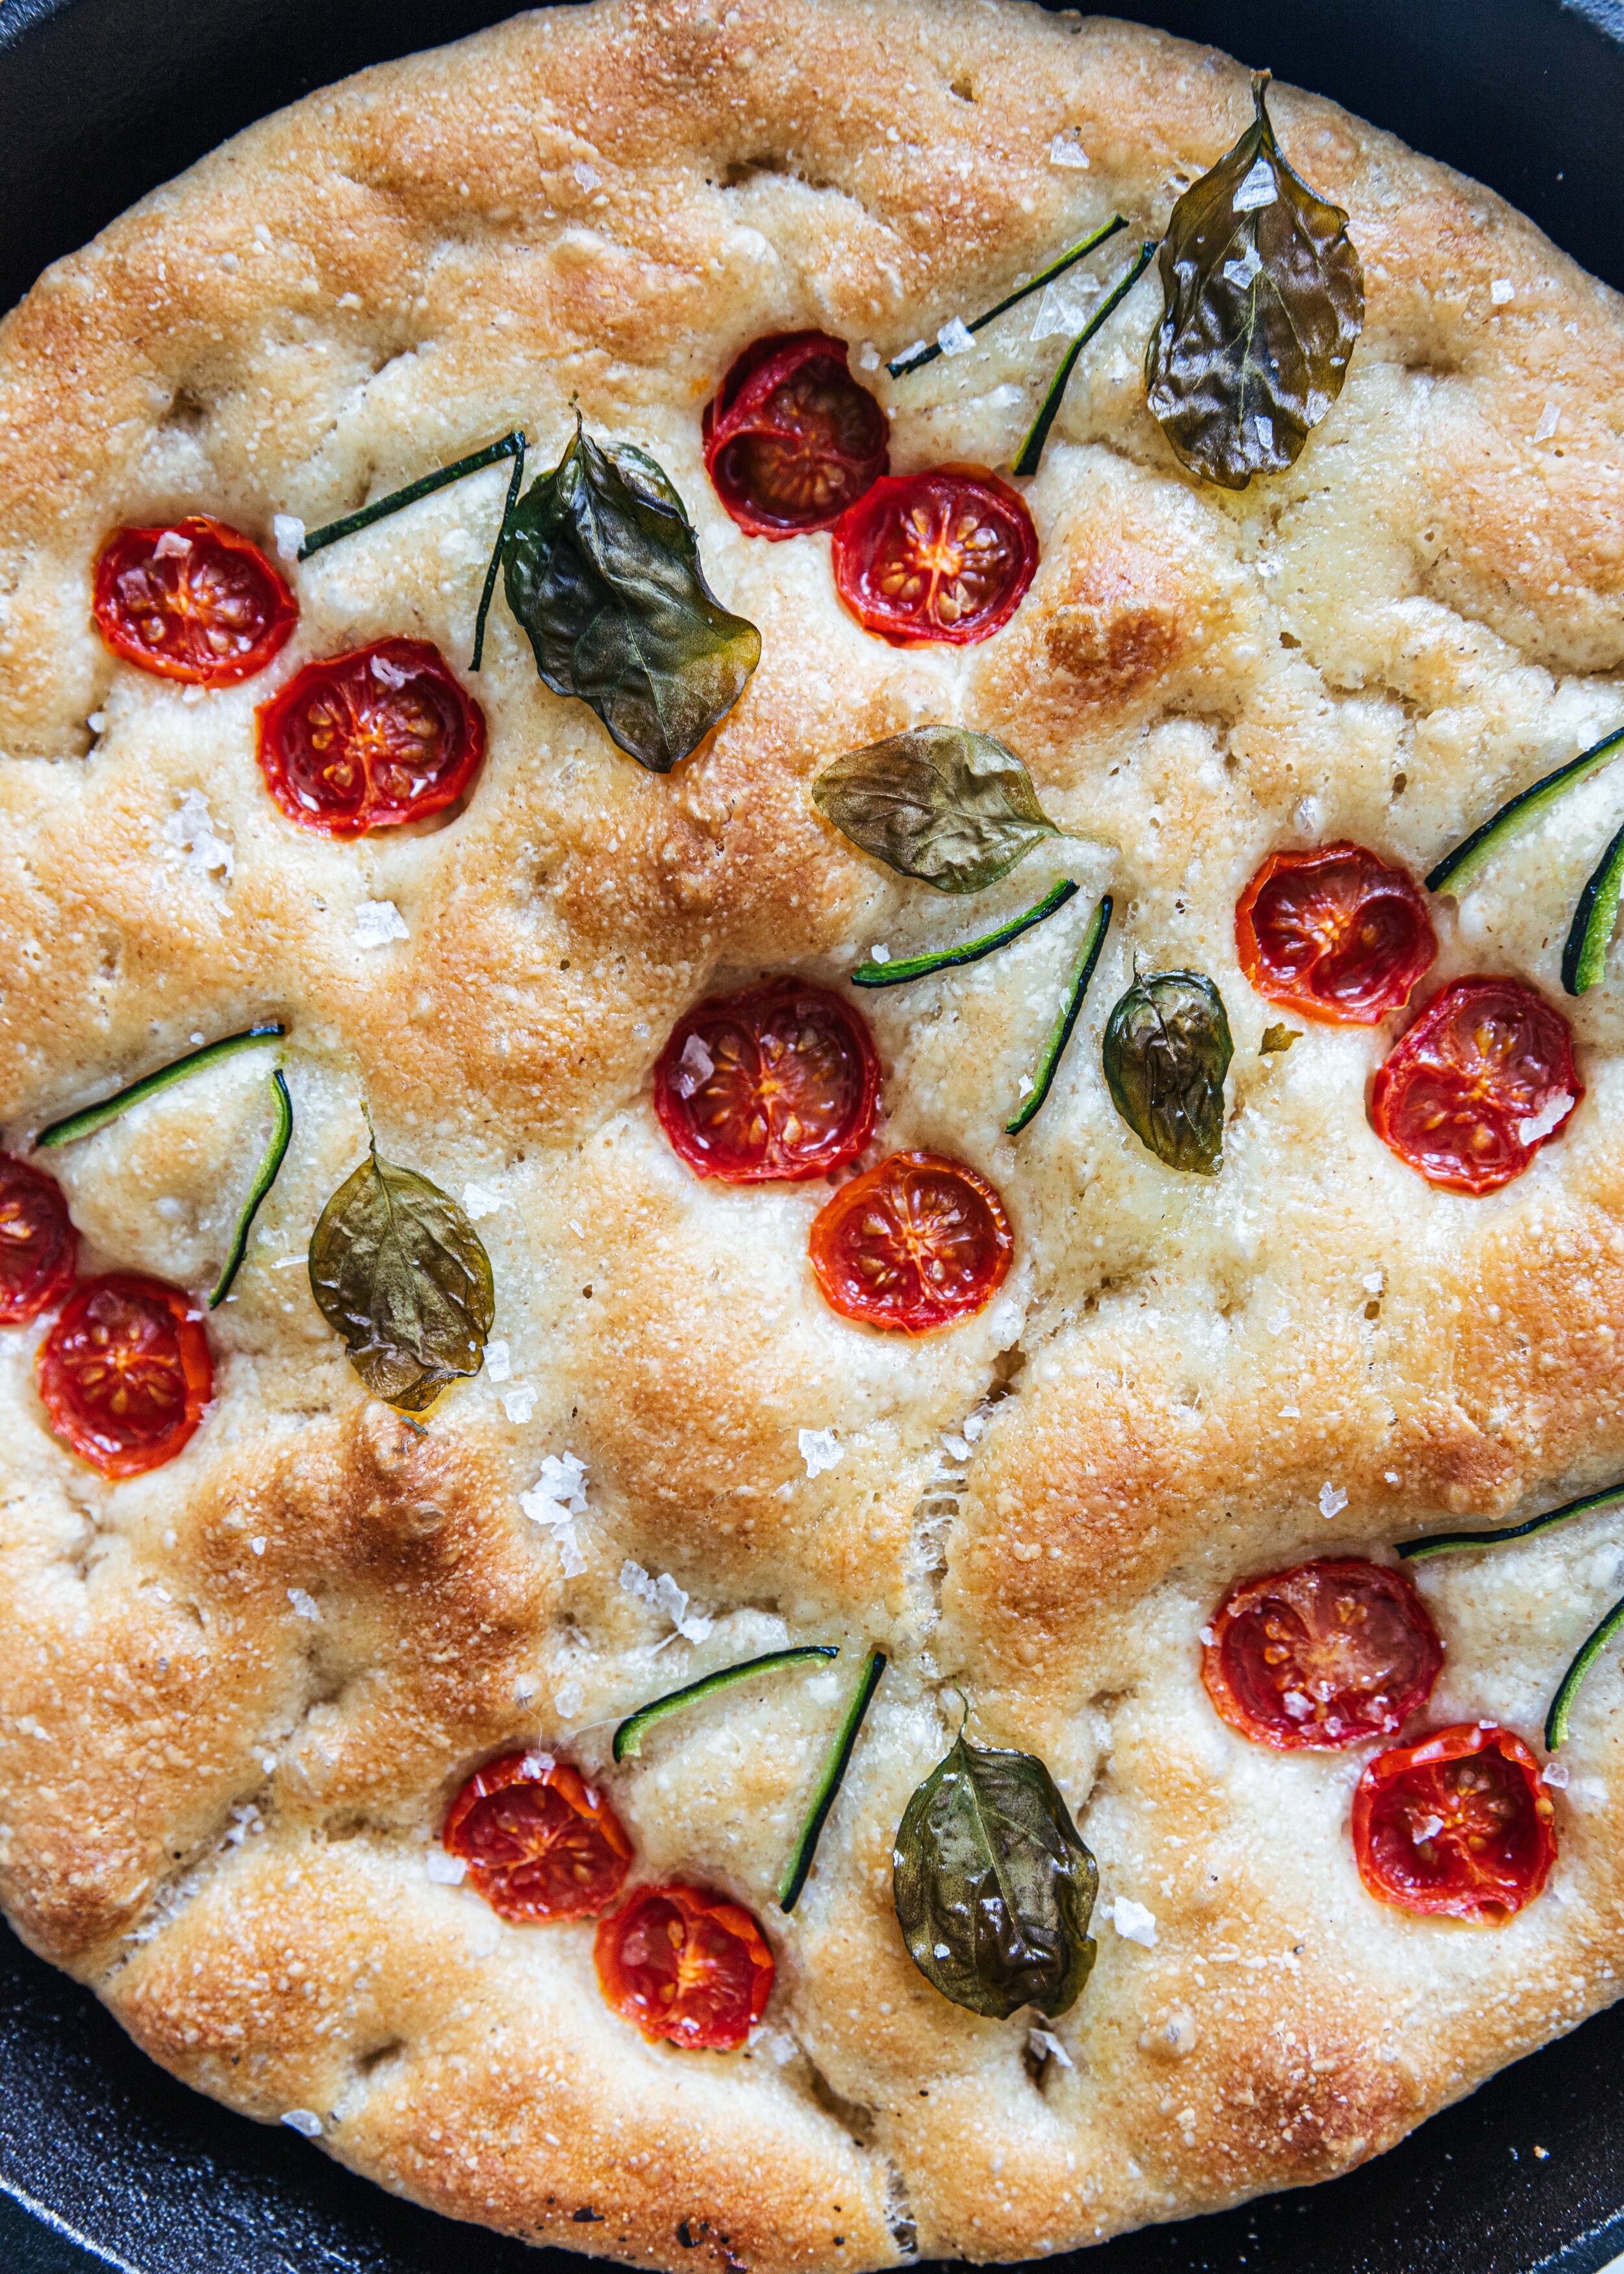
• Toppings can be substituted with anything you fancy. Vegetables, chili flakes, Italian herbs, and edible flowers. I added herbs and garlic on the bottom for flavor without taking away from the topping.

• For mini basil leaves — I used this opportunity to get myself a leafy basil plant. Much easier than digging through basil packages at the market!

cherry-tomato-focaccia-recipe.jpg
cherry-tomato-focaccia-recipe-2.jpg
cherry-tomato-focaccia.jpg
cherry-tomato-focaccia-recipe-5.jpg
cherry-tomato-focaccia-recipe-4.jpg
cherry-tomato-focaccia-recipe-3.jpg
cherry-tomato-focaccia-2.jpg

Cherry Tomato Focaccia

Ingredients

Focaccia

1 ¼-oz. envelope active dry yeast (about 2¼ tsp.)
2 tsp. honey
5 cups (625 g) all-purpose flour
5 tsp. Diamond Crystal or 1 Tbsp kosher salt
6 Tbsp. olive oil, divided, plus more for hands
4Tbsp unsalted butter, plus more for pan
Flaky sea salt, to taste
4 garlic cloves, minced

Cherry tomato Topping

Small tub of red cherry tomatoes, halved
14–20 leaves of basil
Zucchini, a thin peel from the top-down, sliced into batons

Instructions

1. In a medium-sized bowl, whisk one envelope of active dry yeast (2¼ tsp), 2 tsp honey, and 2½ cups lukewarm water. Let sit for 5 minutes. The mixture should foam or at least get creamy. If not, your yeast is probably dead and you’ll need to get a new pack and start over again.

2. In a large bowl that fits into your fridge, measure 5 cups (625 grams) of all-purpose flour, 5 tsp Diamond Crystal salt, or 1 Tbsp kosher salt. Mix with a rubber spatula, scraping the sides and bottoms constantly until the dough comes together and no dry areas remain.

3. Pour 4 tbsp olive oil over the dough. Using the spatula, lift the sides and coat the dough in oil. Cover with a silicone lid or plastic wrap and chill until dough is doubled in size (the dough should look bubbly and alive). Chill for at least 8-hours, overnight or up to a day. If you are short on time, let it rise in a warm spot until doubled in size, 3–4 hours.

4. Generously butter two 10 inch cast irons or a 13x9 inch pan. Alternatively, use a baking pan of your choice. The larger the pan, the thinner and crispier the focaccia. To the buttered pans, add the minced garlic and spread evenly on the bottom. Pour another tbsp of olive oil in the center of the pan.

Step 5 instructions

Step 5 instructions

5. Holding the bowl of dough in one hand and a fork in the other. Gather up edges of dough farthest away from you, lift up and over into the center of the bowl. Turning the bowl as you go and repeat the process a couple of times. The goal is to deflate the dough and form it into a rough ball. Transfer the dough to the prepared pans. Pour any leftover oil in the bowl over the dough and turn it over to coat in coal. Let rise, uncovered, in a dry warm spot for at least 1 hour and up to 4 hours.

6. Preheat the oven to 450°. To see if the dough is ready, poke it and it should spring back slowly, leaving a small indent. If it springs back too quickly, the dough isn’t ready and needs to sit a bit longer. Lightly oil your hands and stretch out the dough to fill the pan(s). Dimple the focaccia dough all over with your fingers, like playing the piano, creating deep depressions in the dough. Drizzle with remaining 1 Tbsp. extra-virgin olive oil and sprinkle with flaky sea salt.

7. At this point, you can decorate the focaccia with whatever topping you are using. Place focaccia in the middle rack and bake until puffed and golden brown all over, 20–30 minutes. Let cool slightly, slice, and serve.

* Focaccia is best eaten fresh but keeps well in the freezer. Slice it into pieces, store it in a freezer-safe container, then reheat it on a baking sheet or in the toaster.

Strawberry Clafoutis

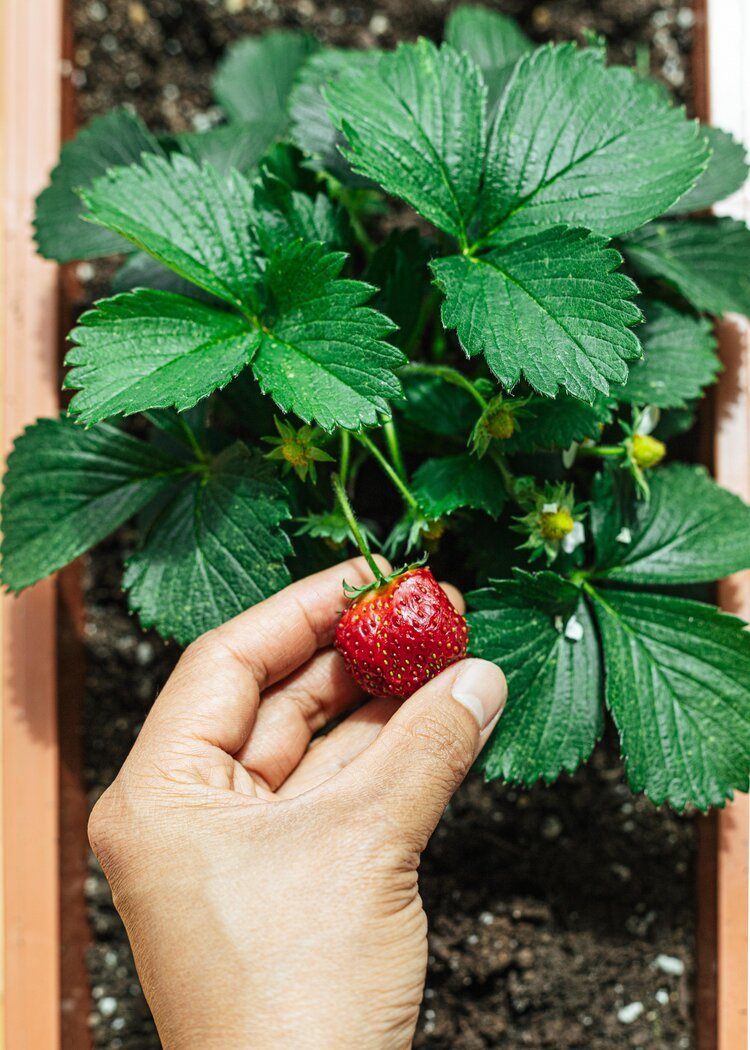
I hope you all have been keeping well. Given the current state of affairs in the world, I have been finding solace in the home, in harvesting my first two strawberries in my pot, feeding myself with good films and cooking inspiration. 

I stumbled across the wonderful film The Hundred-Foot Journey this week. I watched it two times, read every article about it on Google and am now reading the book. The film features an Indian family immigrating from Mumbai to Europe after suffering the loss of their mother and home. They travel over Europe and settle in a small town in France, opening a restaurant across the street from a Michelin restaurant run by the fierce Madame Mallory. The story is a battle and coming together of flavour, cinematic beauty, family and tradition. It’s heartwarming and has everything I love about food, bridging culture, French and Indian cuisine. Personally, any film that features the main actor crying over home-cooked food is one worth watching. The book is beautifully written, I have lost much sleep over it and highly recommend both.

The Clafoutis is a recipe from the movie — one the chef stumbled across while studying his cookbooks. A French recipe I can now say I have made. I hesitate to delve into French cuisine, especially after reading the book of the movie and Julia Child’s memoir — My Life in France. French cuisine feels like such a classic yet complex cuisine to master. It takes a lot to keep things simple and master the technique to coax flavour out of the simplest, quality ingredients. I’m happy to start with this one.

This is a very versatile recipe made with staple ingredients milk, eggs, butter, sugar. You can substitute different kinds of fruit — berries, stone fruit, rhubarb (see note below). The texture is similar to that between a flan or a thick pancake. It's filling, but not too sweet so you won’t tire of it.

Aim for a silky smooth, lump-free batter here.

Strawberry Clafoutis

Ingredients

*Makes a 10-inch cake, serves 8

Butter, for buttering the pan
2 cups (226 grams) strawberries, hulled and halved lengthwise*
3 eggs
1 cup milk
2/3 cup flour
1/4 cup granulated sugar, plus more for sprinkling
1 1/2 teaspoons vanilla
Pinch of salt
Powdered sugar for dusting

Instructions

Preheat the oven to 350 F. Butter the bottom and sides of a pan with butter. Sprinkle one tablespoon of sugar all over the bottom of the pan. This will help release the cake without sticking and provide a crunchy bottom.

In a large mixing bowl, add the eggs, milk, sugar, vanilla. Mix until incorporated. Gradually add the flour and mix until silky to the touch. Pour the batter over a strainer to remove any lumps and into the pan. Arrange the strawberries over the top and bake until a skewer inserted into the batter comes out clean. Around 30 minutes. A golden crust will have formed on the sides. Dust with powdered sugar and serve warm.

* The strawberries bled into the batter. Next time, I will toss them in cornstarch (2 teaspoons) before adding over the batter.

* If you do not have powdered sugar, blitz white sugar in the blender till superfine.

* If using rhubarb, dice into pieces, macerate in 2 tbsps of sugar for 5 minutes and roast at 400F for 10 mins or until soft and bubbly. Let cool and add to the recipe like any other fruit.

Flourless Chocolate Brownie With Edible Flowers

This recipe is an update from a favourite. The fudgy-ist and the most satisfying chocolate recipe I have ever had. I have taken these brownies to many a social gathering, now passing them off in packets while social distancing. They never fail to please. I keep a stack handy in the freezer when I have a chocolate craving.

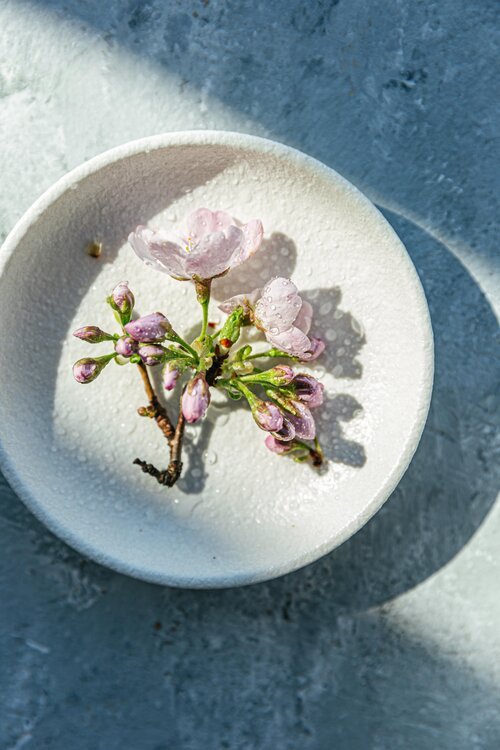
Cherry blossoms are beautiful. They are also edible. I am making Cherry Blossoms Preserves with their buds but making the most out of these fully blossomed buds. I love watching peoples eye’s light up before they take a bite. If you are curious about which flowers are edible, I have a list here. Just make sure they have not been sprayed with chemicals. I source most of mine from my parent’s yard.

Edible Flowers

Nasturcians
Rose
Forget-me-nots
Chive flowers (these smell like onions so use in savoury dishes)
Carnation petals
Pansies
Marigolds

I like my treats to be less sweet and have lowered the 150 grams of brown sugar to 120 grams and 100 grams. It seems to work without breaking the structure of the brownie.

These brownies taste rich, decadent but light without the flour. Please try it and let me know the results. Please also share them.

Flourless Chocolate Brownie With Cherry Blossoms

140g dark chocolate
155g (1/2 c) unsalted butter
120g brown sugar
3 large eggs, lightly beaten
50g (1/2 c) cocoa powder, sifted
1/4 tsp salt
11/2 tsp vanilla extract
1/4 c walnuts, chopped (substitute any kind of nuts)
Maldon sea salt for garnish (optional)

  1. Preheat oven to 350 F. Line a baking pan or sheet with parchment paper.

  2. In 15-30 second intervals, melt chocolate and butter in the microwave and stir until smooth. Set aside too cool. Add brown sugar, cocoa powder, salt, vanilla, and eggs. In that order. Mix but do not over-mix. Transfer batter to baking pan or sheet with a spatula. Top with walnuts.

  3. Bake for 20-30 minutes or until brownie is set and firm in the center. Time will vary depending on container size. Let sit until cool before cutting into pieces. Top with cherry blossoms, buds, and a sprinkle of flaky sea salt.

These are very delicious eaten cool or slightly warmed. They also keep well in the fridge for up to a week. If they last that long.

Apple Rum Galette

Happy Fall everyone. It has been quiet over here this summer. A good kind of online quiet while my offline life was filled with time in nature, cliff jumping, sitting by the beach, and away from the screen as much as possible. I hope it was one as energizing and glorious for you as it was for me. Some warm, bright memories to store up for the coming months.

If you have been following along on social media — you will have noticed my switch from light, airy photography to dark and rich imagery. It is a direction that has taken me by surprise but something I feel very connected to. For me —  a new way of seeing, shaping light, and appreciating details to capture in everyday life. After shooting mostly artificial light for the past year— it feels like I am coming full circle working with natural light again. On a personal level, I feel I am finally embracing the light of dark winters in Canada while absorbing classical inspiration from artists in the Dutch golden era. I have pulled out my music sheets and classic music in the studio is now a thing. It is a personal process, not without emotion, but one that comes with a sense of peace.

Now, let's talk about apple pies. I love how timeless this recipe is, never failing to reappear this time every year. I did not grow up eating apple pies, so this is a new tradition I am setting for myself. I had the best fruit cake in Australia last Christmas with my boyfriend’s family, and finally made use of the rum I bought on that trip. Inspired by Australian fruit cake —  rum will be added to all of my fruit desserts now.

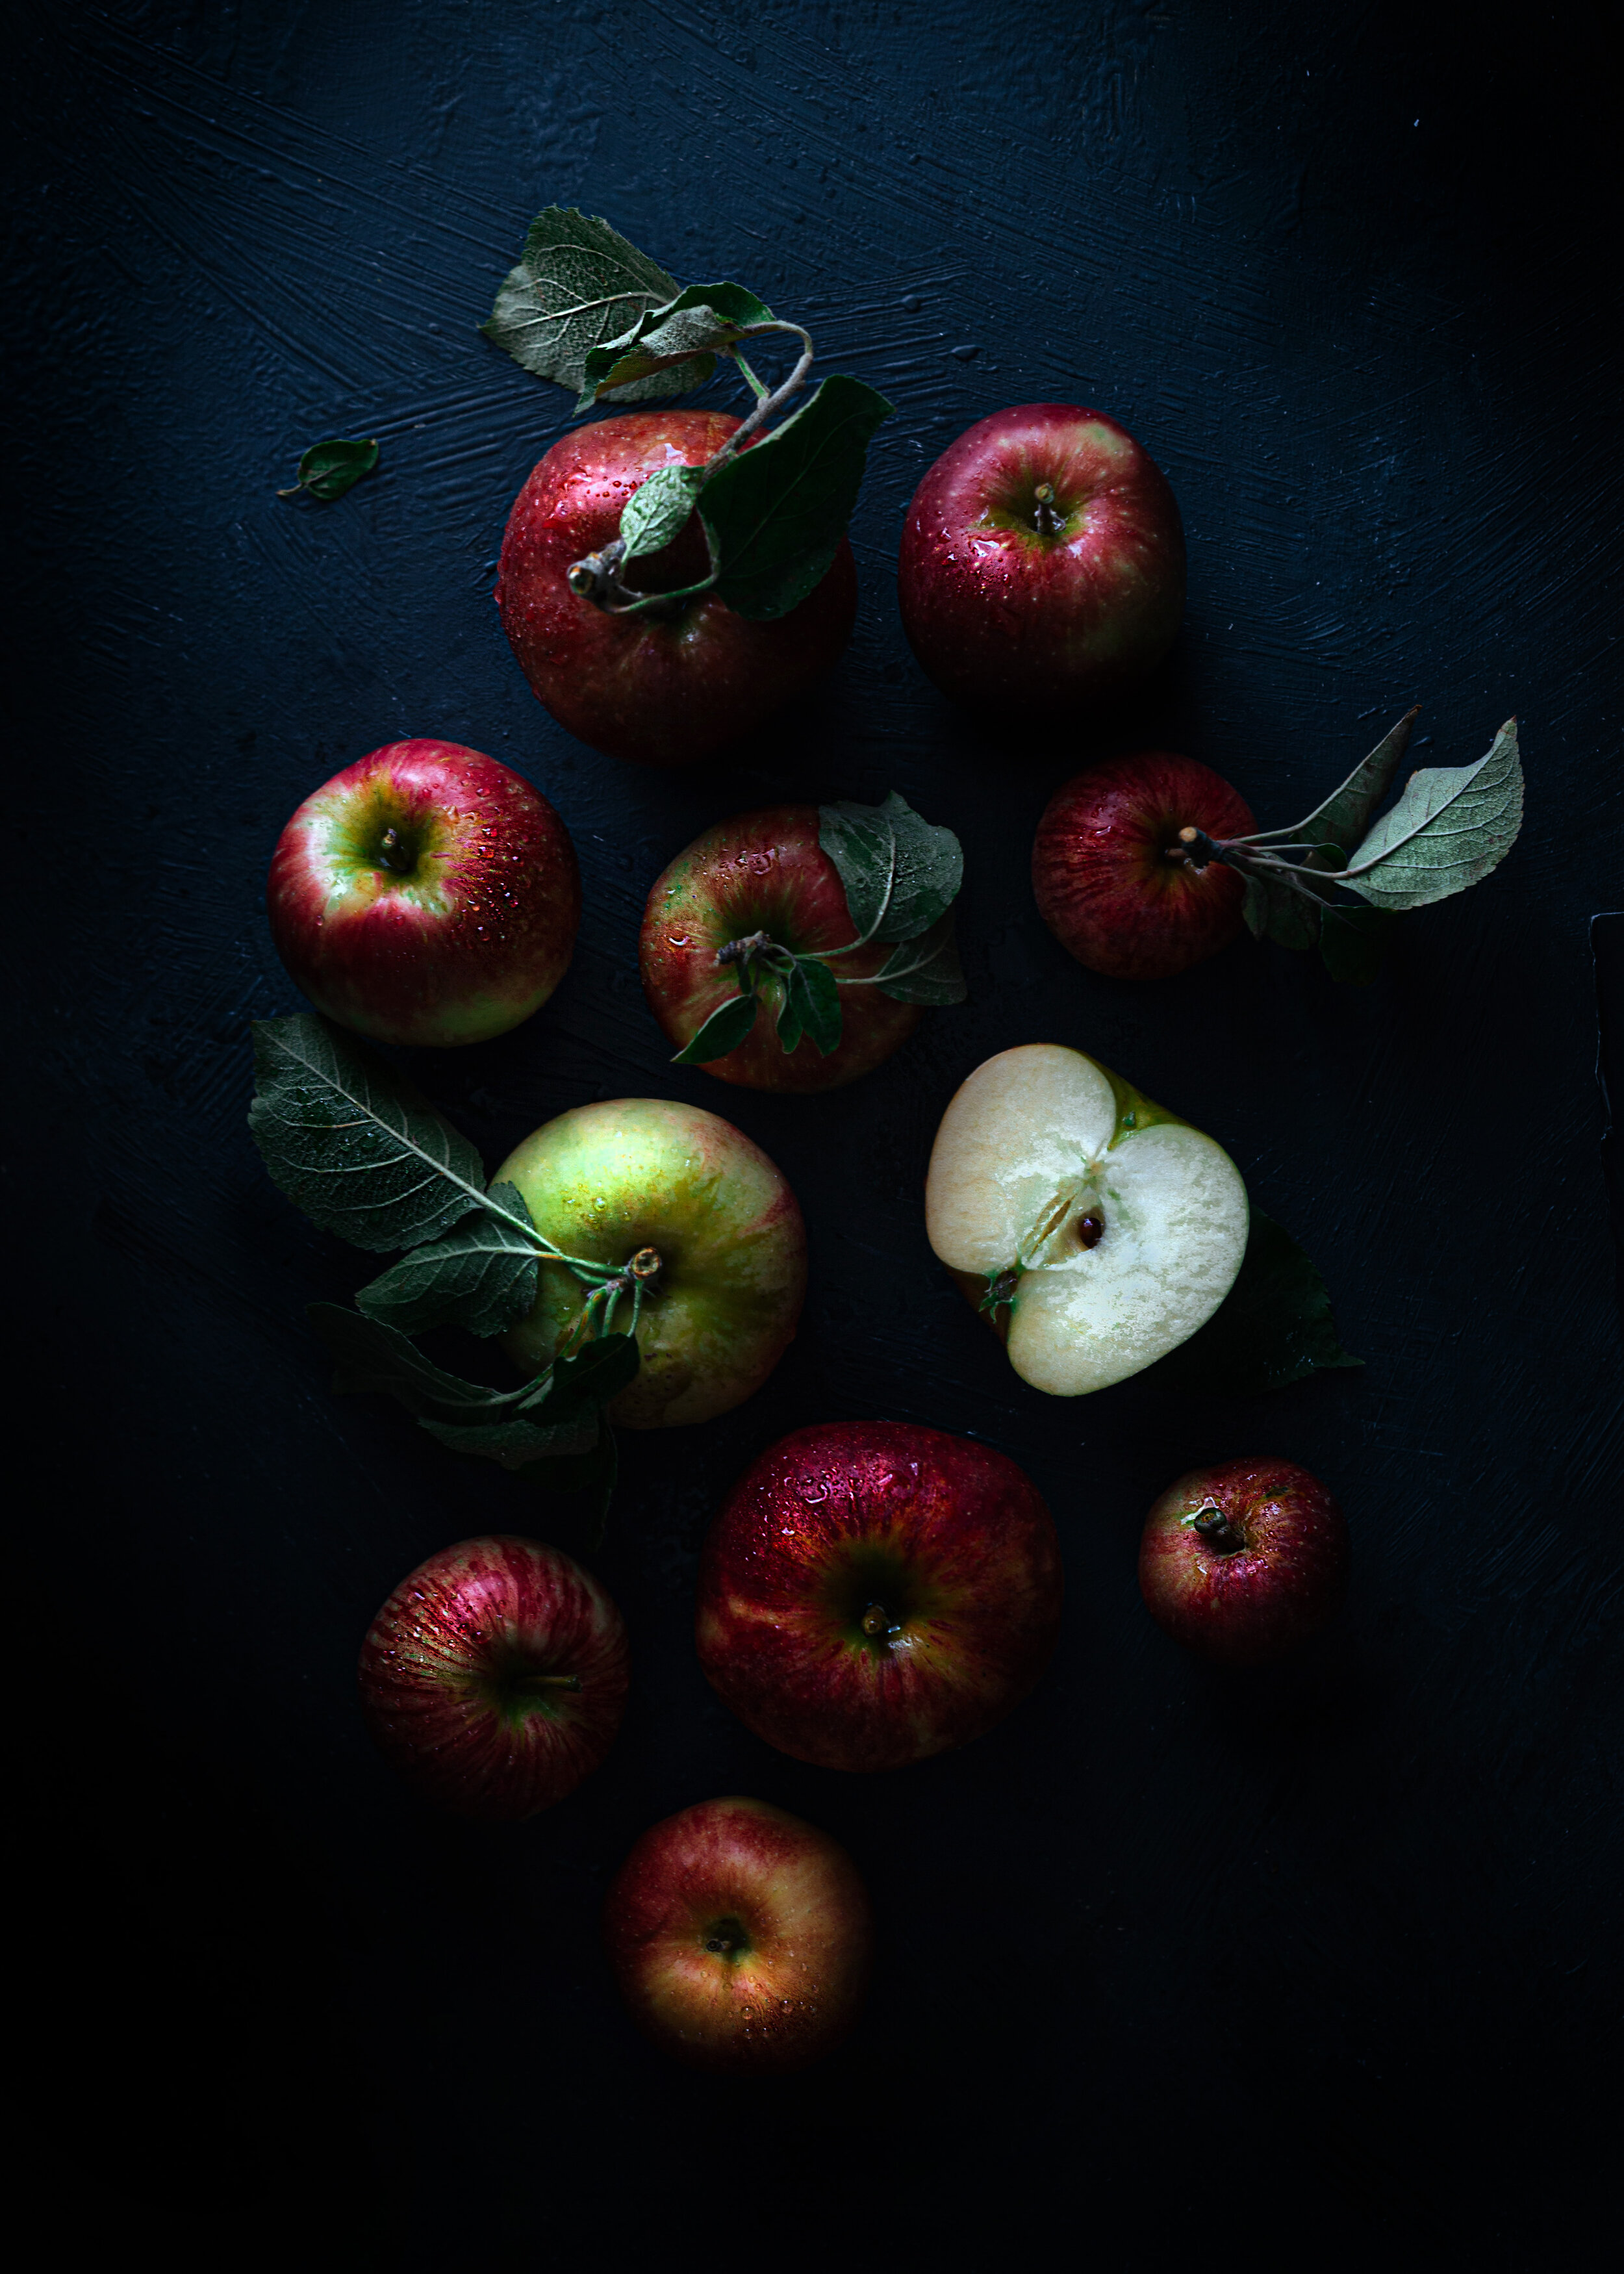
This recipe is adapted from an apple bourbon galette recipe from food52, using flaky pie dough from Cannelle Et Vanille’s cookbook. The apples were picked from Willow View Farm with my family last week, it made a world's difference using fresh apples. Jonagolds are my new favourite eating and cooking apple. I have some Korean pears and plums from the garden that I am looking forward to baking with this recipe. 

apple-picking-willow-view-farm-british-columbia.jpg
Ladybirds, always landing in the perfect time and place.

Ladybirds, always landing in the perfect time and place.

Apples-chiaroscuro-light-photography.jpg
Stocksy_comp_3439539.jpg
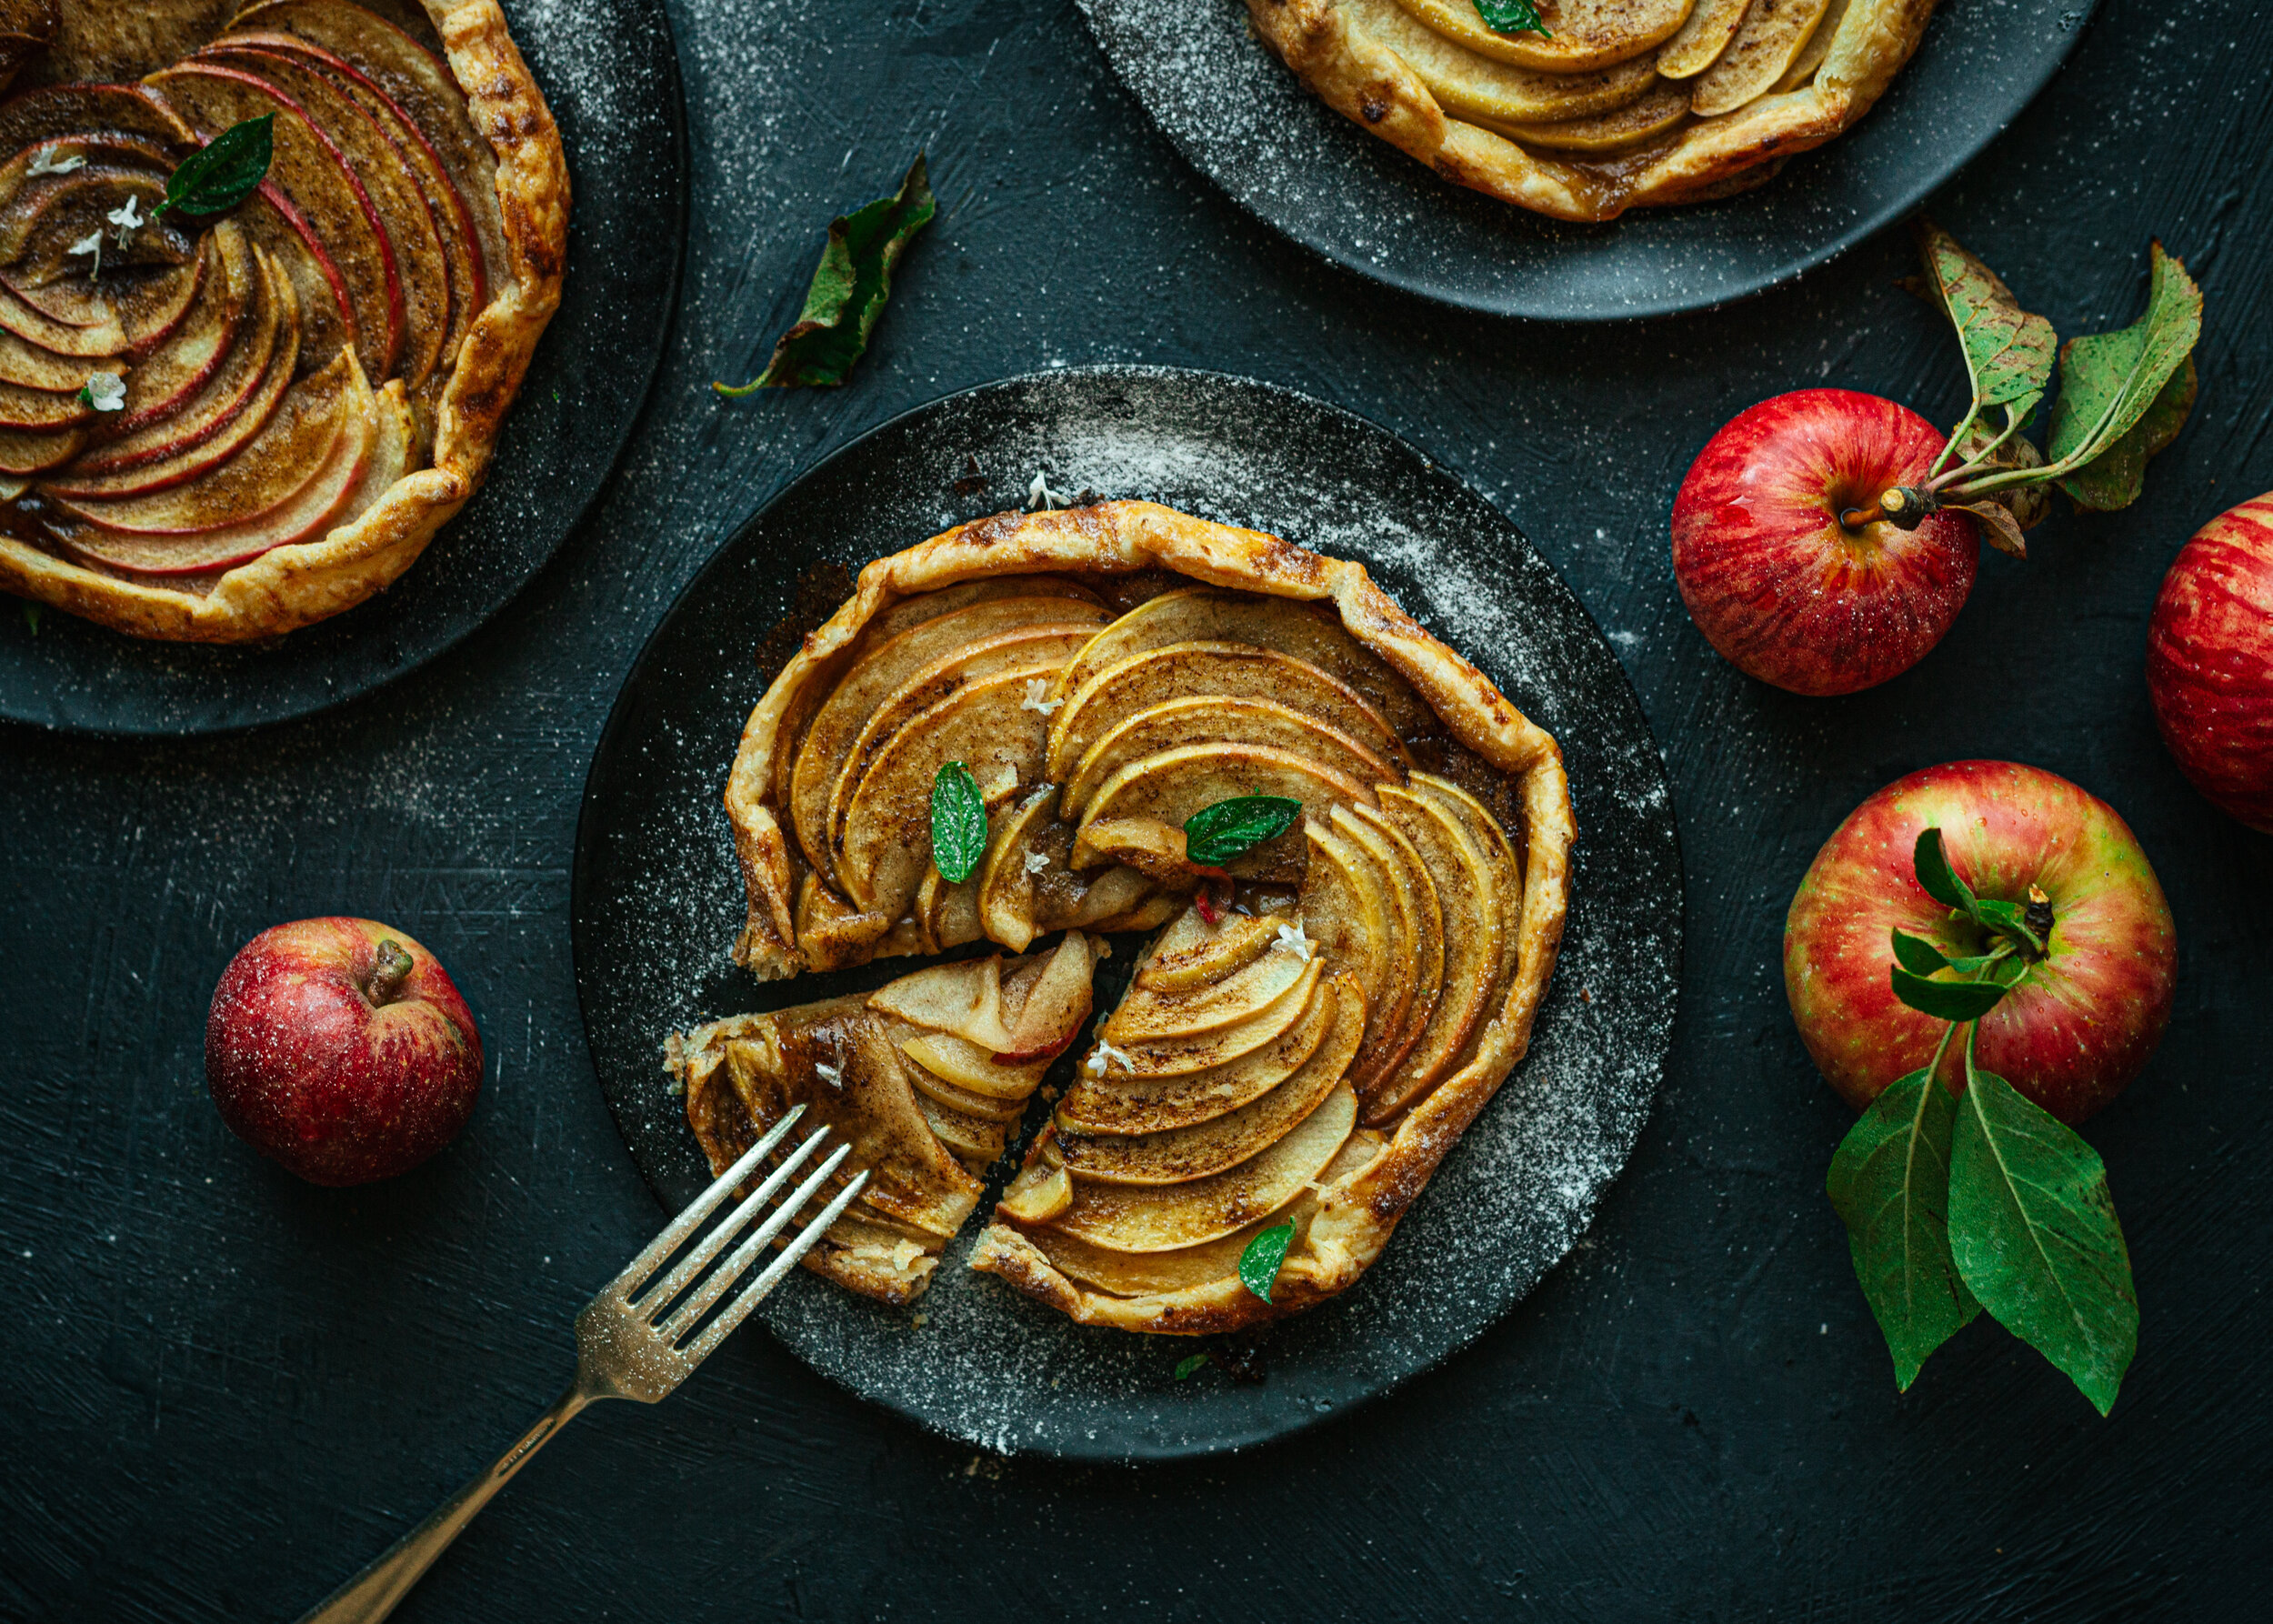
Dusted these with a sprinkle of powdered sugar and basil flowers.

Dusted these with a sprinkle of powdered sugar and basil flowers.

Apple Rum Galette

Serves 6, makes one large galette or 2-3 small ones

Ingredients 

  • 1/2 flaky pie dough

  • 1/3 cup rum

  • 3 tablespoons unsalted butter

  • 1/3 cup dark brown sugar ( I used 1/4 for a less sweet version)

  • 1 tablespoon cornstarch (optional)

  • 1 teaspoon cinnamon

  • 3 large or 4 medium apples, cored and sliced into pieces

  • 1 egg, beaten, for finishing

  • Turbinado sugar, for finishing

  • Basil leaves, for garnish (optional)

Instructions

Preheat the oven to 425° F. Line a baking sheet with baking paper.

  • In a small saucepot, bring the rum to a boil over medium heat. Cook until the liquor is reduced to 2 tablespoons, then stir in the butter until it’s melted.

  • In a small bowl, whisk the brown sugar, cornstarch, and cinnamon to combine. Stir this into the rum-butter mixture and let cool completely.

  • Cut the apples into four outer pieces, leaving the core intact. Carefully slice each piece into thin slices, doing your best to keep sections together while you slice. This will make your apples easier to fan

  • On a lightly floured surface, roll out the dough into a round shape around 1/4 inches thick. Trim the edges if you need to. Transfer the dough to the prepared baking sheet.

  • Starting around the edges — fan the apples out and place them over the dough, leaving about 1 1/2 inches of uncovered dough all around the edge.

  • Fold the sides of the dough over the apples. Overlapping the folds and pinching at the edges to ensure they are secure.

  • Carefully spoon the bourbon-sugar mixture over the apples evenly. Apply egg wash over the edges of the dough and sprinkle with turbinado sugar.

  • Bake the galette until the crust is golden brown and the apples are toasted and tender. Around 25 to 30 minutes. Let cool before slicing and serve with ice cream. Garnish with basil leaves if you like. The galette keeps for2-3 a few days though best enjoyed fresh, a light toast for leftovers in the convection oven helps.

Apple-galette-recipe.jpg

Flaky Pie Dough

To me, what dough can be better than flaky pie dough? I am so delighted every time I bake with this recipe. This dough keeps really well in the freezer (up to three months) and the layers of crispiness really make a difference.

With pie as a North American/European staple—pastry and galettes are something I love learning to perfect and create new traditions for myself. A dough very different from rice cake, dumpling and hand-pulled noodles but just as rewarding to share. I use this for my galettes and am always showered with high praise.

flaky-pie-dough-recipe.jpg

Flaky Pie Dough

Makes two large or four small galettes. I use half and freeze the remaining for future pies.

Flaky Pie DoughFlaky Pie Dough

Ingredients

  • 2 1/2 cup (350g)all-purpose flour (I use Anita’s organic flour when I want to feel fancy)

  • 1/2 teaspoon kosher salt

  • 1 cup (225g) cold unsalted butter, cut into 1/2 inch cubes

  • 6–7 tablespoons (110g) ice-cold water

Instructions

  • Sift the flour into a large mixing bowl. Add the diced butter. With clean hands (or a food processor if you own one), work the butter into the flour until the butter is the size of peas. Add 6 tablespoons of ice-cold water and continue mixing until the dough starts coming together. You may need more ice water depending on humidity. 

  • Transfer the dough to a surface and shape it together without handling it too much. The mixture should be crumbly with pieces of butter still intact. We want to keep the butter cold and chunky without melting it with the heat of your hands. This will aid in a flaky crust.

  • Using a bench scraper or large knife, cut the dough into two equal pieces. Wrap them in saran wrap and flatten them into round discs. Chill the dough for at least 30 minutes before using. I freeze half the dough at this point and use it for future baking sessions. Just thaw it out in the fridge before rolling.

  • To roll the dough, lightly dust a work surface* with flour. Start rolling the dough from the center, rotating the dough with your other hand every time. Aiming for a circular, even shape. Make sure the surface and rolling pin are floured to avoid sticking. If the dough cracks or shapes unevenly, bring the dough back together, knead it a couple of times and start again. 

*A trick I use for galettes is to roll the dough on a piece of parchment paper and transfer it directly to a baking pan.

Strawberry Clafoutis + New Read

Good morning. I hope you all have been keeping well. Given the current state of affairs in the world, I have been finding solace in the home, in harvesting my first two strawberries in my pot, feeding myself with good films and cooking inspiration. 

I stumbled across the wonderful film The Hundred-Foot Journey this week. I watched it two times, read every article about it on Google and am now reading the book. The film features an Indian family immigrating from Mumbai to Europe after suffering the loss of their mother and home. They travel over Europe and settle in a small town in France, opening a restaurant across the street from a Michelin restaurant run by the fierce Madame Mallory. The story is a battle and coming together of flavour, cinematic beauty, family and tradition. It’s heartwarming and has everything I love about food, bridging culture, French and Indian cuisine. Personally, any film that features the main actor crying over home-cooked food is one worth watching. The book is beautifully written, I have lost much sleep over it and highly recommend both.

The Clafoutis is a recipe from the movie — one the chef stumbled across while studying his cookbooks. A French recipe I can now say I have made. I hesitate to delve into French cuisine, especially after reading the book of the movie and Julia Child’s memoir — My Life in France. French cuisine feels like such a classic yet complex cuisine to master. It takes a lot to keep things simple and master the technique to coax flavour out of the simplest, quality ingredients. I’m happy to start with this one.

This is a very versatile recipe made with staple ingredients milk, eggs, butter, sugar. You can substitute different kinds of fruit — berries, stone fruit, rhubarb (see note below). The texture is similar to that between a flan or a thick pancake. It's filling, but not too sweet so you won’t tire of it.

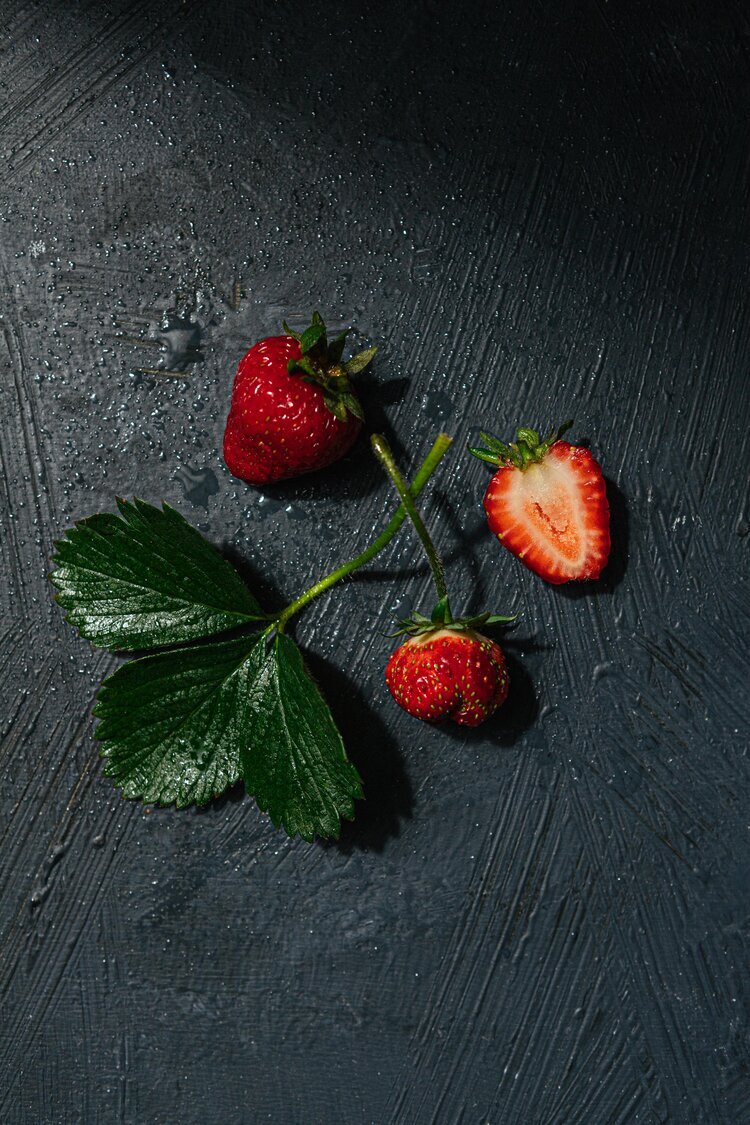
Strawberries picked from my potted plant. My pride and joy.

Strawberries picked from my potted plant. My pride and joy.

strawberry+clafoutis+recipe.jpg
strawberry+clafoutis+recipe-7-1.jpg

Strawberry Clafoutis

Strawberry Clafoutis

*Makes a 10-inch cake, serves 8

Ingredients

Butter, for buttering the pan
2 cups (226 grams) strawberries, hulled and halved lengthwise*
3 eggs
1 cup milk
2/3 cup flour
1/4 cup granulated sugar, plus more for sprinkling
1 1/2 teaspoons vanilla
Pinch of salt
Powdered sugar for dusting

Instructions

Preheat the oven to 350 F. Butter the bottom and sides of a pan with butter. Sprinkle one tablespoon of sugar all over the bottom of the pan. This will help release the cake without sticking and provide a crunchy bottom.

In a large mixing bowl, add the eggs, milk, sugar, vanilla. Mix until incorporated. Gradually add the flour and mix until silky to the touch. Pour the batter over a strainer to remove any lumps and into the pan. Arrange the strawberries over the top and bake until a skewer inserted into the batter comes out clean. Around 30 minutes. A golden crust will have formed on the sides. Dust with powdered sugar and serve warm.
* The strawberries bled into the batter. Next time, I will toss them in cornstarch (2 teaspoons) before adding over the batter.

* If you do not have powdered sugar, blitz white sugar in the blender till superfine.

* If using rhubarb, dice into pieces, macerate in 2 tbsps of sugar for 5 minutes and roast at 400F for 10 mins or until soft and bubbly. Let cool and add to the recipe like any other fruit.

Avocado Chocolate Cake

Growing up in Taiwan, my definition of avocados revolved around the football-sized Choquette avocado sold in fruit shops or juice stalls at the night market. Bred for their intimidating size and mild flavour — the Choquette avocado is used for smoothies with milk, sugar and pudding. Salad culture in Taiwan is slowly catching up to the west, but it was not after moving to Canada that I expanded my worldview on avocados and the many ways one can eat it in salads, guacamole, ice cream and so on.

I have gone through many flourless chocolate cake recipes but this is a new favourite yet. No blender or spiralizer is needed just two perfectly ripe avocados. The raw batter is heavenly and tastes like a thick chocolate pudding. I would make it just to eat the batter. A gluten-free treat you can make vegan by substituting the butter with cashew butter or olive oil. I made a less sweetened version for Mother’s Day and topped it with edible flowers, dried fruit and cashew cream.

Avocado Chocolate Cake

Serves 8/fills a 13-inch baking pan

Wet Ingredients
2 ripe medium-large avocados
4 eggs

Dry Ingredients
1 cup of cocoa powder
1 3/4 cup brown sugar (use 1 1/2 cup for a less sweet version)
4 tablespoons butter, softened at room temperature
2 teaspoons baking powder
2 teaspoons vanilla extract
1/2 teaspoon sea salt
1/2 cup chopped dark chocolate (optional)

Preheat the oven to 325°F. Grease a 10 x 12-inch baking pan with butter or parchment paper. 

In a large mixing bowl, sift the cacao powder with a sieve into a fine powder. Add the brown sugar, baking powder and sea salt. Mix evenly and set aside.

In a medium mixing bowl, mash the avocados, breaking large pieces with a fork as you go. Crack eggs into bowl one by one, add the butter and stir to evenly distribute. Add the wet ingredients into the dry, stirring and scraping the bottom of the bowl from time to time. Pour the mixture into the baking pan and bake for 25-30 minutes. The middle of the cake should be firm while on the edge of gooey. Let the cake come to room temperature before cutting. Top with chopped dark chocolate, sea salt, edible flowers or cashew cream. 

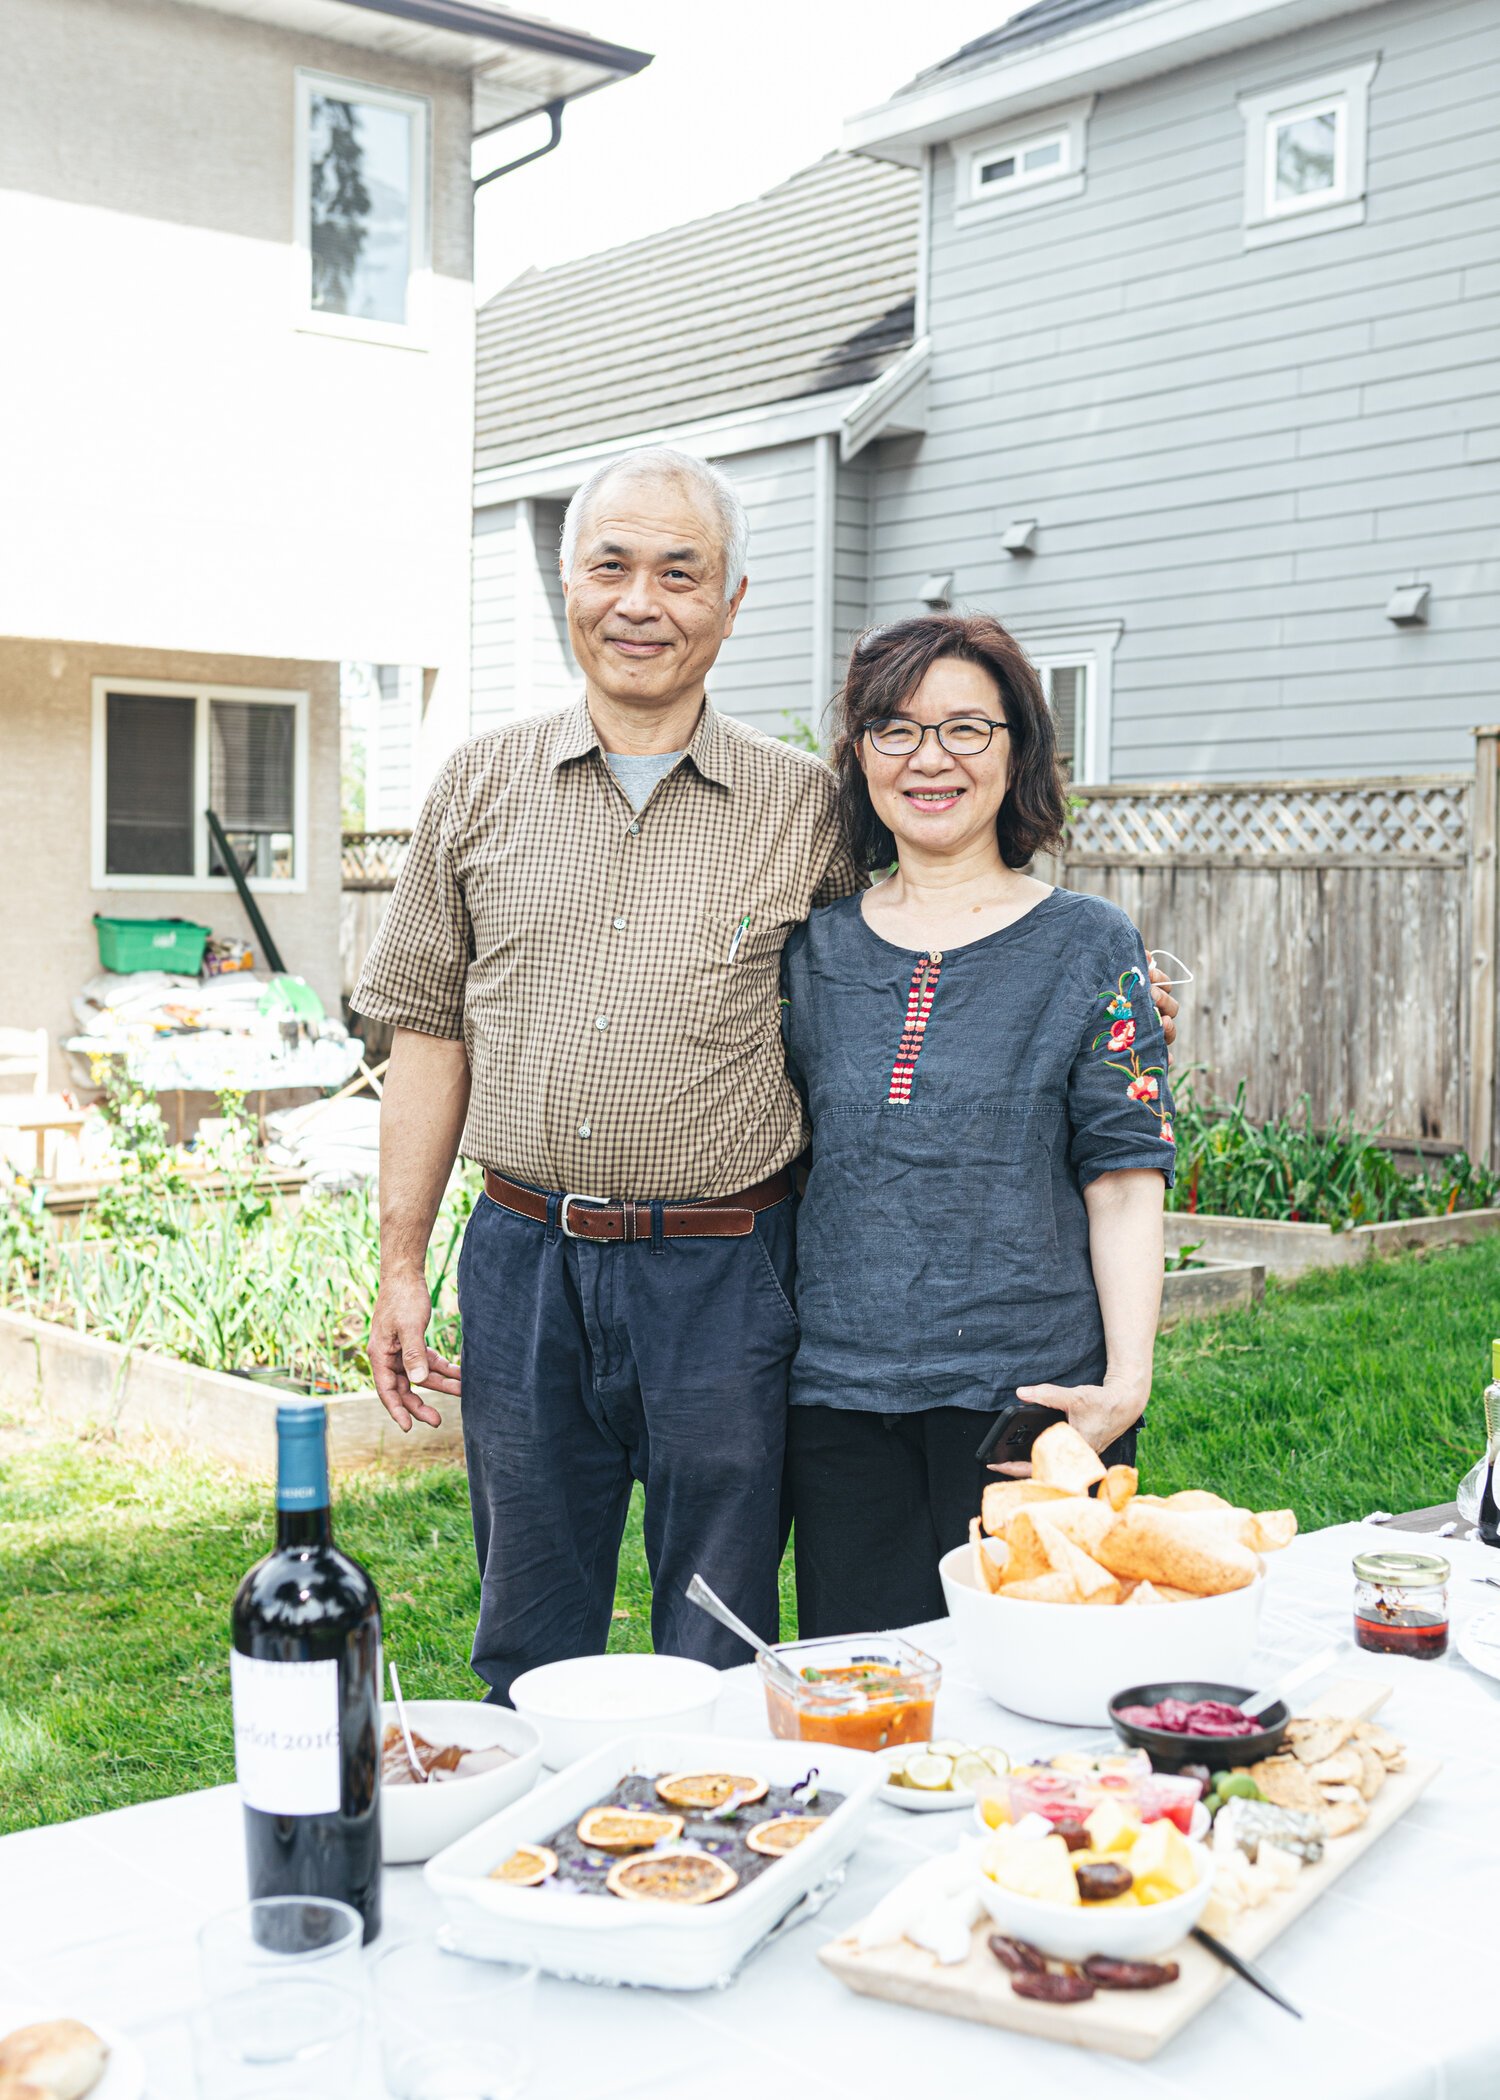
mom, dad and avocado chocolate cake

Chinese Egg Tarts Recipe (Whole Egg)

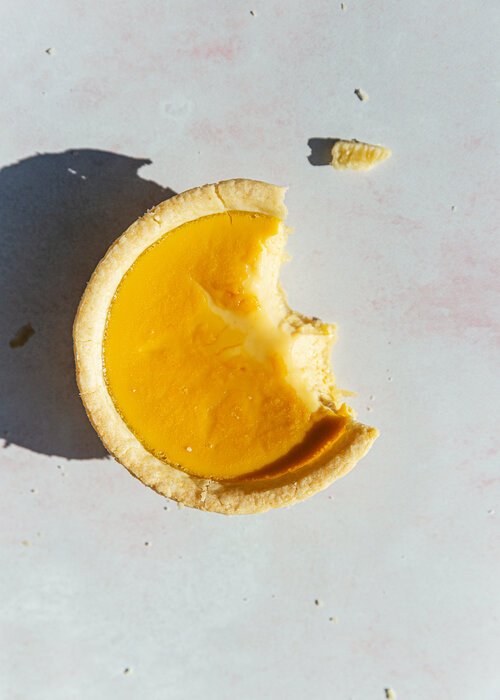
I had some leftover pastry shells in the freezer which I have been itching to put to use. Egg tarts. I never realized how easy it was to make these until I tried. All you need is egg, milk, sugar and some patience. This is a “whole egg” egg tart recipe so you don’t have to worry about coming up with creative ways to use your egg whites.

If you’ve ever been to a Chinese bakery, you’ll know that these are the stars of the show. A simplified version of the Portuguese egg tart — these tarts appear in breakfasts, dim sums, potlucks and brighten many faces with their yellow shade.

If you don’t have pastry shells on hand, the filling is great baked in ramekins as well. Make sure to pass some off to friends as soon as they’ve cooled to avoid eating one too many. My highest record is three a day.

Chinese Egg Tarts 全蛋蛋撻

*Makes 6 egg tarts

Ingredients

5 small pastry shells
5 eggs
80 ml milk
165 ml water
80 grams sugar (I used golden sugar)
1/2 tsp vanilla extract

Instructions

Heat oven to 390 F. In a small saucepan, add water and sugar over medium heat. Stir until the sugar dissolves and set aside to cool. In a large mixing bowl, whisk the eggs until the yolk and whites are combined. Add the milk, vanilla extract, sugar water and mix well. Filter the liquid through a sieve to remove chunky pieces of raw egg. Discard the chunky bits. Fill each shell up to 80%.

Bake for 15 minutes, then reduce heat to 350F and bake for another 10 minutes. Turn off heat, prop the oven door open and let the egg tarts sit for 5 minutes or so. Check on the tarts every so often to make sure the egg filling does not get overcooked. The filling should be soft with just the right amount of gooey in the center. 

Sourdough Workshop — Everyone At The Table

Everyone-At-The-Table-Julie-Ann-Marr-Vancouver.jpg

“If you want to make bread, let’s make bread.” These are the words that captured our attention for an afternoon in Little Italy on Commercial Drive. I had the joy of photographing a sourdough workshop taught by Julie Ann Marr— founder of Everyone at the Table. Between Italy and Vancouver, Julie travels and hosts cooking workshops with her husband Francesco.

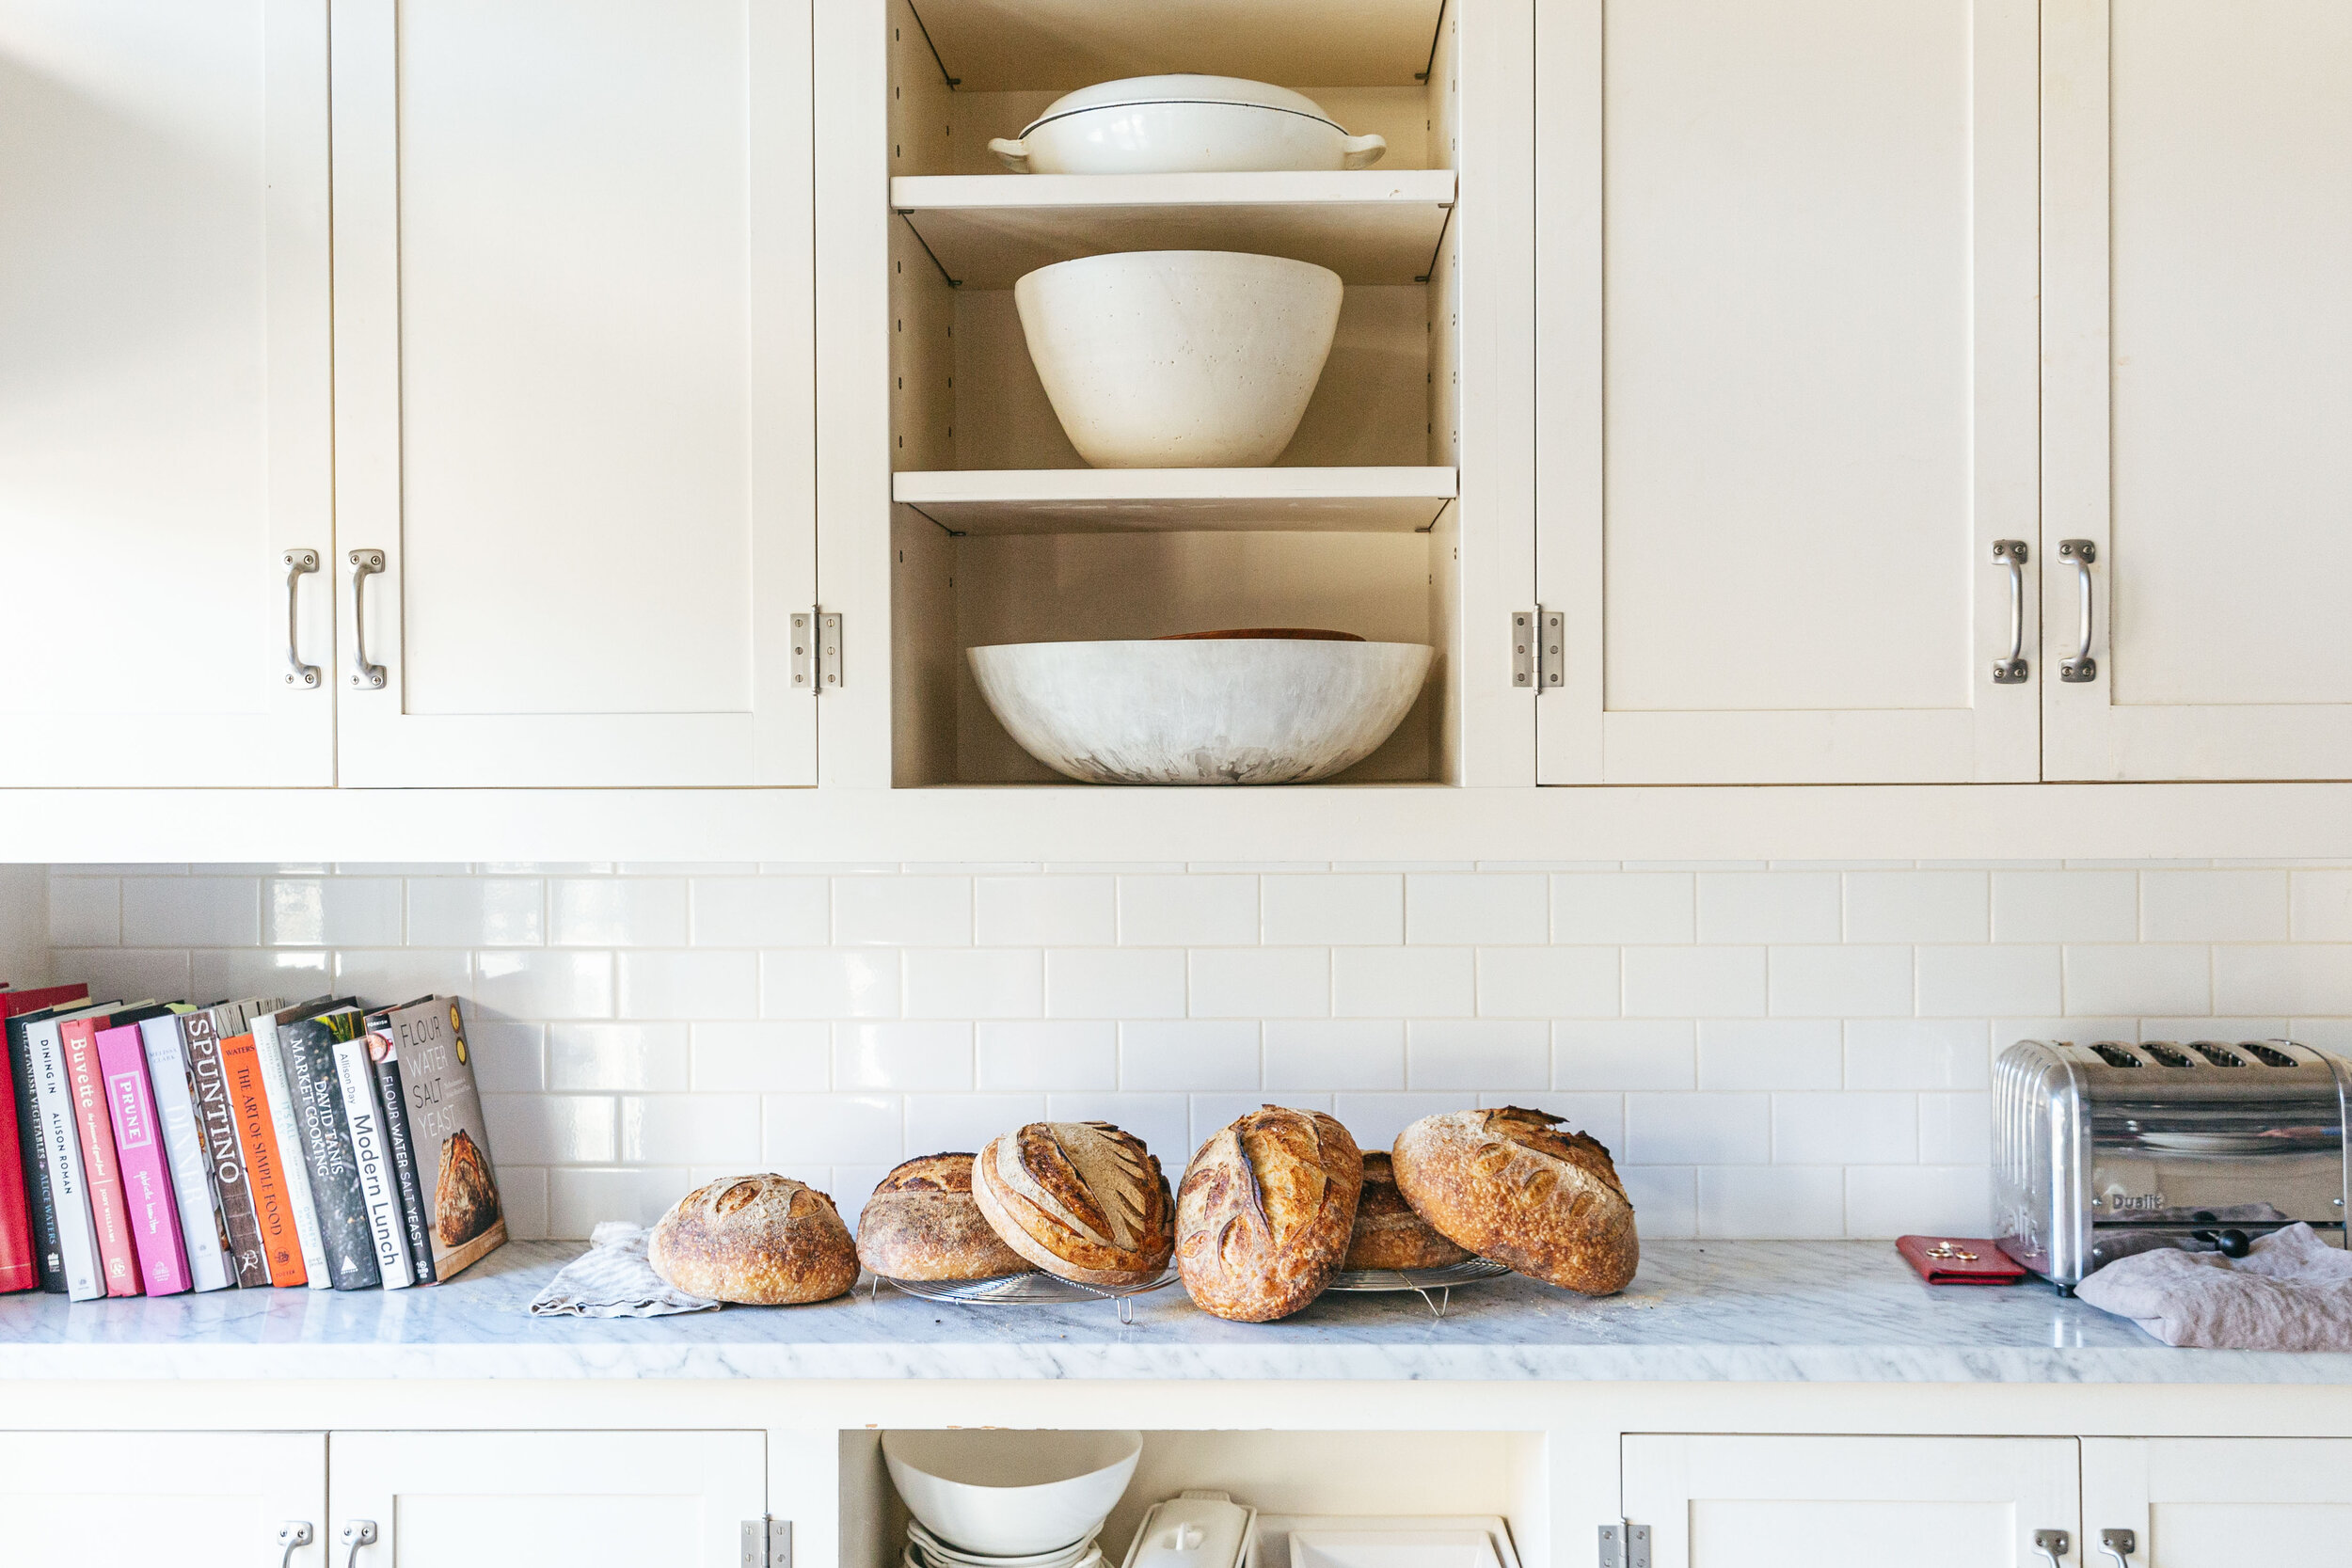
Julies’ kitchen is a place you walk into and instantly want to cook something. Labelled jars of spices, bookshelves laden with cookbooks by favourite authors and ceramics by Janaki Larsen. Jars of dough line her mantlepiece, a method Julie uses to make sure the loaves rise in time for her students.

Everyone-At-The-Table-Julie-Ann-Marr-Vancouver.jpg
everyone-at-the-table-julie-by-sophia-hsin-180.jpg
Everyone-At-The-Table-Julie-Ann-Marr-Vancouver.jpg
everyone-at-the-table-julie-by-sophia-hsin-229.jpg
everyone-at-the-table-julie-by-sophia-hsin-177.jpg
Everyone-At-The-Table-Julie-Ann-Marr-Vancouver.jpg

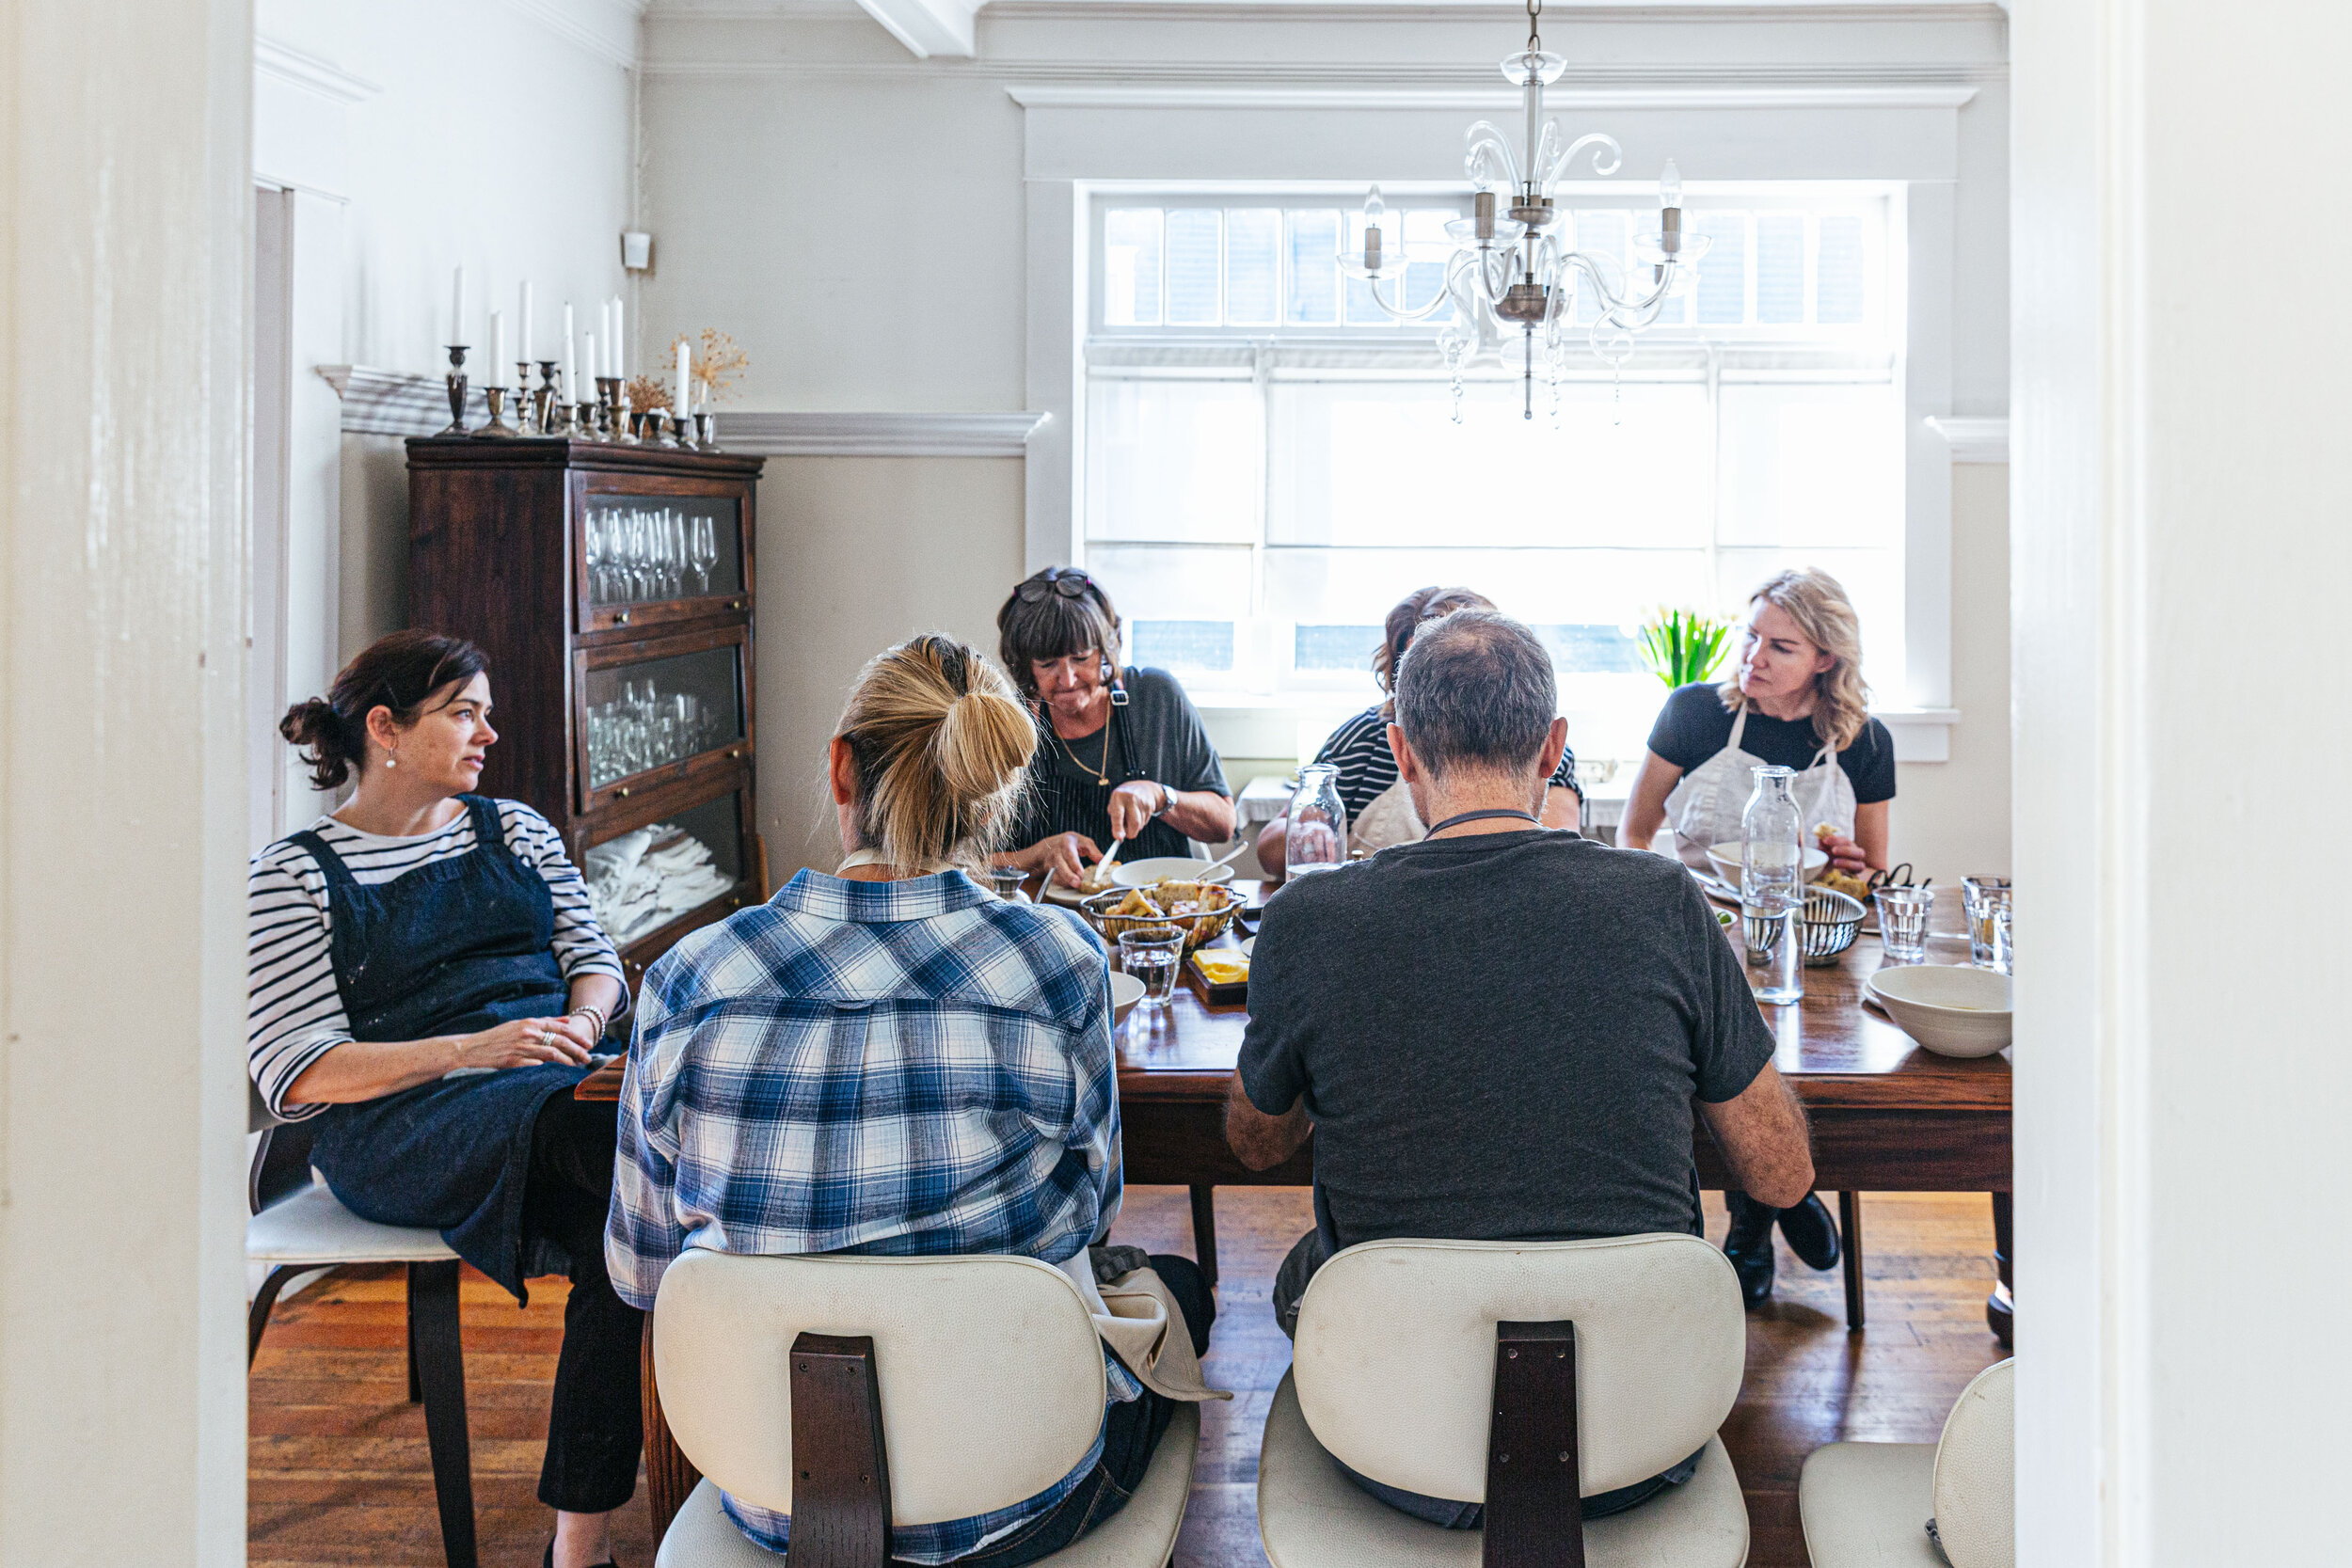
There is no sound more beautiful than the sound of bread crust crackling under your fingertips. There is nothing better than breaking bread with a table full of strangers that now feel like friends. Warm sourdough was served with white bean soup, French cheese, green olives, potato focaccia and a mouth-watering sourdough chocolate cake topped with whipped cream. The meal was pleasantly interrupted by the buzz of the kitchen timer, where students would hop into the kitchen, carve patterns on their risen loaves and pop them into the oven. We talk about travel in Europe: swimming in the ocean, burrata making retreats, and the lingering question that buzzes louder every second — “Why are we not in Italy?”

Julie carries with her a warmth like a ray of sunlight into a rain-dreary Vancouver. Her eyes gleam when she talks about bread, not unlike the pearls that adorn her ears. Decked in a flour-coated apron, Julie zooms around the kitchen opening and shutting oven doors, monitoring loaves, folding dough. We are taught the process of fermentation. Yeast. Water. Salt. Temperature. The art of naming and caring for your starter. Despite the huge amount of activity coming from the kitchen, Julie commands a quietness in the process of baking. Perhaps found in the resting loaves.

I left her quaint home that afternoon with a warm loaf of bread and a feeling that I had experienced something very wholesome. A feeling I wanted to hold onto for as long as possible. If you are looking for an intimate bread making class that leaves you with more food you can eat and a spirit to go home and bake bread, go to Everyone at the Table.

everyone-at-the-table-julie-by-sophia-hsin-245.jpg
Everyone-At-The-Table-Julie-Ann-Marr-Vancouver.jpg

Flourless Chocolate Brownies With Sea Salt

A few of my proudest accomplishments this year include: landed an in-house photography job, tried out and stayed on a sports team this spring (the last time I played in competitive sports was elementary school), signed a lease on an apartment (cannot wait to move in next month), committing to put down roots in this transitional city of Vancouver, and the creation of these fabulous flourless chocolate brownies. 

On days when I feel doubt about trading my freelance life for a nine to five — I make brownies and take them into the office. It is simply impossible to eat more than 3 pieces of these brownies and having coworkers to share them with is a very ideal situation. These will never fail to hit the spot when you need a decadent treat in hope that you can stop at three pieces. A timeless brownie recipe.

You know you have created an excellent brownie when both of the recipe developers at work ask you for the recipe. I first had these at a ladies night and immediately asked my friend for the recipe. I am pretty sure the original creator is Nicole Spiridakis. Here is my version with reduced sugar, roasted nuts and sprinkled with Maldon sea salt

Ps: I finally ordered a cooking scale off the internet. It really is worth it when you want to use up the many dark Trader Joe chocolate bars sitting in your cupboard and not worry about fitting them into measuring cups. 

flourless_chocolate_brownies_sea_salt_-6-1.jpg
flourless_chocolate_brownies_sea_salt_sophia_hsin.jpg

Flourless Chocolate Brownies With Sea Salt and Nuts

140g dark chocolate
155g (1/2 cup) unsalted butter
120g brown sugar
3 large eggs, lightly beaten
50g (1/2 cup) cocoa powder, sifted
1/4 tsp salt
11/2 tsp vanilla extract
1/3 cup almond or walnuts, chopped
Maldon sea salt for garnish (optional)

  1. Preheat oven to 350 F. Line a baking pan or sheet with parchment paper.

  2. In 15-30 second intervals, melt chocolate and butter in the microwave and stir until smooth. Set aside too cool. Add brown sugar, cocoa powder, salt, vanilla, and eggs. In that order. Mix but do not over-mix. Transfer batter to baking pan or sheet with a spatula. Top with walnuts.

  3. Bake for 20-30 minutes or until brownie is set and firm in the centre. Time will vary depending on container size. Let sit until cool before cutting into pieces. Top with a sprinkle of flaky sea salt.

These are very delicious eaten cool or slightly warmed. They also keep well in the fridge up to a week. If they last that long.

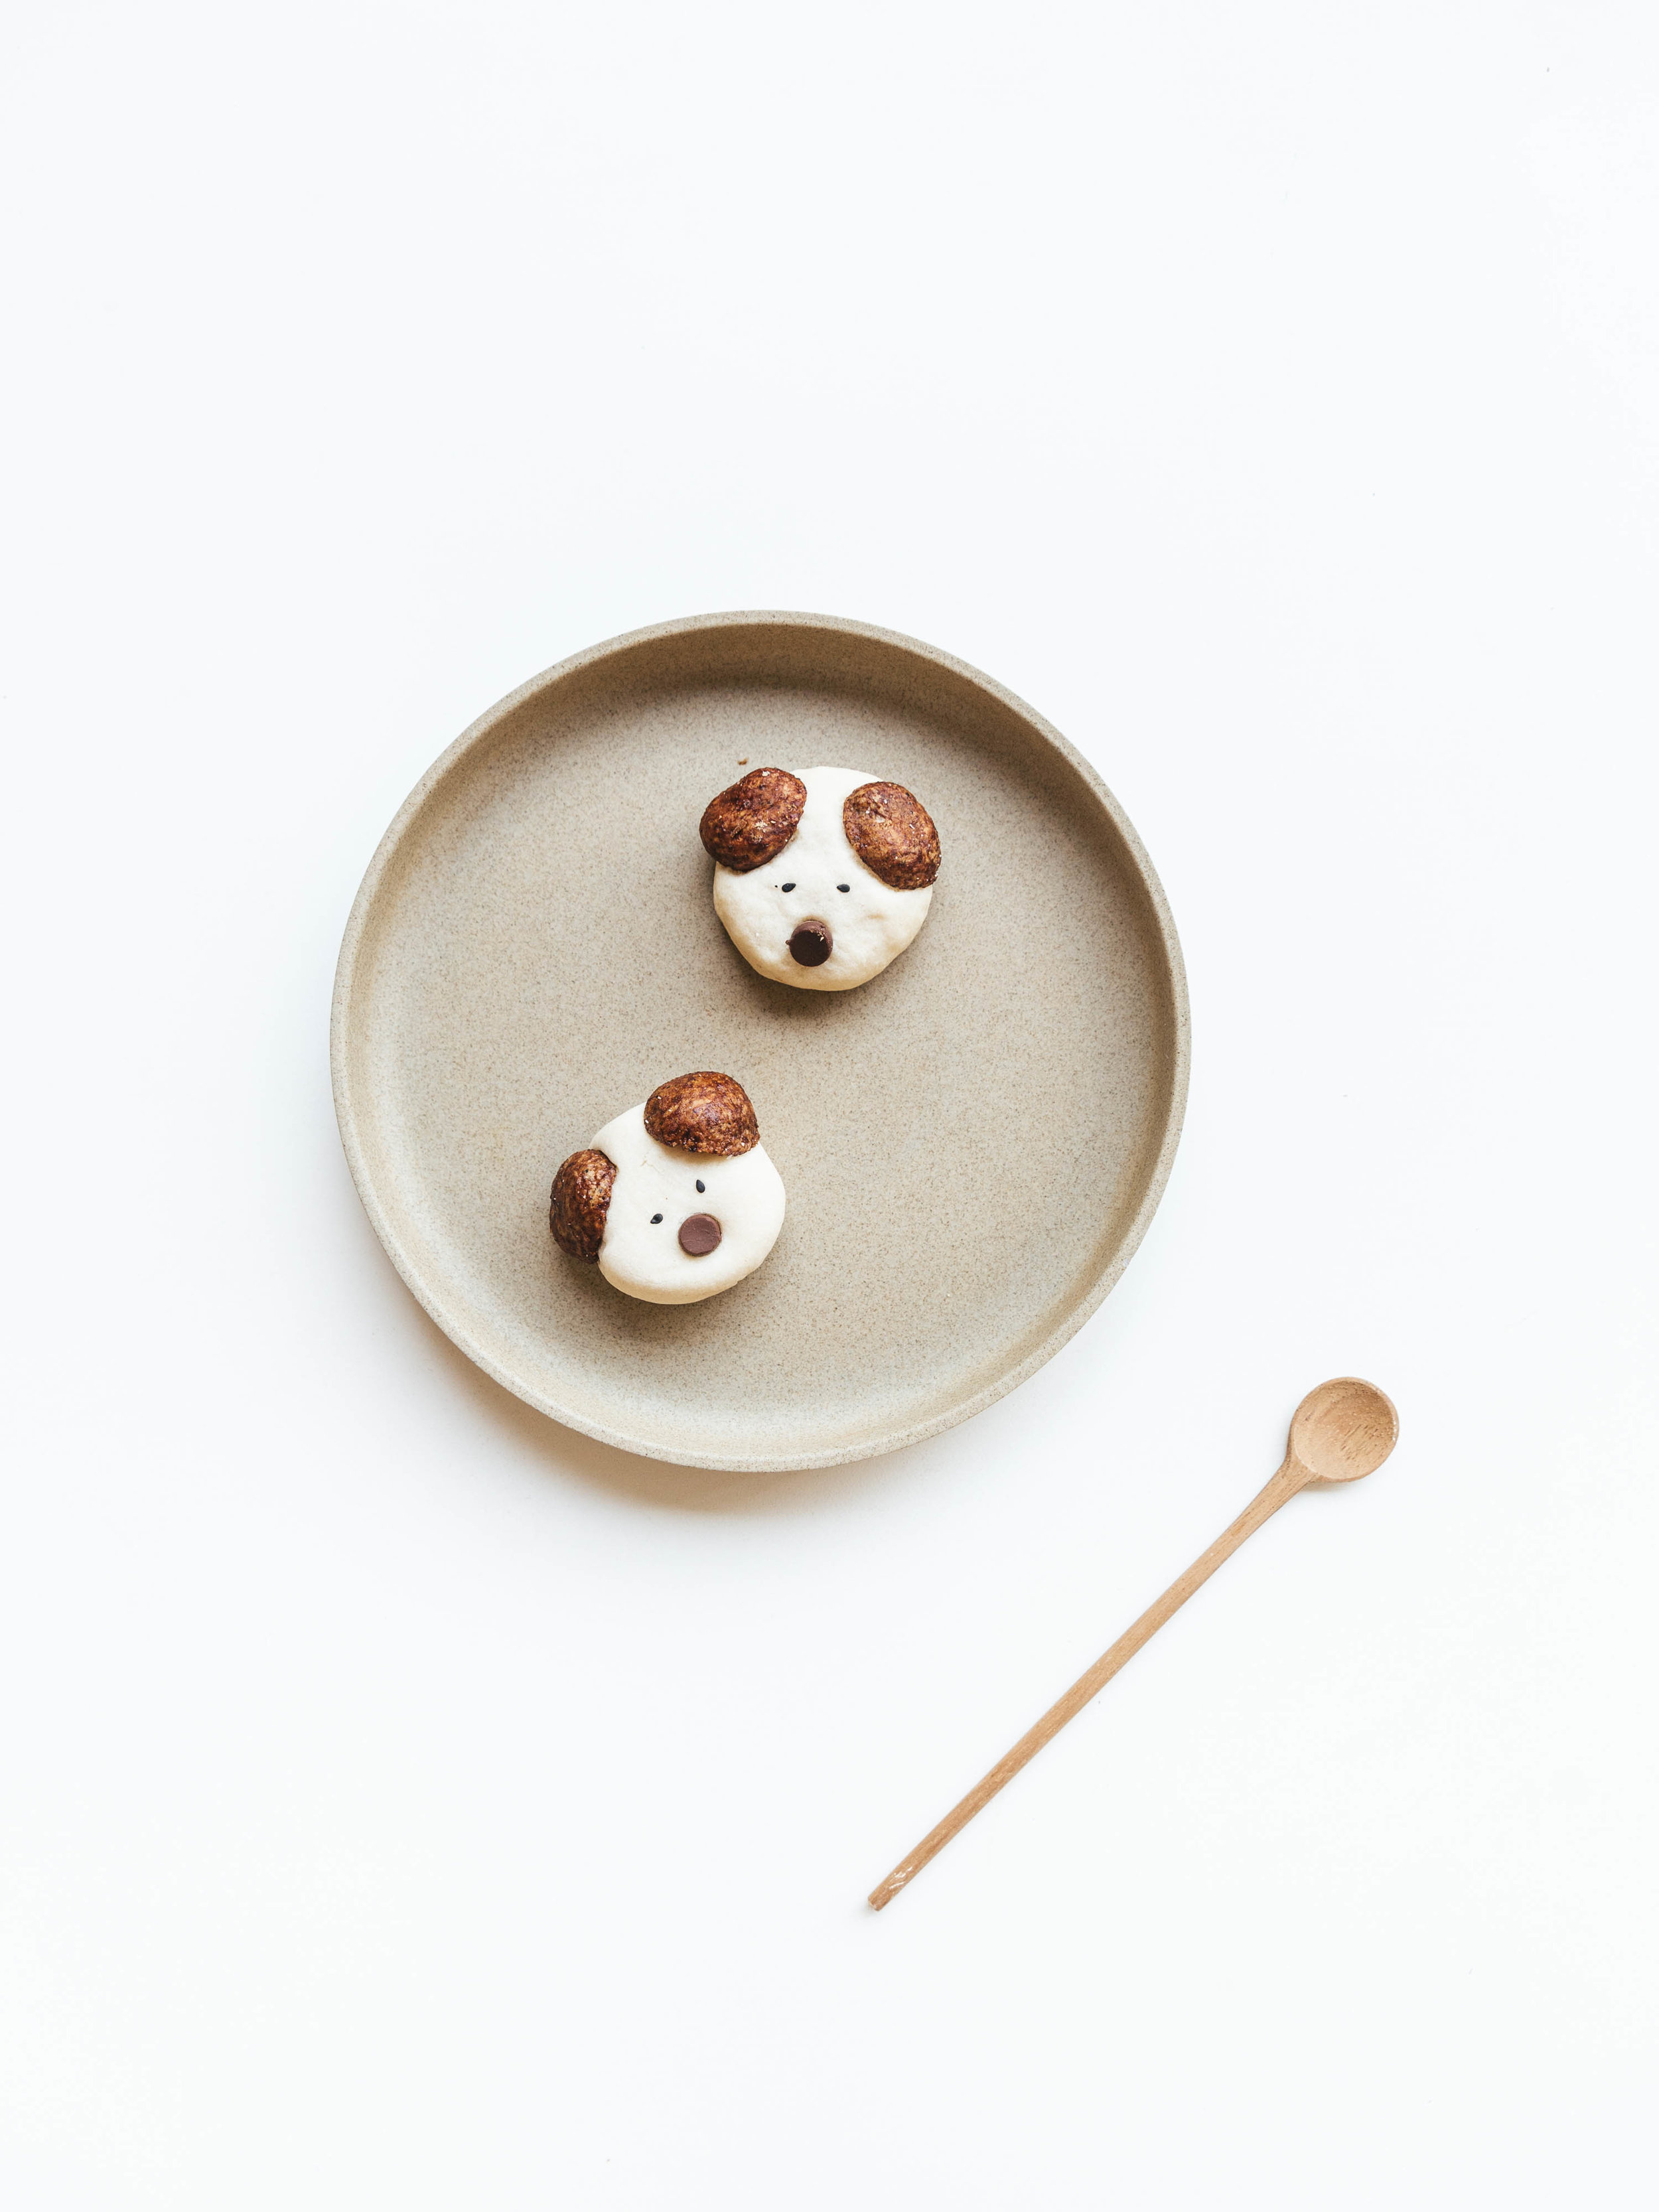
Dog Shaped Cookies for Dog Lovers | A Recipe

dog-shaped-cookies-recipe-chocolate-6.jpg

I have always been a dog person. Sorry to disappoint my cat loving friends but there is something simply irresistible about dogs. The fluff, the woof, the wag. The joyful leap they make towards you at the end of a long day. That grin when they destroy your beloved possessions and get away with it just because.

For me, the one thing that gets me about travel is the inability to bring your fluffy friends with you. My first dog Lisa the Akita died young (the drama queen in me likes to think it was from heartache) when my family immigrated to Canada. My dachshund who I left behind for college is now retired in Shanghai after many moves, travels, and change of homes. The family discussions, tearful goodbyes, and a little canine who will faithfully wag their tail serving whichever master they end up with.

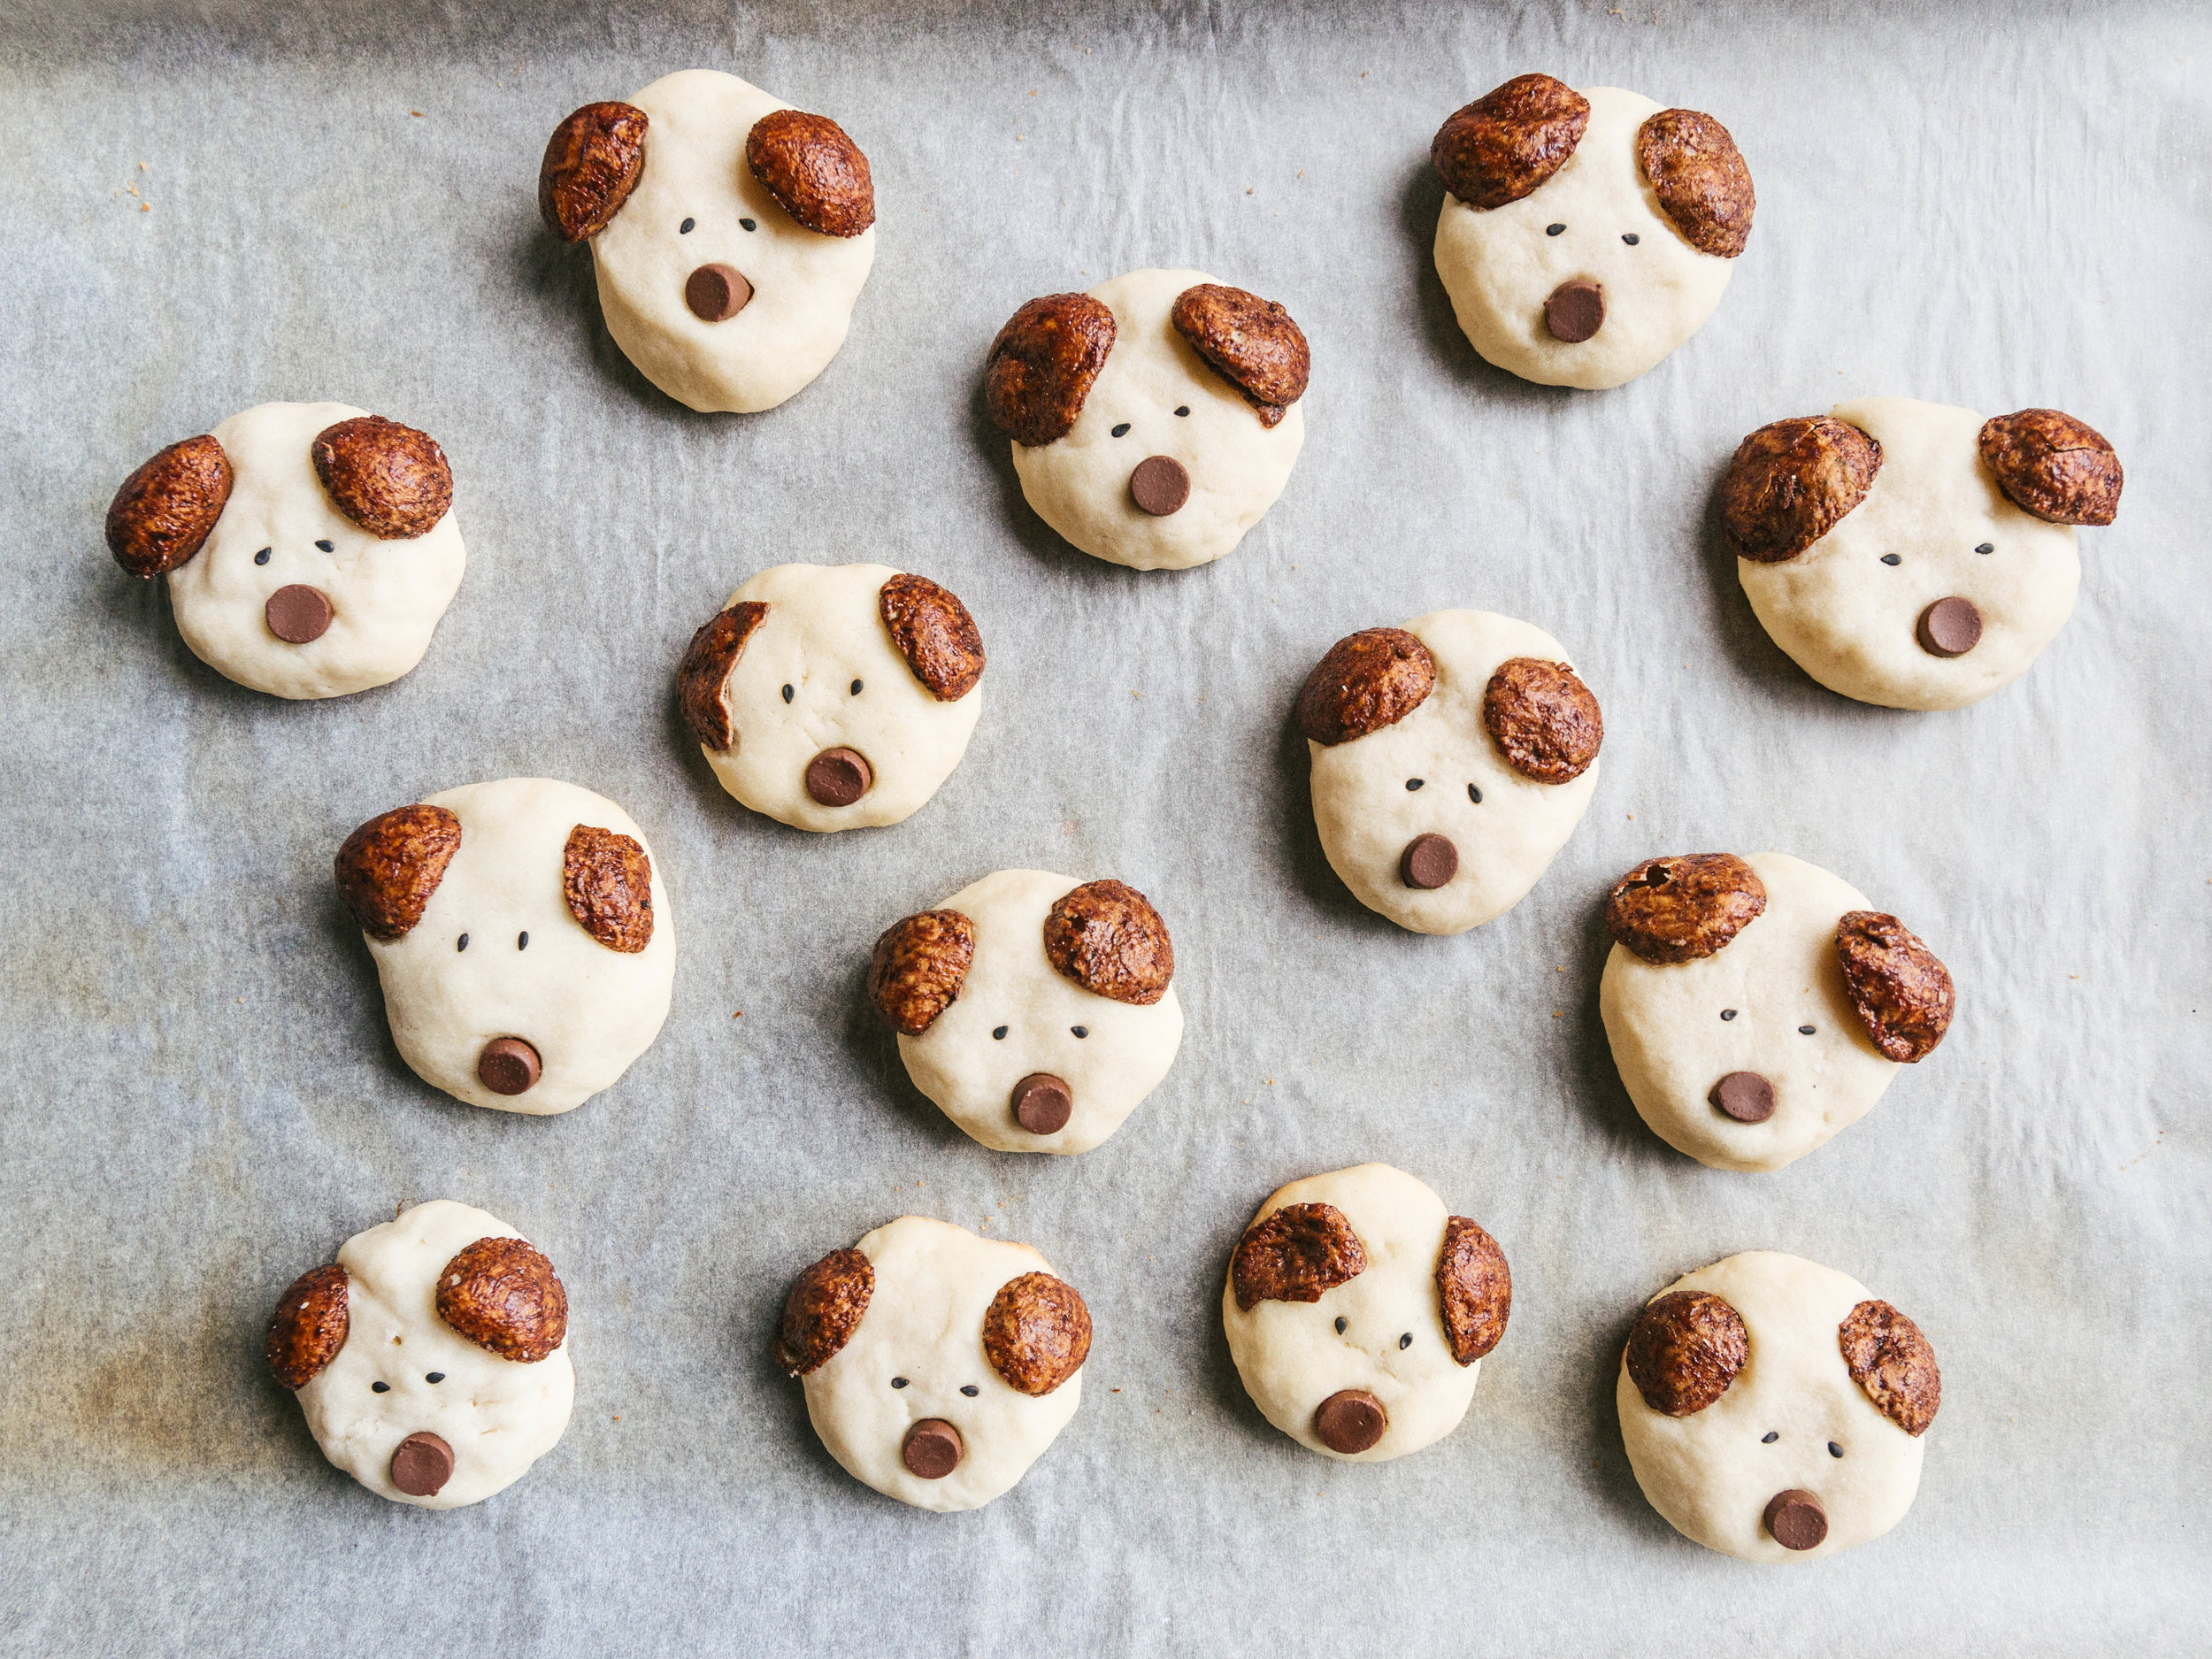
This post is dedicated to all the dogs I have ever loved and photographed. A dog photo book is the list for projects I want to create and I trust that I am getting close to the process everyday. In the meantime, I will be content making dog shaped cookies.

This is a recipe adapted from Not quite Nigella and Baking Taitai. It is actually a recipe for Weihnachtsplätzchen — German sugar cookies eaten during advent. I love the addition of potato starch which gives the cookie a very biscuit-like texture. Good for convincing yourself you are eating vegetables when having a cookie too many.

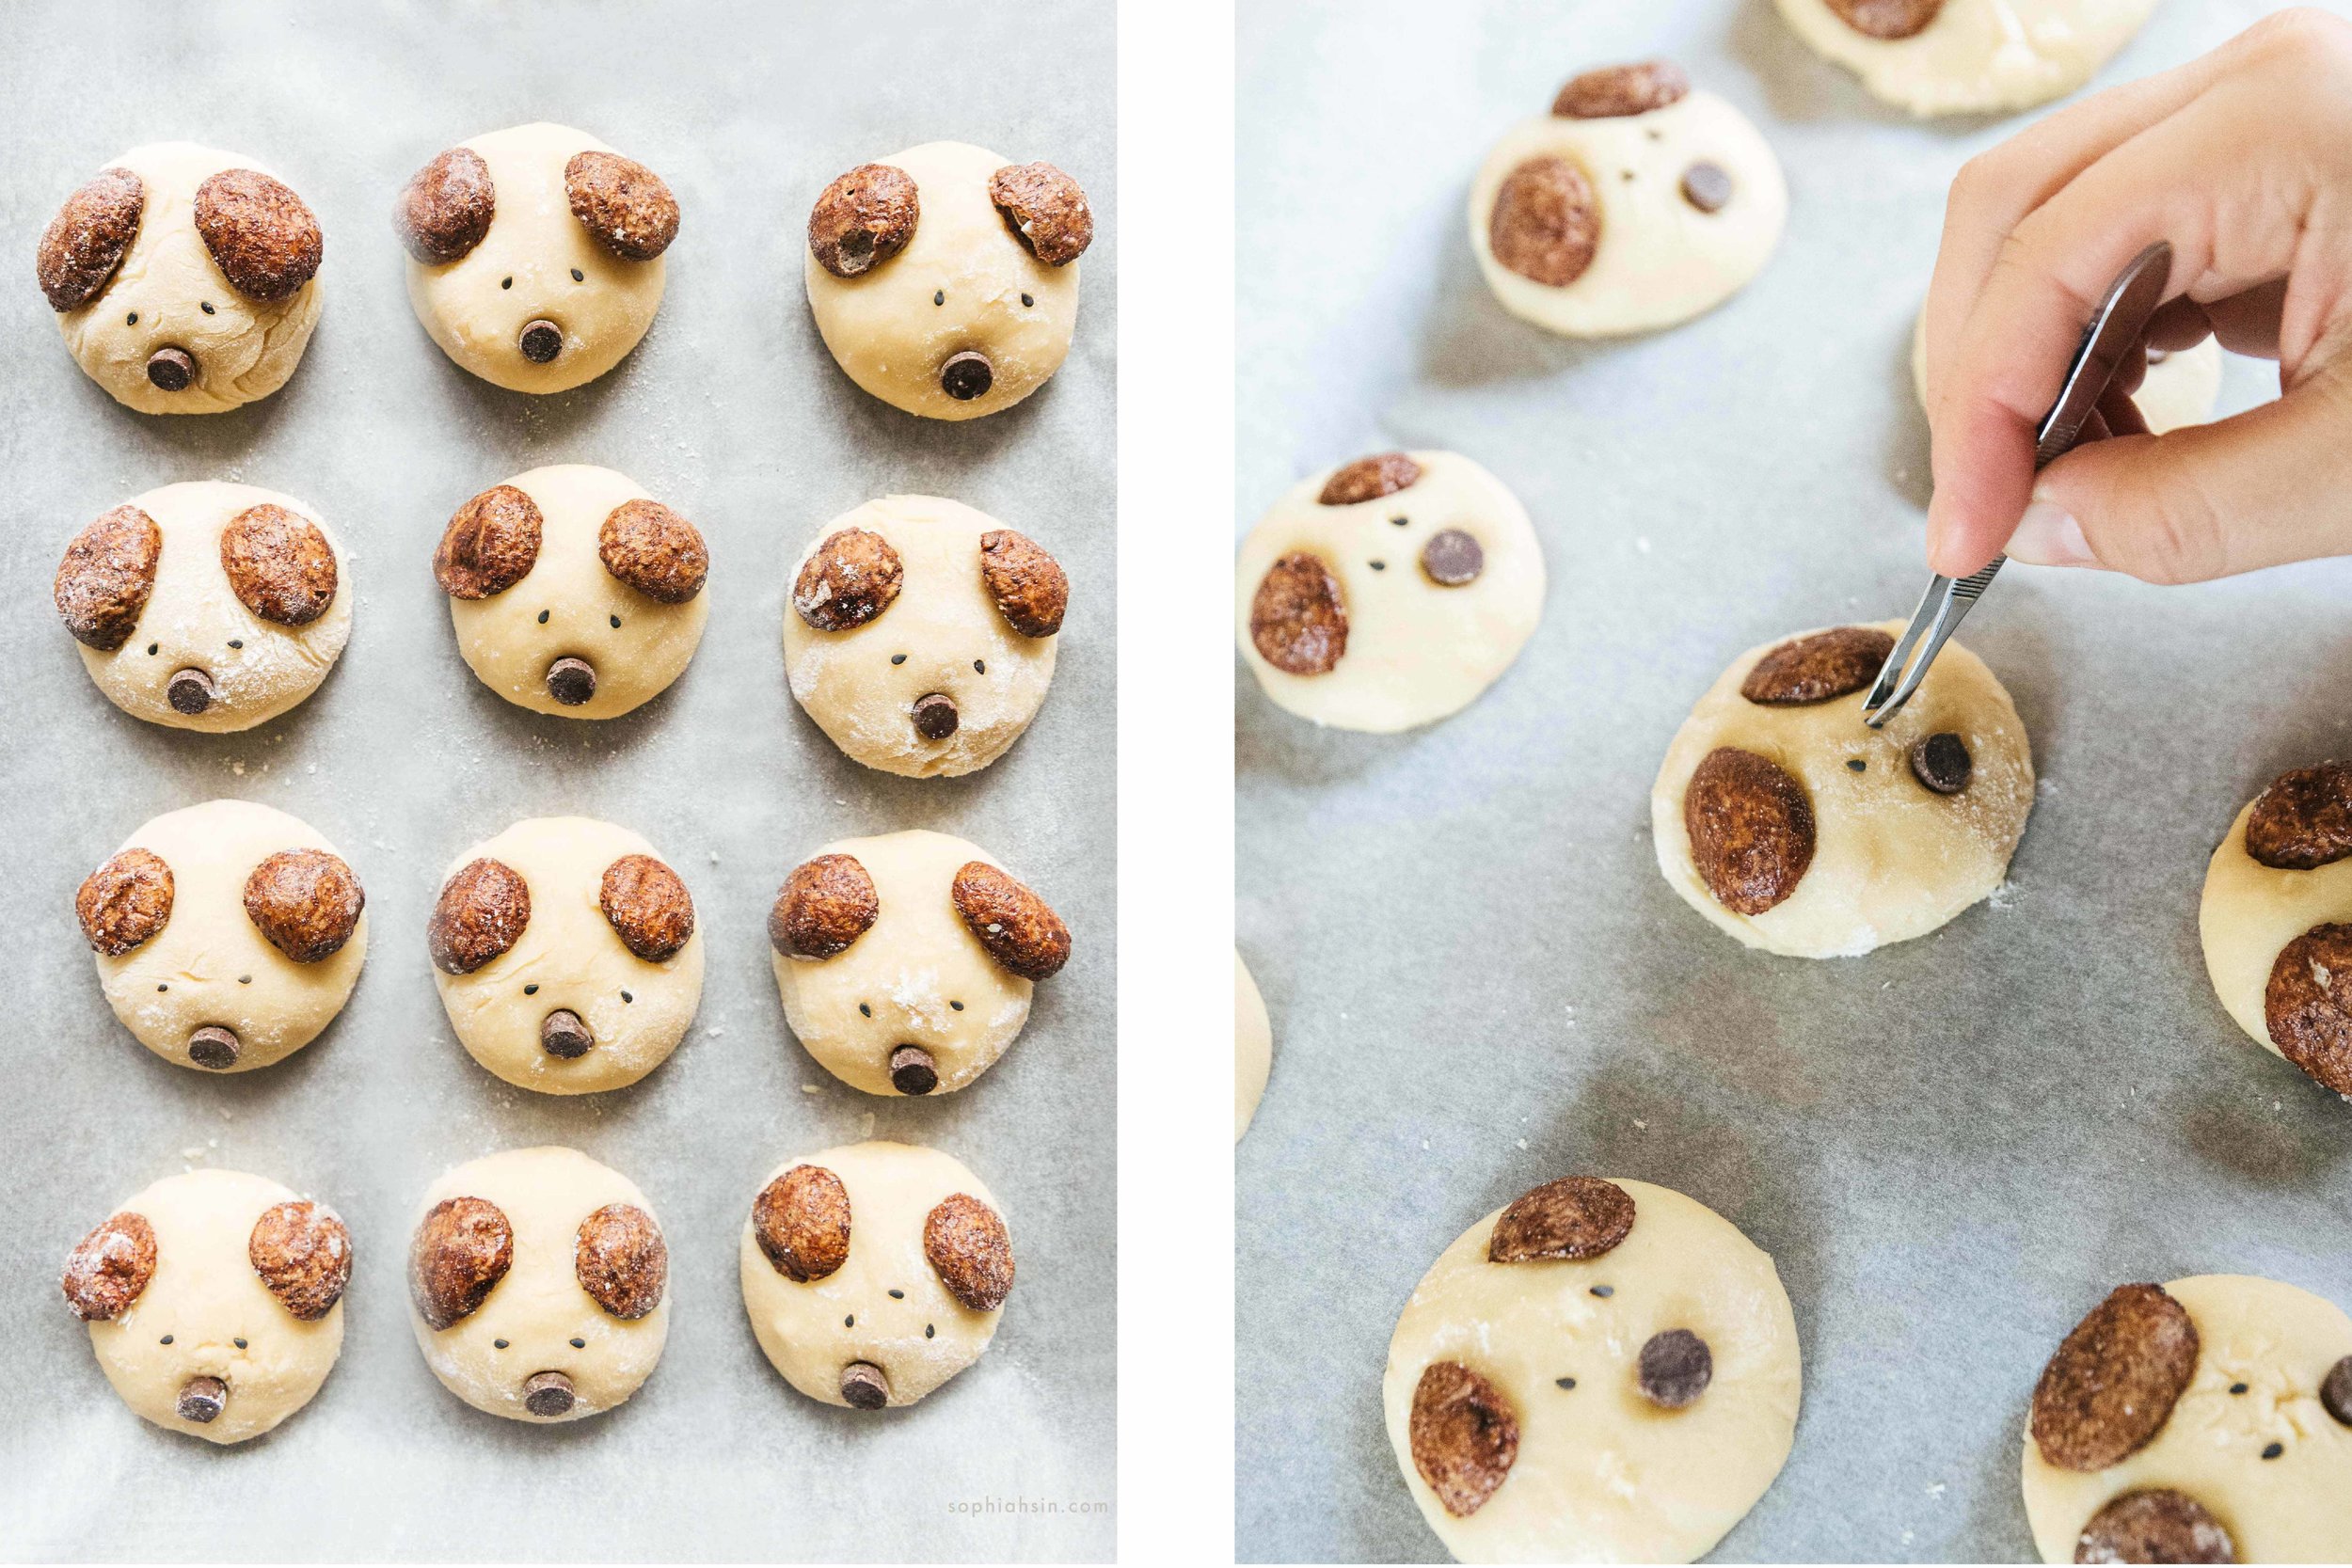
These cookies can be time consuming cookie to make. My advice is to invite at least one friend to help with dough rolling, the application of cereal ears and sesame eyes. The end product is meant to be shared with at least four friends.

dog_shaped_cookies_recipe.jpg
dog-shaped-cookies-recipe-chocolate-3.jpg
dog-shaped-cookies-recipe-chocolate-5.jpg

Dog shaped cookies for dog lovers
*
Makes around 20 cookies 

Ingredients

• 1.5 cup flour
• 2 cup potato starch
• 2 teaspoon vanilla extract
• 2/3 cup icing sugar
• 1 cup unsalted butter
• Chocolate cereal for ears (I found a box at Wholefoods in Vancouver)
• Black sesame seeds for eyes
• Baking chocolate chips for noses

Directions

1. Combine butter and sugar (wet ingredients). Beat until fluffy. Add vanilla and beat until combined.
2. Combine potato starch and plain flour (dry ingredients). Mix until combined.
3. Thoroughly mix dry and wet ingredients. If the mixture is too dry, add a few splashes of regular or oat milk. Cover with wrap and rest for half an hour or longer (I pre-make the dough and leave it in the fridge)
4. Line a baking tray with baking paper. Scoop dough into similar-sized balls and flatten them onto the surface of the tray. Add two chocolate cereal ears and a chocolate chip nose. Use a tweezer to add sesame seed eyes (this step requires a lot of patience)
5. Bake at 340F for 15 minutes or until cookie bottoms are golden.

Notes: 

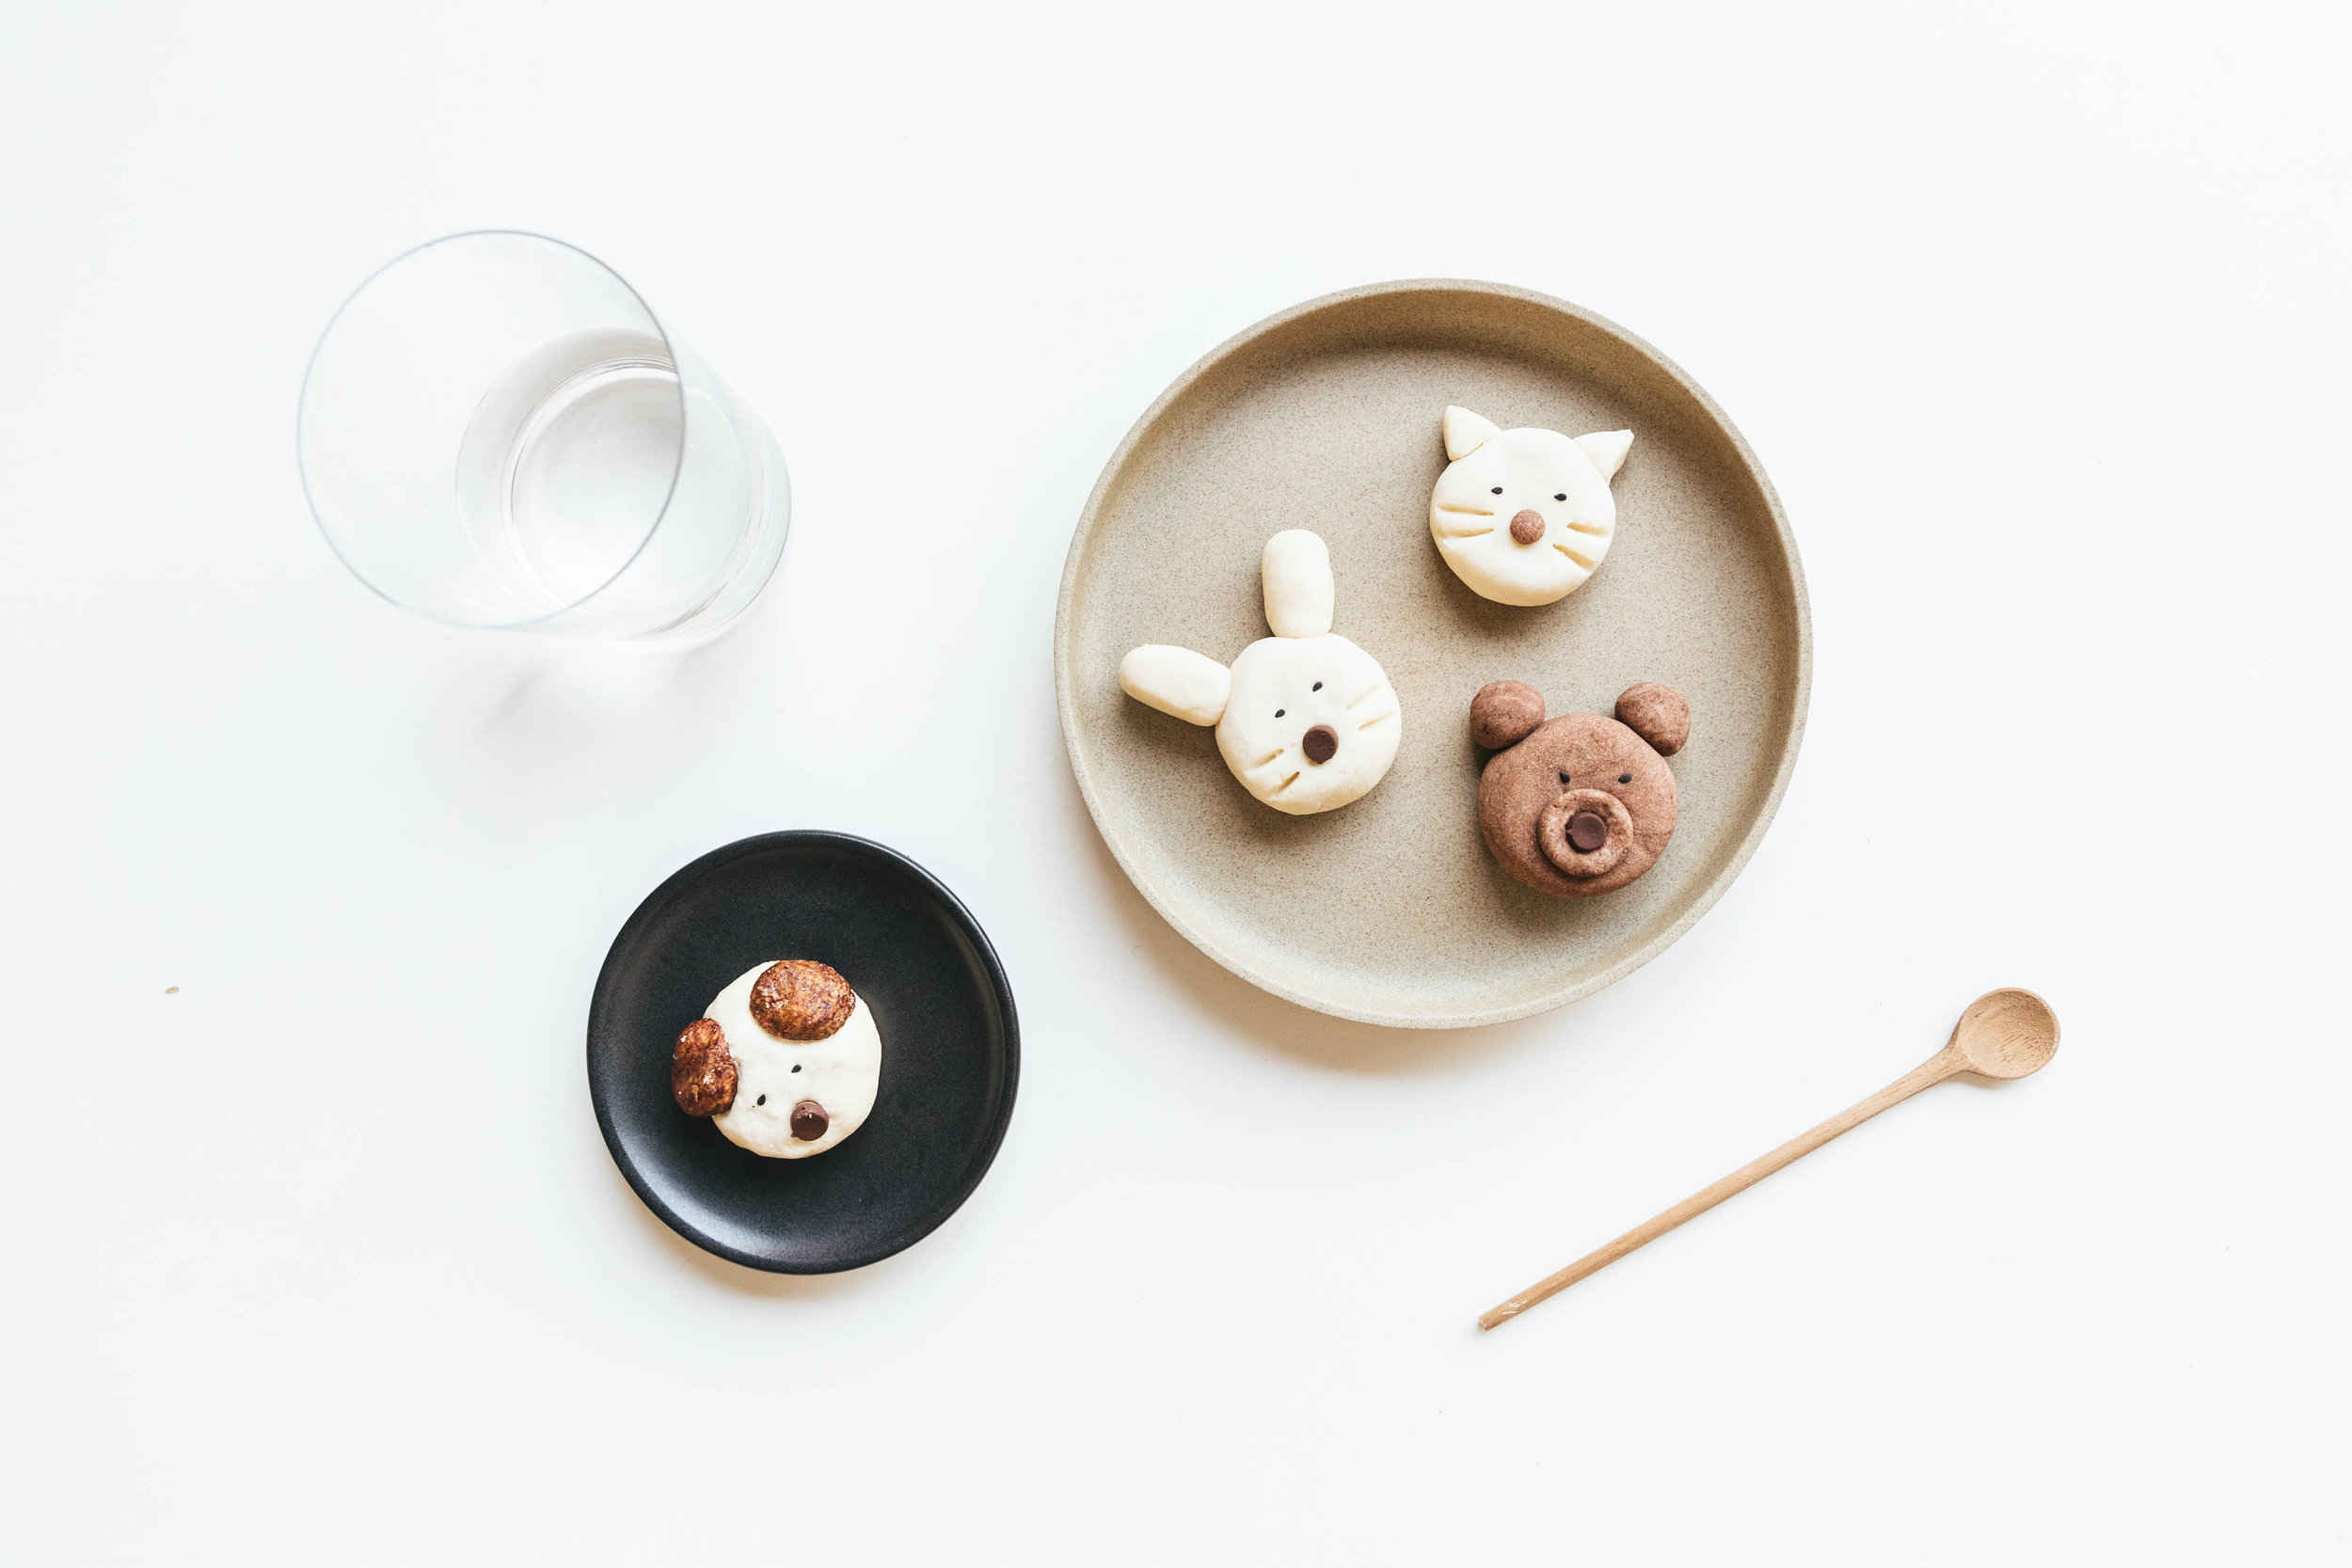
*For cocoa cookies, add a scoop of cocoa powder into the dough and mix until the colors are combined.  Additionally, you can expand from dog cookies to every kind of animal. 

animal-shaped-cookies-recipe-chocolate-7.jpg

Enjoy

My first dog Akita Lisa + brother | Shot on film in Taiwan, 1992

My first dog Akita Lisa + brother | Shot on film in Taiwan, 1992