Sauteed Boy Choy 

Boy Choy is a versatile vegetable used in many Chinese dishes. You will find them chopped up in dumplings, added to bowls of noodles for a pop of color, or served as a main vegetable dish. These jade green bulbs are easy to prep and will brighten up any winter day. A simple recipe that will bring a hint of sweetness to your meal.

For shiitake mushroom water — I’ve learned to always keep a jar of mushrooms soaking in the fridge. It’s incredibly umami and handy for making miso soup, mapo tofu, or replacing vegetable stock in dishes. 
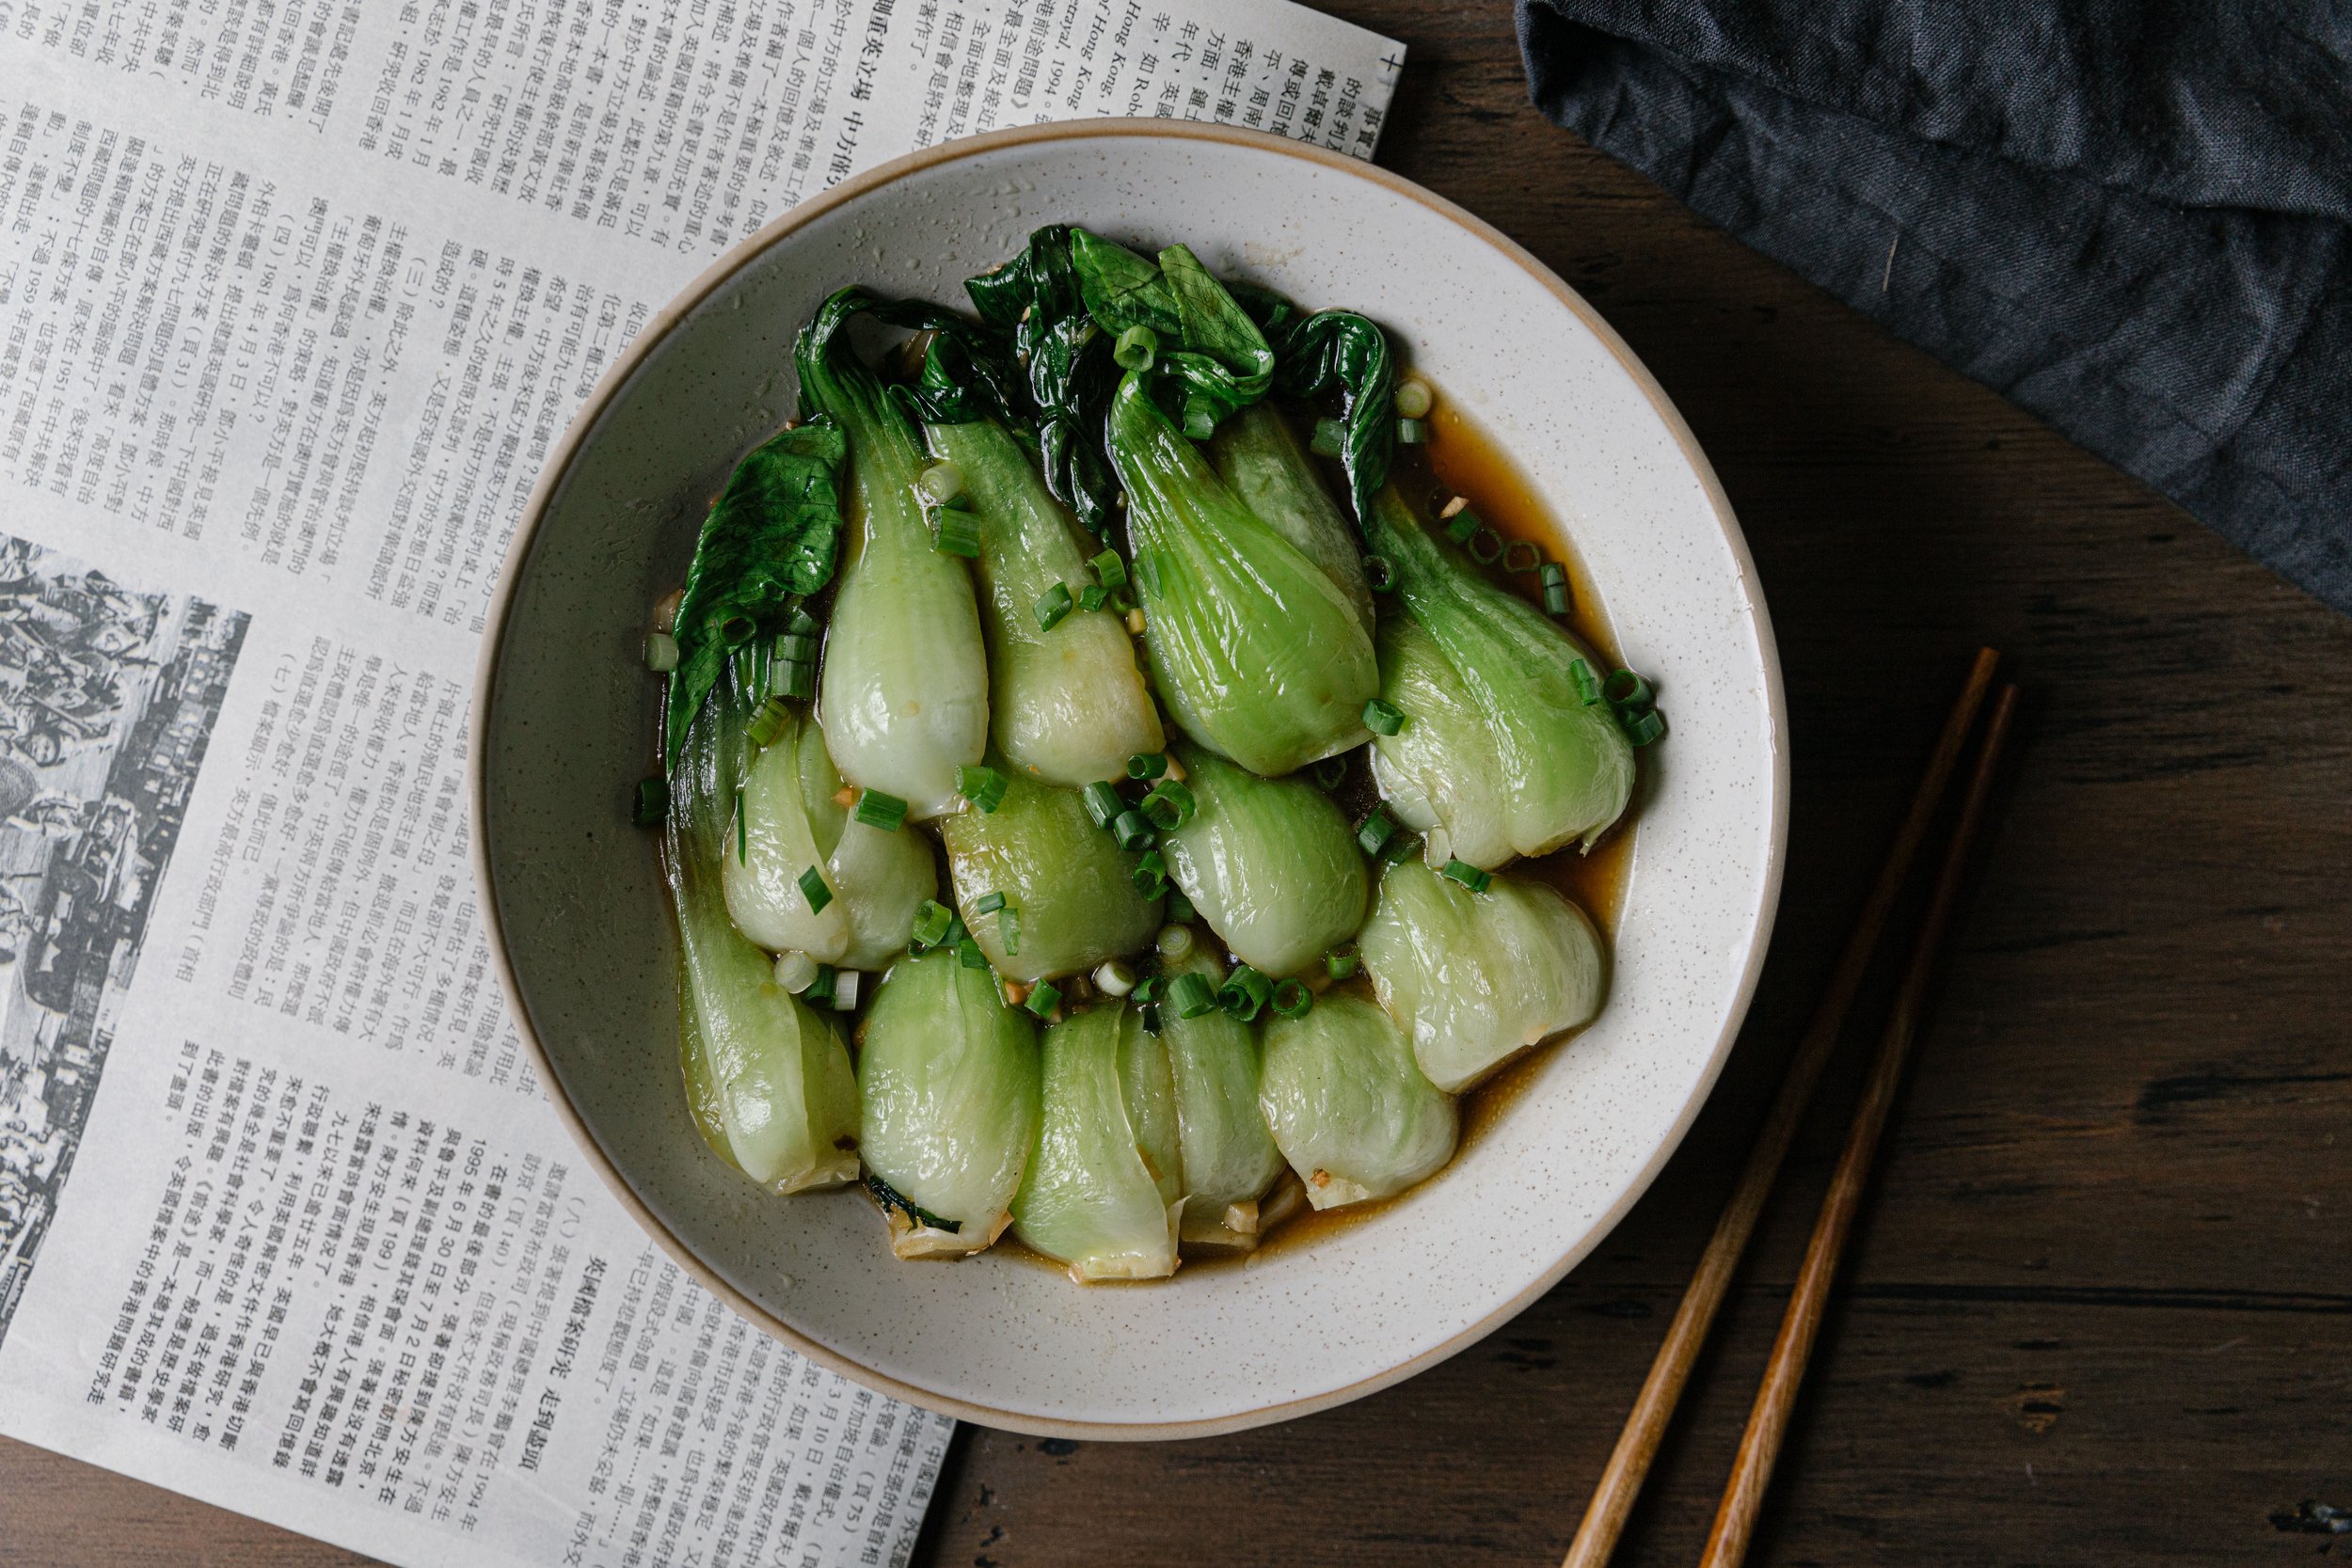
Sauteed Boy Choy 

Serves 2

Ingredients 

  • ¼ cup mushroom water* 

  • 5 pieces shanghai bok choy, washed

  • 3 tbsp vegetable oil

  • ½ tbsp ginger peeled and minced

  • 1 tbsp garlic, peeled and minced 

  • ¼ Shaoxing wine, or sake or rice wine

  • 3 tbsp light soy sauce

  • Salt, to taste

  • Green onions, sliced for garnish 

Instructions

  1. Soak 5 shiitake mushrooms in hot water for 30 minutes or in the refrigerator overnight. 

  2. Halve or quarter the bok choy depending on the size. 

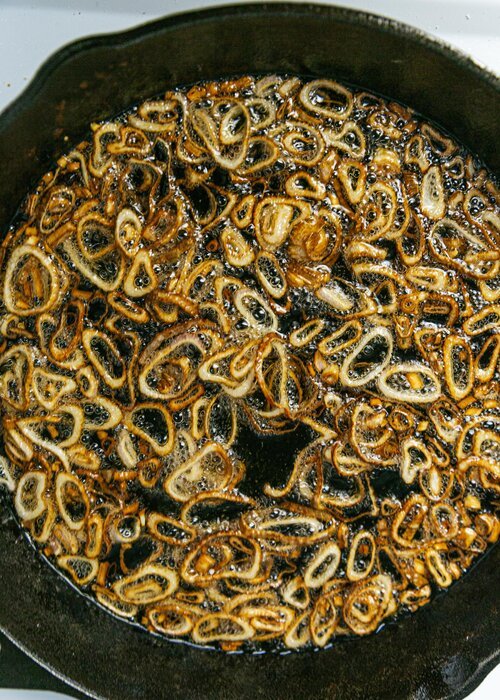
  3. Heat a large work or pan over medium heat and add the vegetable oil. Add the ginger and saute for 30 seconds, add the garlic and fry until fragrant and golden.

  4. Add the bok choy and turn the heat to high. Pour in the Shaoxing wine and cook for 1 minute.

  5. Add the soy sauce and mushroom water. Turn the bok choy over, cover the pan, and cook for 2-3 minutes. 

  6. Remove cover, add salt to taste, and stir. You can add cornstarch to make a slurry or enjoy it as is. Garnish with sliced green onions and serve immediately.

Cooking tips:

  1. There are many varieties of bok choy so feel free to try the best you can find. Just adjust the cooking time according to size.

Kabocha Steamed Buns

When I think about steamed buns — I think about lining up for these, piping at hot breakfast shops 早餐店. Enjoyed with a cup of fresh soy milk. In Taipei, steamed bun shops line every alleyway, serving every kind of savoury and sweet filling you can think of. There is nothing like trying these buns handmade, straight from a steamer to your plate. 

We never had to learn how to make these back home as they are sold everywhere — made by people that have been cooking them for generations.  I love how working on these recipes made me think of home. Many have asked how I ended up working in food photography and here it is — food is truly a bridge between worlds and a love language for all cultures. My peaceful and delicious protest against long dreary winters in Canada.  

Here is my take on sweet buns, bao or baozi as you call it. Featuring my favourite kabocha squash and a dough dyed with carrot juice. For beginners, steamed buns are just as intimating to make as sourdough. But once you get into the process, it’s super rewarding. I hope you all have a chance to try a handmade bun, there is nothing quite like it!

Kabocha Steamed Buns

Serves 10

INGREDIENTS

Kabocha Filling*

  • 350 g kabocha, around ½ a medium-sized kabocha

  • ¼ cup (60g) sugar, or to taste

  • ¼ cup (50 g) butter

  • 1 tsp (4 g) vanilla extract 

Dough* (for carrot dough, see notes)

  • 1/2 cup (150 g) of lukewarm water 

  • 1½ tbsp (20 g) sugar

  • 2 tsp (5 g) active yeast

  • 2 cups (250 g) all-purpose flour

  • 1 tsp (3 g) baking powder

  • 1 tsp (5 g) vegetable oil

INSTRUCTIONS

For the Filling

  1. Halve the kabocha and scoop out the seeds with a spoon. Peel and chop the kabocha into 2-inch pieces. Transfer the kabocha to a steamer and steam for 10-15 minutes. The kabocha is done when it is soft and easily pierced with a chopstick. 

  2. Transfer the kabocha to a pot and add the sugar and butter. Heat over low heat, stir and mash the mixture with a spatula until everything comes together into a paste. Set aside and let cool. This filling should keep for 2-3 days in the fridge if made ahead.

For the Dough

  1. Make the dough: In a small bowl, add the yeast, warm water, and sugar and stir to dissolve. Let sit for a few minutes to activate the yeast. The liquid should foam and look creamy. If not, your yeast is dead and you’ll have to try again.

  2. First Kneading: In a large mixing bowl, add the flour and make a well in the center. Sprinkle the baking powder around the outer ridges of the bowl so it will incorporate later. Gradually stream in the yeast mixture to the flour, mixing with a pair of chopsticks as you go. The dough should come together into a loose mound. When there are no dry patches left, add the vegetable oil and knead for 10 minutes. You’ll know that the dough is ready when it has “Three Shines or San Guang 三光” — Shiny hands, clean bowl, shiny dough. The dough should be smooth and soft like a baby's bottom.  If the dough is too sticky, add flour or vegetable oil. If the dough is too tough, add water to your hands and continue kneading. 

  3. First rising*: Place the kneaded dough in a well-oiled bowl. Cover and let sit in a warm spot for 1-2 hours until it has doubled in size. The time will depend on the temperature in your home so keep an eye on it. To check if the dough is ready — pull the dough away from the edge of the bowl. There should be strands of airy, honeycomb-like textures. 

  4. Second Kneading: Using well-oiled hands, transfer the risen dough onto a pastry board. Knead vigorously for 8 minutes, popping as many air bubbles as you can.

  5. Prepping the dough: Halve, and divide the dough into 10 morsels. I use a scale to ensure even portions. Knead each morsel into a sphere and flour generously to prevent sticking. Cover the dough morsels while you work so they don’t dry out.

  6. Rolling the wrapper: Flatten a morsel of dough with your palm. Hold the edges of the dough in one hand and roll the edges from the outside in with a rolling pin, rotating as you go. You want thin edges and thick centers on your wrapper. The wrapper should be 4-5 inches in diameter. 

  7. Pleating the Bun*: Place the wrapper in one hand and scoop a heading tablespoon of filling into the center. The filling should weigh around 30-40 grams. For beginners, start with a minimal amount of filling to help the pleating process. Flatten the filling with a spoon and follow the steps below. Reserve hands if you are left-handed. Refer to the moving image above.

    • With your right forefinger and thumb, firmly pinch an edge of the wrapper to make the first fold. 

    • Continue pinching folds with your right index finger and thumb. Rotate the wrapper with your left hand as you go, pinching until the whole bun is pleated. While pleating, use your left thumb to press down the filling so the dough comes over the filling. Your right thumb should never leave the bun.

    • Seal the bun with a series of pinches to form the pointy top of the bun. Repeat with the remaining dough and filling.

  8. Second Rising:  Line your steamer with parchment paper*. Transfer your buns to the steamer, cover them, and let them sit for 15-20 minutes. The 2nd rising will allow the buns to be pillowy and soft. You’ll know the buns are ready when they have expanded in size and are fluffy and light to the touch. 

  9. Steaming the buns: Over high heat, bring a pot of water to boil. Place the steamer on top and immediately turn the heat to medium. Steam for 12 minutes and let sit for 5 minutes before taking the lid off. This will ensure your buns do not deflate with the quick temperature change. 

  10. Serve immediately, or let cool and refrigerate or freeze. To reheat, steam for 2-3 minutes in a steam or microwave with a wet paper towel covered on top. 

Cooking Tips:

  • Carrot Dough: Blend ½ of a medium carrot with one cup of water in a powerful blender. Strain the pulp and use the liquid in place of the lukewarm water in the dough recipe. Omit the sugar in the dough recipe since carrots are naturally sweet.

  • To speed up the rising process. Place your dough or wrapped buns in the oven with a plate of boiling water underneath. The temperature should be around 38 C/100 F. Check the dough around the 25-30 minute mark. 

  • For beginners, start with a minimal amount of filling to help the pleating process. No one starts out with good-looking buns so practice makes perfect. 

  • You can find steamer liners at Asian shops. To make your own steamer liner — measure and cut a round parchment paper to fit inside your steamer. Cut holes in the parchment paper that are 1½ inches apart to allow steam to rise through.

  • Alternatively, you can use pumpkin instead of kabocha. If using canned pumpkin, you’ll have to boil down the puree until no liquids remain. The filling should be a paste, not a sauce.


Tofu Gado Gado

My husband made this Indonesian Tofu Gado Gado for me in the early stages of our relationship. It’s a great example of our mutual love for food — fresh flavors, filling, light, and exotic without being too fiery. A classic you’ll come back to again and again.

I’ve tweaked some ingredients to maximize the use of dried pantry goods. For the salad — feel free to substitute with bean sprouts, julienned carrots, purple cabbage, radishes, or top with crispy shallots. I’ll say that the warm potatoes with crispy napa cabbage are the highlights for me here.

Halve or double the portions depending on the party size you’re serving.

Tofu Gado Gado

Serves 4 people as a main course, 6 as a side dish

Ingredients

Salad

  • 1 tbsp vegetable oil

  • 1 pack of fried tofu*

  • 500 grams potatoes, cubed into 1-inch pieces

  • 4 eggs (omit for vegan)

  • 200 grams green beans, ends trimmed and halved lengthways

  • 200 grams Napa cabbage, washed and finely shredded

  • 1 Persian cucumber or 1/2 cucumber, sliced into thin rounds

  • a handful of coriander leaves, picked and roughly chopped

  • 4 tbsp roasted peanuts, chopped

Spicy Peanut Dressing

  • 50g peanut butter

  • 2 1/2 tbsp soy sauce 

  • 1/2 tbsp honey

  • 1 tbsp fish sauce* (omit for vegan/vegetarian)

  • 1 tbsp cane sugar

  • 1 garlic clove

  • 1-inch piece of ginger

  • 2 fresh or dried red chilies (optional)

  • Juice of 1 lime

  • 75 ml coconut milk

Instructions

  1. Using a large pot, bring 1.5 liters of salted water to a boil. Add the potatoes, and eggs and cook for 9 minutes. While the ingredients are cooking, prepare an ice bath. When the timer goes off, transfer the eggs into the ice bath and chill. Continue cooking the potatoes until fork tender.

  2. Using a blender or food processor — blend all of the peanut dressing ingredients. Adjust the salt and spices to taste. Add more coconut milk or water for desired consistency. Set aside.

  3. When the potatoes from step 1 are almost tender, add the green beans, fried tofu, and boil for 1-2 minutes until tender and bright green. Drain the vegetables, tofu and run under cold water until chilled. Slice the fried tofu into bite-sized pieces.

  4. Peel and cut the chilled eggs in half. Assemble the salad by layering potatoes, green beans, tofu, sliced cucumber, and eggs. Serve immediately with peanut sauce, chopped peanuts, and cilantro.


Cooking Tips:

  1. Substitute fried tofu with firm tofu (cubed and fried) or with tempeh.

Caramelized Onions with Soy Sauce

I have searched long and hard for an Asian-inspired caramelized onion recipe and I’m quite happy with this one. I love to make a batch of these soy sauce caramelized onions. They go with anything — toast, focaccia, sandwiches. These last for a week or so in the fridge so I like to make a big batch and have them handy. A great way to level up a quick lunch or snack on the go.

Caramelized onions served over toast, cream cheese with a dash of pepper and green onions

Caramelized Onions with Soy Sauce

Ingredients

  • 2 large onions, halved and sliced into thin rings

  • 4 tbsp vegetable oil, for frying

  • 1/2 tbsp sugar

  • 2 tbsp soy sauce

Instructions

  1. In a medium-large pan, heat the vegetable oil over medium-high heat until hot. Add the onions and fry for 2-3 minutes. Lower the heat to medium-low and fry until onions are browned, caramelized, and soft. Around 20-25 minutes. If the onions start to burn, lower the heat.

  2. Add the soy sauce, sugar and cook for another 5 minutes. Taste and adjust seasoning if need. Serve warm or store in a container. These last in the fridge for a week or so.

Stir-fried Tomato and Egg / 番茄炒蛋

Amongst all my memories of delicious childhood dishes — this is by far my favorite + most classic of all. Everything Chinese family has a version. My dad makes it, my grandma makes it, all the lunch bento spots we ate at as students make it. It’s ridiculously comforting and easy to make with minimal ingredients. The sweet-sour tang of tomatoes makes the dish so full of umami flavor and brings depth to a simple egg dish. A classic away-from-home dish to make during my years as a college student and while living abroad.

Ripe juicy tomatoes, a handful of eggs, green onions and cornstarch is all you need. Let’s get cooking

Note: If I am making this dish for one— I halve the recipe.

Tomato Fried Egg

Serves 2–3, recipe adapted from Adam Liaw

Ingredients
3 ripe medium-sized tomatoes, roughly chopped
1/2 cup water
2 tbsp vegetable oil
½ tsp salt
¼ tsp sugar
2 spring onions, cut into 5cm lengths
½ tsp cornstarch, mixed with a little cold water
5 eggs, beaten

Instructions

  1. Heat a medium pan over medium-high heat and add a tablespoon of oil. When the oil is hot, add the tomatoes and fry until they are soft around 2 minutes.

  2. Add the salt, sugar, 1/2 cup water, and green onions. When the green onions soften, slowly add the cornstarch mixture, stirring as you go. The tomato mixture will thicken into a saucy slurry. Taste and add more salt or sugar as desired. Remove the tomato mixture from the pan and rinse the pan.

  3. Return the pan to heat and add the remaining tablespoon of oil. Add the beaten eggs and stir every 15 seconds until the eggs resemble the texture of a loose omelet. Add the tomato mixture to the eggs and stir to combine. Taste and adjust seasoning, garnish with more green onions if desired. Serve immediately.

Yunan Spicy Potato Pancakes

spicy-potato-pancakes-recipe-6.jpg

Most days, after long hours of cooking and photographing food — there are few things I look forward to than potatoes with a dash of olive oil, salt and pepper. The comfort of carbs and refreshment for the over-stimulated taste buds.

This potato pancake requires a fair bit of arm work, a trusty grater, and a passion for spicy Chinese food. In this case — cuisine from the mountainous province of Yunnan. All at once, Yunnan is known for its scenic views, mountains and rivers that run throughout the province. Mushrooms, flowers, fresh river fish, rice noodles (Mi Xian) are key to Yunnan cuisine.

My memories of Yunnan cuisine consist of sensational hot pots I had in Beijing — a visual meal filled with mushrooms of every kind, carnation petals, sesame sauce, jasmine flowers marinated in vinegar and rice wine served in bamboo flasks. Then there was my auntie’s Yunnan restaurant in Taipei — I can still recall the array of fresh fish, red chilis and fungi served with every meal. In Vancouver — the closest conversations I have around Yunnan food are with my designer friend Lisa, whose family hails from the rivers and mountains of Yunnan.

These potato pancakes are an adaptation to a local snack served at street markets in Yunnan. The egg in this recipe was added by Lisa’s grandmother for nutritional purposes. The potato starch that seeps from salted potatoes acts as a natural binding agent. It’s a great side dish for dinner and something I look forward to eating for breakfast. The recipe is adapted (and tested four times) by yours truly, with Lisa suggesting to dip it in a sauce made of vinegar, soy sauce and Yunnan chilli flakes.

Lisa and a potato pancake feast

Lisa and a potato pancake feast

Potato starch separating from potato water.

Potato starch separating from potato water.

The only spicy, sweet and sour dipping sauce you need (recipe below).

The only spicy, sweet and sour dipping sauce you need. Recipe here

spicy-potato-pancakes-recipe.jpg

Yunnan Potato Pancakes

Serves 2 (1 potato makes one pancake)
You will need a box grater or mandolin, two large mixing bowls, and a nonstick frying pan

Ingredients

  • 2 medium-large russet potatoes

  • 1 1/2 teaspoon salt

  • 1/4 teaspoon black pepper

  • 1 teaspoon soy sauce

  • 1 teaspoon sesame oil

  • 1/2 teaspoon chili flakes

  • 2 eggs

  • Green onions, sliced (optional)

Instructions

1. Grate the potatoes into a large mixing bowl. Add 1 1/2 teaspoons of salt and mix thoroughly. Allow the potatoes to sit for 15 mins (or as long as 30 mins) for the water to separate out from the potatoes. Squeeze as much water as you can out of the potatoes into the bowl and transfer the potatoes to a second bowl. Leave the residue water in the original bowl.

2. Let the residue water sit until the potato starch sets in a layer at the bottom, 1-3 minutes. Discard the water on top, using hands or a spoon, and transfer the potato starch into the grated potatoes. This will help bind the pancake together.

3. Create a well in the potato mixture and crack in the eggs. Gently beat until the whites and yolk are mixed. Add the black pepper, soy sauce, and sesame oil to the egg and mix thoroughly.

4. Heat a medium frying pan until medium-high heat. Using a spatula, transfer a quarter of the potato mixture onto the frying pan and press gently to form a pancake. Turn the heat down to medium-low and fry for 4–5 minutes per side.

5. Serve straight from the pan with sweet & spicy dipping sauce. Garnish with green onions. Bon Appétit!

Cooking Tips

*Turning the heat down once potatoes are in the pan will ensure thorough cooking and a crispy outer layer without burning the pancake.


Stir Fry Lotus Root

In Chinese culture, lotus root is described as “the lover’s vegetable”. There are strands of fibre that connect every piece as you take a bite. In short, a sentimental vegetable that is unwilling to part with itself. Stewed in broths, thrown in stir-fries and pickled for salads — I’ve loved poking my chopsticks through the holes to eat as a child. It’s a vegetable that is rewarding to work with and fun to introduce to your friends.

Read More

Japanese Onion Salad Dressing (Wafu)

Wafu (和風) is a popular Japanese salad dressing which is basically an onion vinaigrette. It takes 5 ingredients to make and pairs perfectly with greens, lettuce, cucumber for an appetizer or a refreshing side.

This dressing brings me back to my high school days when I worked at Mos Burger — a Japanese chain restaurant that specializes in rice burgers. Boy, I loved everything on the menu — fish fillets, pomelo ice teas, organic rice patties (some of my coworkers used them to make fried rice). It was a memorable and delicious time.

Among their menu, Wafu salad was a bestseller. It had completely slipped my mind until I came across it on Adam Liaw’s social media. Making it brings me back to the school days — walking home after an evening shift, the jasmine-scented gardens of Chang Kai Shek memorial hall, koi fish ponds, and the many meals I shared with my friends. I will be eating lots of Wafu dressing on salads this summer.

Japanese Onion Salad Dressing (Wafu/和風醬)

Ingredients

  1. 1/2 onion, roughly chopped (around 1 cup)

  2. 1 tbsp soy sauce

  3. 2 tbsp rice vinegar (sub-seasoned rice vinegar and omit the sugar)

  4. 1 tbsp cane sugar

  5. 1/2 cup grapeseed oil (sub olive oil)

  6. 1/2 tbsp toasted sesame seeds (optional)

Instructions

  • Add all of the ingredients aside from the oil into a blender or food processor. Pulse and blend into a thick dressing. Don’t overblend.

  • Top with oil of choice and sesame seeds. Seal the jar, and give it a good shake until the ingredients emulsify. Serve over salad or soba/rice noodles. Dressing keeps for 3-4 days in the fridge

Cooking Notes:

• Traditionally, the onions are grated with a Microplane grater to preserve texture. I find the blender method easier with limited time on my hands.

• If making beforehand, give the dressing jar a good shake before serving.

Smashed Cucumber Salad

In Taiwan, one cannot eat at a restaurant without ordering 小菜 “Little Plate” or side dishes. Usually consisting of vegetables, marinated firm tofu, soft boiled peanuts, or black wood ear mushrooms. Little Plate is a part of Taiwanese restaurant culture and something I look forward to every time I eat out. It is also a good way to get your veggie fix as Taiwanese cuisine can be heavy and salads are not really a thing.

This cucumber salad is a 涼拌, which translates into “Cold Toss”. Similar in cooking style compared to a green papaya salad — I would say it is a signature “little plate” in Taiwan. I enjoy making this as an appetizer when friends come over. It’s refreshing yet flavourful. The peanuts make it indulgent, the birds-eye chilli gives it a good kick, and one can not eat too many cucumber dishes in summer weather.

Smashed Cucumber Salad 涼拌小黃瓜

Ingredients

5 mini Japanese or Persian cucumbers (around 350 grams)

2 Tbsp Kosher salt

4 red or green Thai chiles, halved lengthwise keeping stem end intact

2 garlic cloves, minced

½ cup unseasoned rice vinegar

2 Tbsp fish sauce

1 Tbsp sugar

Chopped unsalted or salted roasted peanuts

Instructions

Smash cucumbers with a rolling pin or a wine bottle. Careful not to smash too close to the cutting board now, you want some crunch in them. Tear into 2-inch pieces, place in a medium bowl and season with salt. Let sit for 30 minutes.

In the meantime, add chillies, garlic, vinegar, fish sauce and sugar to a medium bowl. Whisk until the sugar dissolves.

Drain cucumbers, rinse with cold water and squeeze to release salty water. Add to bowl with dressing and toss to combine. Chill in the fridge for an hour and serve topped with peanuts.

These cucumbers will keep in the fridge for 2 or 3 days.


Cilantro Salad with Shallot Oil

I had a bunch of cilantro sitting in the fridge leftover from a week of recipe shooting. It felt like a problem waiting for a creative solution. I researched some recipes online and came across the delightful site of Madame Huang, a California native who lived in Taiwan for a number of years.

I love this recipe because I now have a way to use up all my extra cilantro. I also rediscovered a lovely substitute for sesame oil if I ever need something that tastes a little lighter and fragrant —shallot oil.

I grew up eating fried shallots in lots of dishes — a topping over rice noodle soups, folded into steamed turnip cakes or served over vegetables. I usually avoid store brought fried shallots, not trusting the quality of oil they were fried in. A good reason to make one’s own.

This salad calls for an entire bunch of cilantro. Not brown, wilted ones but fresh, vibrant cilantro. I substituted peanuts for cashews and yellow pepper for red since I cannot drop by the grocery store as easily these days. Toasted peanuts on the top of my shopping list next week. 

Shallot Oil

Ingredients

1 cup thinly sliced shallots (around three shallots)
1.5 cup fresh rice bran oil ( sub peanut or grapeseed oil)

*Make this oil at least a day ahead before you want to use it to flavour your dish.

Instructions

Slice shallots into thin rings, as evenly as you can. Heat oil over medium-high heat in a pan. You can tell the oil is ready when there are small ripples on the surface. Test by inserting a chopstick into the oil, it should be covered in bubbles immediately. Sprinkle in the shallots, reduce heat to medium and fry them until they turn a golden brown. Stir often so they fry evenly. Turn the heat off when they are a light golden brown, and fry with the residue heat.

Strain the shallots over a sieve into a vessel. Reserve the shallots as a topping, and use the oil for stir fry, a sesame oil substitute or in other dishes. Alternatively, you can add the cooled oil back into the shallots and use as a topping over rice, noodles or steamed greens

Cilantro and Peanut Salad

Ingredients

1 bunch fresh cilantro*
½ cup fried or toasted peanuts
½ sweet bell pepper 
1 tsp soy sauce
½ tsp sugar
¼ tsp sea salt
2 tbsp shallot oil (sub sesame oil)
1 tbsp toasted sesame seeds

Instructions

Trim and remove the tough or browned stalks of cilantro. Wash in water, shake dry, cut into 1-inch pieces and transfer to a mixing bowl. Prep the bell pepper and slice into small pieces, around the size of a peanut. Add peppers to the mixing bowl.

Toss cilantro with pepper, peanuts and the rest of ingredients. Taste and add more seasoning if you’d like. I added some fried shallots from the shallot oil. Serve as an appetizer or as a side. Also great as a chilled dish, just toss in the peanuts and dressing before serving. 

*As cilantro is the main ingredient, use the nicest bunch you can find.

Spicy Cucumber Fans

I will call these quarantine cucumber fans, as a cure for worrying — making something is better. They do take some time to produce and is a great way to add veggies to your meal. If you are looking for a simpler recipe with no cooking — my Smashed Cucumber Salad is a great alternative.

This recipe is adapted from Barbara Troops, author of the China Moon Cookbook. I am savouring the pages of her recipes and cooking notes. There is nothing more lovable and inspiring than a tiny American lady, traveling through China, recreating dishes from different regions, and serving them to people who think Sichuan peppercorn is a complete novelty. Give it a read, the recipes will take time to put together and a trip to the Asian grocery store will be needed. I am loving her Sichuan Peppercorn Salt and Hot Chilli Oil, which I am using liberally in my cooking as of the last two weeks. It is also a cookbook that reinforces my dream of getting a gas stove and a smoking hot wok.

This cucumber dish is not quite a salad, but more an appetizer or little dish (小菜) as we call it in Mandarin. I enjoy making this as a side for dumpling nights or simply have in the fridge to add to a heavier meal. You can chop, smash, slice, the cucumber however you please, I do find the fan a delightful change in appearance and texture. Recipe adapted from China Moon Cookbook.

spicy-cucumber-fans.jpeg
spicy-cucumber-fans-recipe.jpeg

Spicy Cucumber Fans 麻辣黃瓜條

Ingredients

Ingredients

  • 5 Persian or Japanese cucumbers

  • 2 tbsp kosher salt

  • 2 wooden chopsticks

Aromatics

Aromatics

  • 1 1/2 tsp finely julienned fresh ginger

  • 1 tbsp minced garlic

  • 1/2 tsp dried red chilli flakes

  • 1/2 tsp Sichuan peppercorns

Seasoning

Sauce

  • 1 tsp soy sauce

  • 2 tbsp unseasoned rice vinegar

  • 3 tbsp sugar

  • 1 tbsp peanut or vegetable oil

  • A few drops of sesame or shallot oil

Instructions

Instructions

  1. Remove the ends from the cucumbers. Set two chopsticks in a V-shape on the cutting board and pin the cucumber inside the point of the V. Cut the cucumber crosswise at 1/8 inch intervals. The chopsticks prevent the knife from cutting all the way into the cucumber, leaving you with a lovely fan shape.

  2. Toss the sliced cucumber with salt and set aside for 30 mins. The salt will soften and drain the cucumber of liquid. Drain the cucumbers, rinse with cold water, squeeze to set aside.

  3. Combine the aromatics in a small dish, combines sauce ingredients in a small bowl.

  4. Heat a skillet over moderate heat until hot. Add the oil, swirl to cover the bottom, reduce heat to low. When the oil is hot enough to sizzle a bit of garlic, add the aromatics. Stir until fragrant, around 10 seconds. Watching the heat so it foams without browning. The smell should be punchy when you take a whiff.

  5. Add the cucumber, toss to combine, then add the sauce. Toss gently to mix and dissolve the sugar. Taste and add more sugar if you’d like. Remove from heat and toss again.

  6. Layer the cucumbers, fan side down in a shallow bowl. Scrape the liquids over top. Seal and chill in the fridge for an hour, or overnight. Do not eat this warm! Serve slightly chilled. The cucumbers are good for a few days in the fridge, although they will lose some of that vibrant color.

Spicy Smashed Roasted Potatoes

Every day is brunch day when you have smashed roasted potatoes. Crispy and dredged in flavour, these are the perfect size to consume in one bite. They are easy to make, excellent for entertaining, and bring delight to all potato lovers. I had these at a summer potluck and have rarely gone back to normal baked potatoes since.

I highly recommend making these with Sichuan Peppercorn Salt. Sichuan peppercorns add much flavour and a fragrance normal peppercorns do not yield. If you do not have time, normal salt and pepper will do. The trick with potatoes is to roast until they are crispy, on the edge of burning, and eat them while they are hot.

Spicy Smashed Roasted Potatoes

Spicy Smashed Roasted Potatoes

Ingredients
1 pound small potatoes 
3 cloves garlic, peeled and minced
Olive oil
Sichuan Peppercorn Salt
Chives, parsley or green onions

Instructions

Preheat your oven to 425 F. Wash potatoes and put in a large microwaveable bowl. Fill a bowl with water until potatoes are 80% submerged. Cover with saran wrap and poke a few holes in it. Microwave at 5-minute intervals or until potatoes are soft and easily pierced with a fork. Some potatoes may explode, which is to be expected. Drain potatoes and set aside.

On a large baking sheet, spread potatoes evenly and firmly press with your hands or spatula until smashed and flat. Try not to overcrowd the pan. Drizzle with olive oil, peppercorn salt. Roast for 25-30 minutes or until brown and crispy, flipping after the 15-minute mark. For extra crispiness, turn the broiler on high and cook for another 3 minutes, keeping a close eye on them so they do not burn.

Garnish with chopped herbs, sprinkle with more peppercorn salt if you wish. Serve immediately.


Bryant Terry’s Amazing Green Rice

I made Bryant Terry’s Amazing Green Rice today and loved the flavour and different ways of cooking rice with pureed vegetables. Food is really for the spirit as well as the body. I have been enjoying the slow-down time and my weekends hunting for organic greens, chopping and cooking away before sitting down to enjoy the few hours of labour.

If you are looking to venture out of your usual way of cooking, Bryant’s new cookbook Vegetable Kingdom features a lot of afro-vegan recipes. Jamaican dishes, Chinese spices. It really opens up a world of cooking with vegetables. I have a list of purees, veggie roasts and dressings I am looking to make. It is a beautiful example of food as a bridge to sharing that personal yet worldly part of ourselves in the kitchen.

I would love to make onigiri this next, perhaps with sushi rice, some preserved cherry blossoms. I used a cast iron pan for this and was rewarded with a crispy bottom. I would also love to experiment with different coloured vegetables, purple rice, yellow rice, orange rice you name it. I threw in soaked cashews I had on hand (you can use coconut cream) with whatever greens and garnishes I found in my fridge.

Bryant Terry’s Amazing Green Rice

Ingredients

Serves 4–6
1 c tightly packed spinach leaves ( sub with any kind of greens)
1 c tightly packed kale leaves, stems removed
1 1/2 c water (sub vegetable stock and omit the stock cube)
1 vegetable stock cube
1/3 c soaked cashews (or sub 2 tbsp of coconut milk)
Sprinkle of sea salt
1 c long grained rice
1 tbsp oil ( I used butter)
1/2 c diced yellow onion
1/2 c diced green peppers
3 cloves garlic, peeled and minced

Instructions

1. In a blender, puree the greens, water, stock cube, soaked cashews, and salt. Blend until frothy and smooth. Set aside.

2. Wash rice in a sieve. Give it a good shake and set aside.

3. In a medium-sized pan (I used my cast iron) heat oil until hot. Add the onion, bell pepper, and sauté until soft. Add minced garlic and cook for another 2 to 3 minutes. Add the rice and stir until the water evaporates and the rice is lightly toasted and aromatic. Pour in the contents from the blender and turn the heat up to high until the whole thing comes to a boil. Reduce heat to low, cover with a lid and simmer for 15 to 20 minutes.

4. Take the pan off the heat and let it sit for 10 minutes or so with the lid on. Fluff the rice with a fork before serving and top with toasted nuts, chopped herbs, fresh ground pepper, or anything to your fancy. I find it really great satisfying paired with an egg, tofu, or served as a main.

Recipe inspired and adapted from Heidi Swanson. Original recipe creator Bryant Terry

Pender Grocery: Artist Interview + Pan Con Tomate Recipe

pender_grocery_vancouver_british_columbia.jpg
spanish_bodega_vancouver_british_columbia_artist_interview-2.jpg

With its colourful interiors and sun-lit space — it is hard to miss this charming grocery store on Pender street. The smell of fresh baked goods beckons you in to admire the shelves and tables that are wonderfully stocked with Spanish goods, everyday necessities and organic produce.

Today, I sit down with Shawn, one of the three founders of Pender Grocery. Shawn tells stories of food in the Basque region, how he discovered his passion for through travel, and their vision to cultivate slow living in a busy city. For a moment in time, my mind is transported to apple fields, farmer markets, old Europe towns through the relaxed ambiance that the store seems to emit.

Tell me how you went from importing cider to opening a grocery store in downtown Vancouver.

A few years ago, my wife and I travelled to Spain to visit our friend Michael, who was the chef of a restaurant in San Sebastian, a city known for Michelin restaurants. Michael introduced us to Basque cuisine — we experienced the pintxo culture and ate our way through restaurants, each more interesting than the last. The experience shook me and there I discovered that I had a deep passion for food. It was a lightbulb moment. After Michael moved back to Vancouver, the three of us started importing wine and cider from the region and it led to importing goods, and the opening of this store.

Opening a store was actually a plan for us in the next three-five years. Luckily, we came across this space at the perfect time, and the landlord, who was hugely supportive of our idea, made us an offer we couldn’t resist.

pender_street_grocery_vancouver_british_columbia_interview-7.jpg
spanish-bodega-vancouver.jpg
pender_street_grocery_vancouver_british_columbia_interview.jpg
spanish-bodega-vancouver.jpg

The sign on the wall and decorations in the store caught my attention the moment I walked in, how did the look and design for the store come together?

We are actually sitting in a space that used to be parking lot 100 years ago. The sign on the wall is something really special — we uncovered it when we were tearing down the walls to reconstruct the space. It is a ghost sign from 1906 that was covered up in 1908. We decided to keep it to lead the look of the space. After that, everything seemed to fall into place. Many of the vintage pieces here are collected from friends and family. Some favourites are passed down from Kelly’s late grandmother.

This is a very interesting location to open a grocery store, what is it that you hope to bring to the community here?

Living in the city, we are disconnected from farmlands and we don’t get to see how food is grown and made. We felt that the area was lacking a grocery store, and the idea was to create a Bodega — a grocery store for the neighbourhood.

Our customers consist of working professionals and residents from the local community. We want to cater to everyone but also want people to come in not knowing what to expect. We want to invite shoppers to take their time to browse, and to be inspired to cook.

Using ingredients from your shop, what is a simple and delicious recipe that anyone can make?
I love a good Pan Con Tomate — a humble recipe with few ingredients. Slice a fresh tomato, place on traditional crusty bread, drizzle with olive oil and add a sprinkle of salt. A good snack can be a can of conservas from the store — sardines, squid or mussels marinated in Galician sauce. Simply open a can, dip with bread, and eat with gusto with a glass of wine. A tasty high-end treat.


heirloom_tomato_organic_grocery_vancouver_bc.jpg
spanish_bodega_vancouver_british_columbia_artist_interview-1.jpg

Pan Con Tomate Directions

• In a small bowl combine sliced tomatoes, garlic, olive oil, salt and pepper
• Whisk until combined
• Toast the bread slices individually until golden warm and crispy
• Set on a plate and sprinkle with sea salt
• Top with fresh basil

Enjoy!