Black Sesame Soup

I find myself craving black sesame soup when the weather gets cold. It’s extremely comforting, and nutritious, and warms you from the inside out.

Black sesame is a popular ingredient used in many Asian desserts. The Chinese believe that eating black sesame promotes healthy hair and healthy bones. You’ll find them in ice cream, blended into hot drinks, baked as a paste into bread, or stuffed into dim sum in all shapes and sizes. 

The jujube here is added for nutritional benefits. Known as the beauty fruit in China — jujube is full of minerals, fiber and adds a natural sweetness to dishes. 

Black Sesame Soup

Serves 4

Ingredients

2 tbsp (30 g) glutinous rice

1/2 cup (75 g) toasted black sesame seeds*

4 tbsp sugar or sweetener of choice, to taste

6 jujube dates, pitted (optional)*

2 cups (480 g) water

Instructions

  1. Rinse the glutinous rice and soak for 3 hours at room temperature or overnight in the fridge.

  2. Drain the glutinous rice and add to the blender with sesame seeds, jujube dates, and 2 cups of water. Blend on high until very smooth.

  3. Transfer the mixture to a medium-sized pot. Heat over medium heat until boiling, stirring constantly to prevent the bottom from burning. When the soup starts to bubble, add the sugar to taste. Continue cooking to your desired consistency (I like this soup on the thick side). Garnish with goji berries and serve warm.

Cooking notes:

  1. You can use raw black sesame seeds if you’re not able to find toasted ones. Just toast them for 10 minutes until the seeds start to pop.

  2. The jujube here is added for nutritional value and for a hint of sweetness. Feel free to omit it if it is not something you have in your pantry.

  3. It’s very important to stir and keep an eye on the soup to prevent the bottom from burning. The glutinous rice will thicken rapidly and stick to the bottom as you cook.

  4. This soup will keep in the fridge for 3 days or in the freezer for 1 month. The layers will separate so give it a stir before serving.

Beef and Onion Steamed Buns

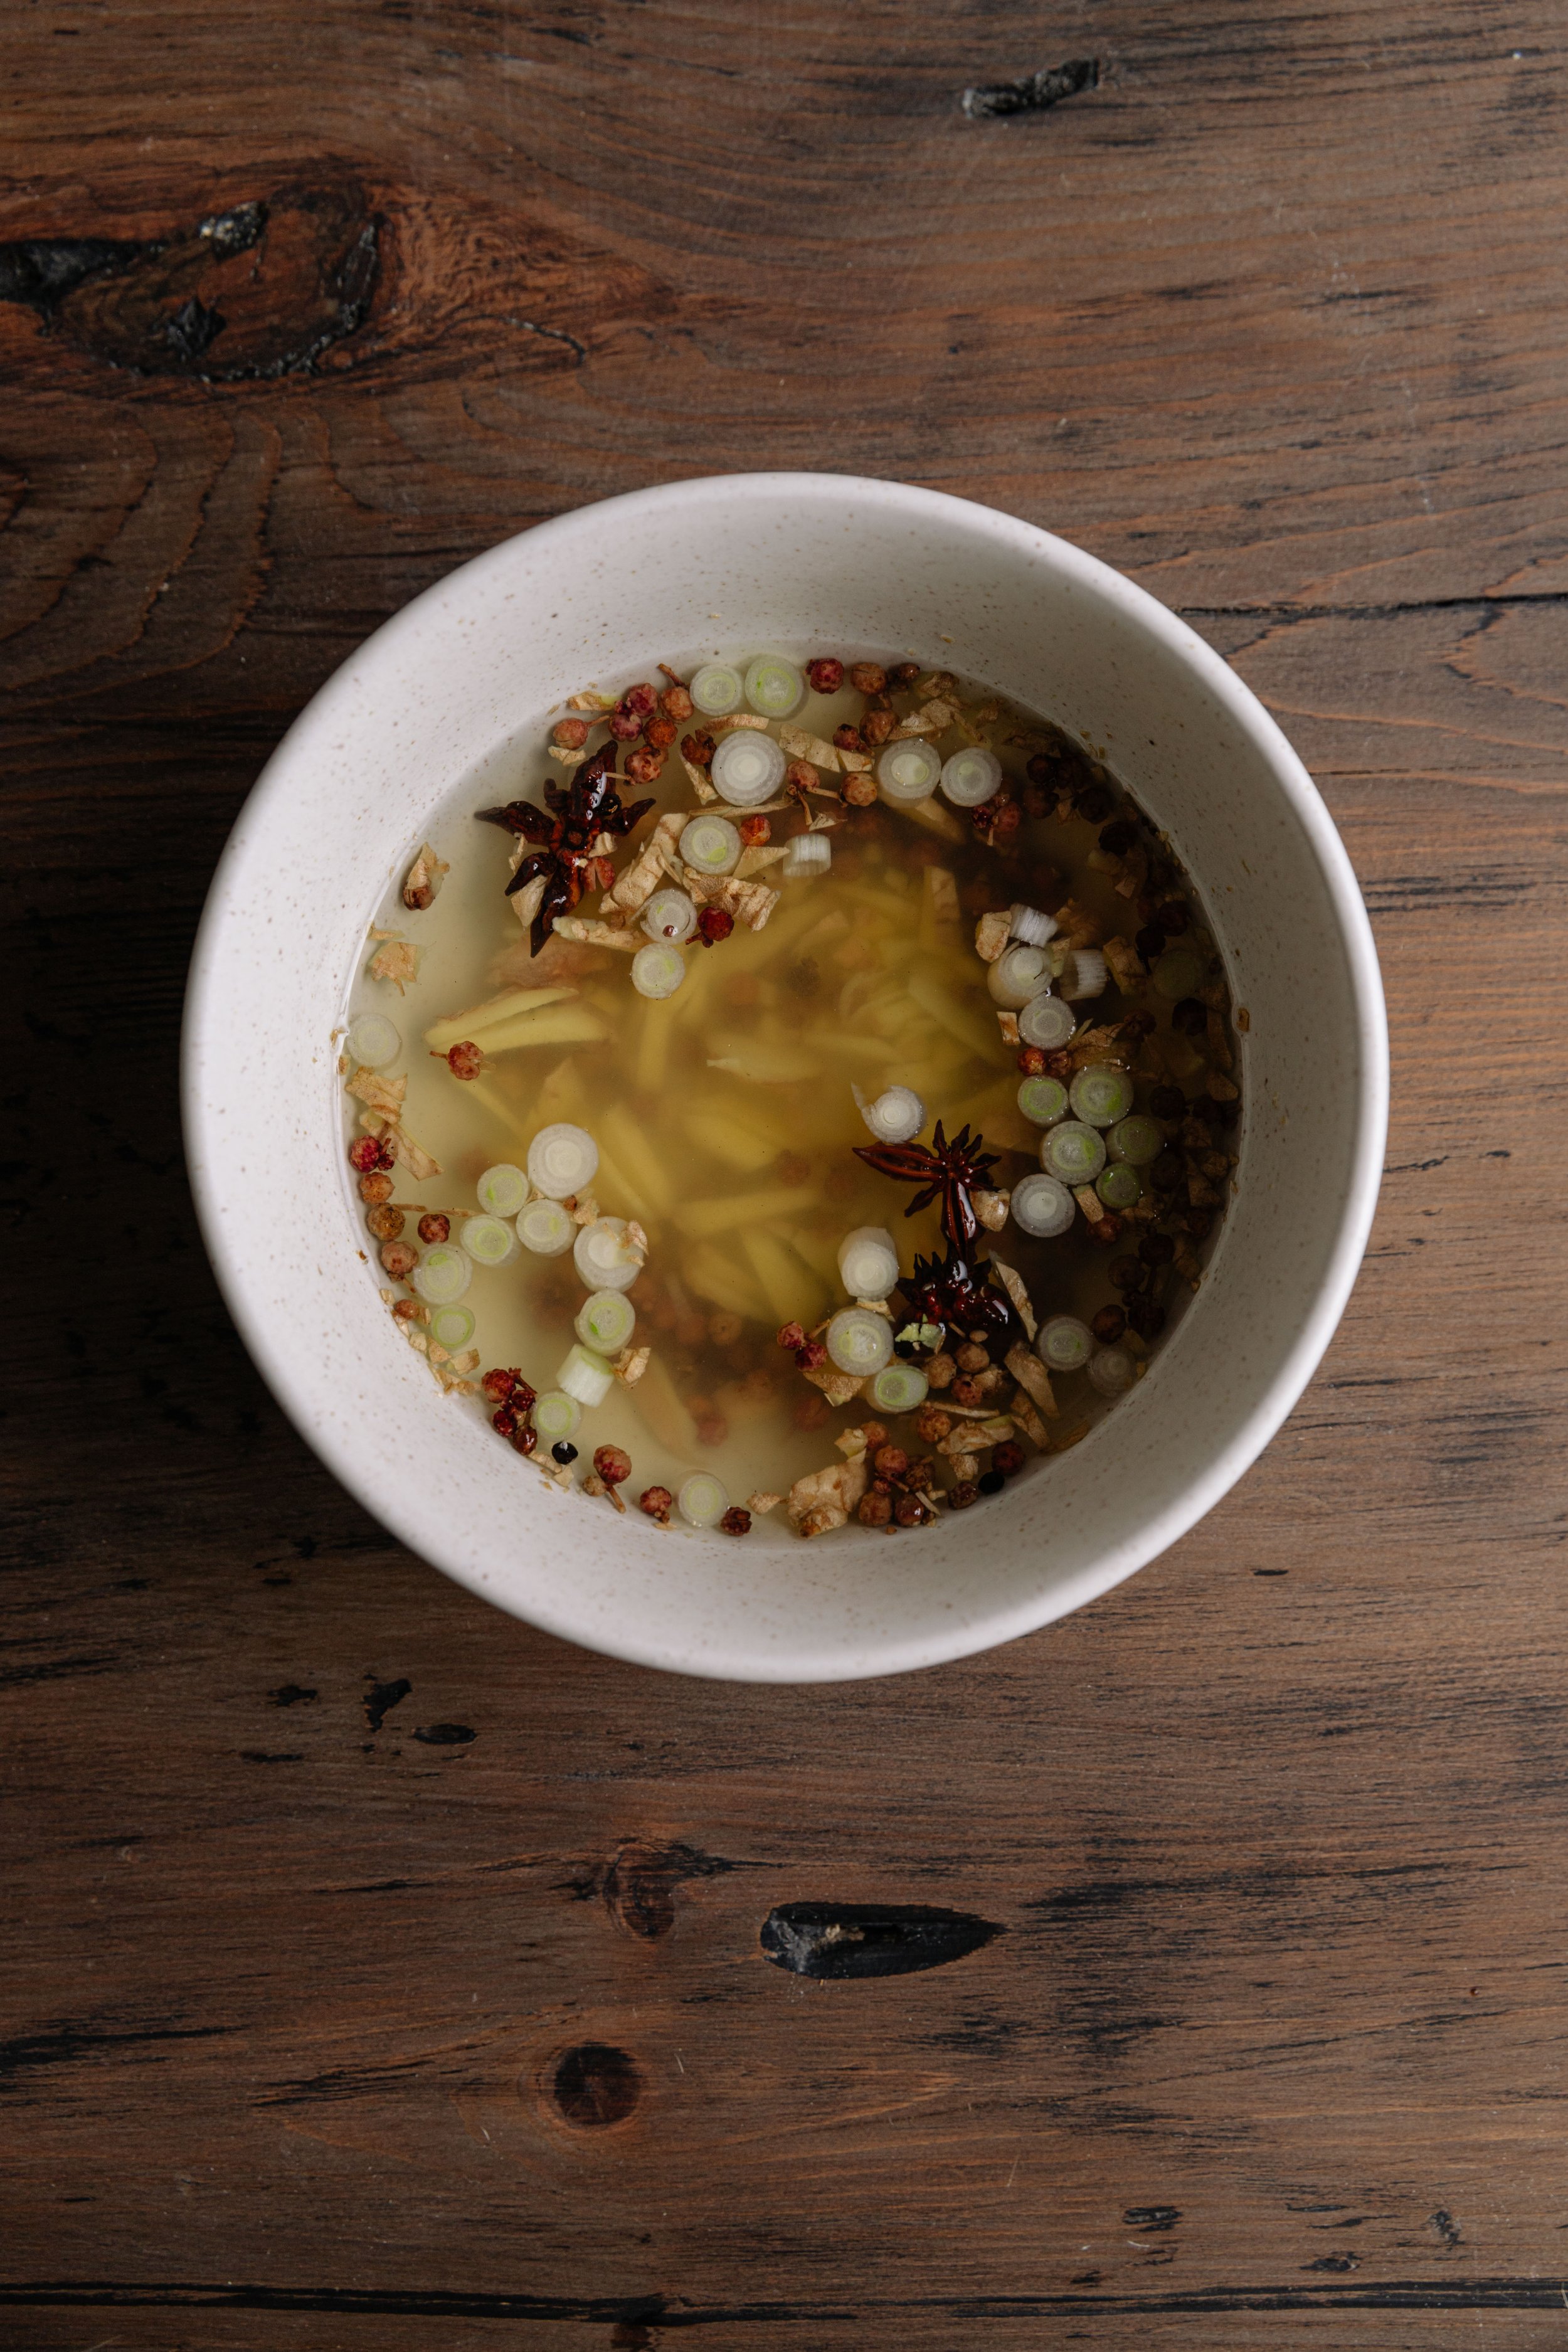
The secret to juicy meat buns — onion, pepper and ginger water

Pleated buns, ready for a steaming

Growing up in Taipei, steamed buns are a staple in everyday life. They are found at breakfast shops, dim sum restaurants, and the many street food vendors that line the alleys of Taipei City. Steamed buns come in every variety — pan-fried, steamed, stuffed with vegetable meat, or sweet fillings. 

The secret of a juicy meat bun is the onion, ginger, and pepper water that is beaten into the filling. It prevents the meat from drying out and you’ll end up with a tender and juicy filling. This recipe is designed for an afternoon or evening of hanging out in the kitchen. For cold climates, rise the dough for 25-30 minutes with a tray of boiling water in the oven. Make the filling while you wait for the dough to rise. Assign a wrapper roller while others pleat the buns. The beauty of making these in batches is that there will be plenty to share and give away. 

Beef and Onion Steamed Buns

Makes 16 buns

Ingredients

Onion, ginger, pepper water

  • 2 tbsp (15 g) ginger, peeled and sliced

  • 2 star anise seeds (optional)

  • 1 tsp Sichuan black peppercorns*

  • 3 white parts of spring onions, chopped

  • 1/3 cup (113 g) boiling water

Meat Filling 

  • 1 lb (453 g) lean ground beef

  • Onion, ginger, pepper water (recipe above)

  • 1 tbsp soy sauce

  • 1 tbsp salt

  • 1 tsp Sichuan peppercorn powder

  • 1 large onion, peeled and finely chopped

  • 3 green parts of spring onion, chopped

  • 2 tbsp sesame oil

Steamed Bun Dough

  • 1 cup (236 g) of lukewarm water 

  • 1 tbsp (12 g) cane sugar

  • 2 tsp (5 g) active dry yeast*

  • 3 cups (420 g) all-purpose flour, plus extra for kneading and rolling

  • 1/2 tsp (3 g) salt

  • 1 tsp (4 g) baking powder

  • 1 tsp (5 g) vegetable oil, plus extra for coating the bowl

Instructions

Making the filling: Bring a jug of water to boil. Add the ginger, star anise, chopped white parts of spring onion, and peppercorns to a bowl. Pour 1/3 cup of boiling water into the bowl, steep and let cool.

Add the meat to a large mixing bowl. Gradually stream in the onion, ginger, and pepper water. Mixing until well incorporated. Add in the salt, soy sauce, pepper powder, onion, and green onion, stirring continuously. Lastly, add in the sesame oil and mix. The oil will prevent the mixture from becoming too watery. Set the filling aside until ready to use.*

Making the dough: In a small bowl, add the yeast, warm water, and sugar and stir to dissolve the yeast. Let sit for 5 minutes to activate the yeast. The liquid should foam and look creamy. It’s important to use fresh yeast.  In a large mixing bowl, add the flour and make a well in the center. Sprinkle the baking powder around the outer ridges of the bowl so it will incorporate later. 

Slowly stream in the yeast mixture to the flour, mixing with a pair of chopsticks as you go. The dough should come together into a loose mound. When there are no dry patches left, add the vegetable oil and knead for 8 minutes. You’ll know that the dough is ready when it has “Three Shines or San Guang 三光“ — Shiny hands, clean bowl, shiny dough. The dough should be smooth and soft like a baby's bottom.  If the dough is too sticky, add flour or vegetable oil. If the dough is too tight, add water to your hands and continue kneading. 

First rising*: Place the kneaded dough in a well-oiled bowl. Let sit in a warm spot for 1-2 hours until it has doubled in size. The time will depend on the temperature in your home so keep a keen eye on it. To check if the dough is ready — pull the dough away from the edge of the bowl. There should be strands of airy, honeycomb-like textures. 

Using well-oiled hands, lift the dough out of the bowl onto a floured surface. Knead for another 5 minutes until the air bubbles have popped and you have a smooth round ball. The fewer air bubbles, the smoother your buns will be. Roll the dough into a log and divide it into two portions. Cover one portion of the dough with a clean dishcloth while you work with the other half. This will prevent the dough from drying out. Roll your portion of dough into a log and divide it into 8 pieces. Each piece should weigh around 35-40 grams. Knead and roll each morsel into a round, smooth ball.

Rolling the wrapper: Flatten a morsel of dough with your palm. Using a rolling pin, roll it from the edge towards the center, without actually rolling the center of the dough. You want a thick center and thin edges on your wrapper. The wrapper should be 4-5 inches in diameter. 

Pleating the Bun: Place the wrapper in one hand and scoop a heaping tablespoon of filling into the center.  The filling should weigh around 30 grams. For beginners, start with a minimal amount of filling to help the pleating process. Flatten the filling with a spoon and follow the steps below. Switch hands if you are left-handed. 

  • With your right forefinger and thumb, firmly pinch an edge of the wrapper to make the first fold. 

  • Continue pinching folds with your right index finger and thumb. Rotate the wrapper with your left hand as you go, pinching until the whole bun is pleated. While pleating, use your left thumb to press down the filling so the dough comes over the filling. Your right thumb should never leave the bun.

  • Seal the bun with a series of pinches to form the pointy top of the bun. Repeat with the remaining dough and filling.

Second Rising: Line your steamer with parchment paper*. Transfer your buns to the steamer, cover them, and let them sit for 15-20 minutes. The 2nd rising will allow the buns to be pillowy and soft. You’ll know the buns are ready when they have expanded in size and are fluffy and light to the touch. 

Steaming the buns: Over high heat, bring a pot of water to boil. Place the steamer on top and immediately turn the heat to medium. Steam for 15 minutes and let sit for 5 minutes before taking the lid off. This will ensure your buns do not deflate with the quick temperature change. 

Serve immediately, or let cool and refrigerate or freeze. To reheat, steam for 2-3 minutes in a steam or microwave with a wet paper towel covered on top. 

Cooking Tips:

  1. If you are using instant yeast, substitute the same amount, skip the proofing step, and add the yeast directly to the dry ingredients. 

  2. If you are making the filling ahead, mix everything together aside from the onion, spring onion, and sesame oil until you are ready to pleat the buns. This will prevent the vegetables from becoming too watery.

  3. To speed up the rising process. Cover your dough and place it in the oven with a plate of boiling water underneath. The temperature should be around 38 C/100 F. The dough should be ready in 25-30 minutes. 

  4. For beginners, start with a minimal amount of filling to help the pleating process. No one starts out with good-looking buns so practice makes perfect. 

  5. You can find steamer liners at Asian shops. To make your own steamer liner — measure and cut a round parchment paper to fit inside your steamer. Cut holes in the parchment paper that are 1½ inches apart to allow steam to rise through.

  6. These buns reheat extremely well in the steamer or microwave (covered with a damp paper towel before heating). Eat within 3 days or freeze in an airtight container for up to 2 months.

Taiwanese Pan-Fried Buns 水煎包

This pan-fried steamed bun recipe is delicious and easily made with a frying pan. Steamers are not required! They are perfectly crispy, juicy, and to be enjoyed straight out of the pan.

In Taiwan — we call these “Water Fried Buns 水煎包“. Vendors fry these by the batch and serve them piping hot with chili vinegar sauce drizzled all over. In Shanghai, you’ll find smaller versions of these buns called “Shanghai pan-fried bao 上海生煎包“. They are world-renown and ultra delicious.

This recipe uses the same filling as the Pork Tomato Steamed Bun. I halved it for smaller portions. You’ll need cornstarch slurry and a decent-sized pan, as they’ll crisp up with more space. Fry in batches if you need. If you’re using a cast iron pan, keep an eye on the heat as the bun bottoms can burn very quickly. 

Pleating the buns

Fluffy proofed buns, ready to be fried

Perfectly juicy and golden-brown buns.

Pork and Tomato Steamed Buns

Makes 8  buns, serves 2 people

INGREDIENTS

Meat Filling (Or use a filling of choice)

  • 1/2 lb (225 g)  lean ground pork

  • 1 medium (100 grams) tomato

  • 1 tbsp soy sauce

  • 1/2 tbsp (5 g) ginger, peeled and finely minced

  • 1/2 tsp Sichuan peppercorn powder

  • 1/2 tbsp salt

  • 2 spring onions, chopped

  • 1 tbsp sesame oil

1/2 Half Portion of Steamed Bun Dough

Cornstarch slurry

  • 1 tsp cornstarch

  • 1/4 cup water

  • 1 tsp oil

Garnish

  • Black sesame seeds and chopped green onion (optional)

INSTRUCTIONS

  1. Make your dough: I like to make the filling while I wait for the dough to rise. You can also prep the filling ahead to save time. 

  2. Prep the tomato: Over high heat, bring a small pot of water to boil. Drop in the tomato and stir gently. Cook for 2 minutes, drain, and let cool. Peel the skins off the tomato, squeezing as much tomato juice as you can into a separate bowl while reserving the pulp. Finely chop the tomato pulp. Set the juice and pulp aside. 

  3. Mixing the mince: Add the meat to a large mixing bowl. Gradually add in the tomato juice, stirring with chopsticks until well incorporated. The meat should start to look like a paste. Add in the soy sauce, pepper powder, ginger, green onion, salt, and tomato pulp, stirring continuously. Lastly, add in the sesame oil and mix. The oil will prevent the mixture from becoming too watery. Set the filling aside until ready to use. 

  4. Make the cornstarch slurry: Add the cornstarch, water and oil to a small bowl. Stir to combine and set aside.

  5. Prep your frying pan: Generously oil the bottom of a frying pan. This is where you’ll place the pleated buns for proofing.

  6. Rolling the wrapper: Make half of this steamed bun dough recipe. Flour your surface and flatten a morsel of dough with your palm. Using a rolling pin, roll the dough from the edge towards the center, without actually rolling the center of the dough. You want a thick center and thin edges on your wrapper. The wrapper should be 4-5 inches in diameter. Cover the wrappers while you work. 

  7. Pleating the Bun: Place the wrapper in one hand and scoop a heaping tablespoon of filling into the center.  The filling should weigh around 30-40 grams. For beginners, start with a minimal amount of filling to help the pleating process. Flatten the filling with a spoon and follow the steps below. Swap hands if you are left-handed and refer to the moving image above:
    - With your right forefinger and thumb, firmly pinch an edge of the wrapper to make the first fold. 
    - Continue pinching folds with your right index finger and thumb. Rotate the wrapper with your left hand as you go, pinching until the whole bun is pleated. While pleating, use your left thumb to press down the filling so the dough comes over the filling.
    - Seal the bun with a series of pinches to form the pointy top of the bun. Repeat with the remaining dough and filling. Place the buns in the frying pan, allowing 1 inch of space between the buns.

  8. Second Rising: Cover the frying pan and cook over low heat for 2-3 minutes. The bottom of the pan should be warm and not burning to the touch. Let the buns sit for 15-20 minutes. The 2nd rising will allow the buns to be pillowy and soft. You’ll know the buns are ready when they have expanded in size and are fluffy and light to the touch. 

  9. Fry the buns: Fry the buns over medium-low heat, uncovered for 6-7 minutes or until crispy and golden on the bottom. Lift and check the bottoms periodically with a fork. Stir the cornstarch slurry and pour it into the pan, avoiding the buns if possible. Cover and cook for 8 minutes. Let sit for 5 minutes before taking the lid off. This will ensure your buns do not deflate with the quick temperature change. 

  10. Garnish with sesame seeds or green onions. Serve immediately, or let cool and refrigerate. These buns are best fresh and will keep in the freezer for 2 months.

Cooking Tips:

  1. If you are making the filling ahead, reserve the spring onion and sesame oil until you are ready to pleat the buns. The raw filling will keep in the fridge for 2-3 days. 

  2. Alternatively, use canned peeled tomatoes.

  3. For beginners, start with a minimal amount of filling to help the pleating process. No one starts out with good-looking buns so practice makes perfect.

  4. Use any leftover meat filling for dumplings or meatballs.

  5. These buns are best enjoyed fresh as the dough will absorb the meat juices over time.

Black Sesame Steamed Buns

These sweet sesame buns are a nostalgic delight that appears in bakeries, dim sum restaurants, and street food vendors. There is something hearty and fulfilling about molten sesame paste, oozing out of a fresh-steamed bun. These make great breakfasts, a sweet to wrap up a meal, or a snack on the go. I make these by the batch and stock them in the freezer for cravings such as the above.

Black Sesame Steamed Buns

Makes 12  buns

INGREDIENTS

Black sesame filling

  • 110 grams of cane sugar 

  • 180 grams, black sesame seeds, toasted

  • 100 grams of butter, warmed and melted in the microwave

  • A pinch of salt

1 Portion of Steamed Bun Dough

INSTRUCTIONS

  1. Make your dough: Refer to this steamed bun dough recipe. I like to make the filling while I wait for the dough to rise. Alternatively, you can prep the filling ahead to save time. 

  2. Make the sesame filling: Add the sugar to a powerful blender or food processor. Blitz until the sugar turns to powder. Add the sesame seeds and blitz again until finely processed. Add the melted butter, salt and blend again until evenly combined. The paste should be thick and molten. Cool the filling until it’s firm enough to handle, then scoop it directly onto a steamed bun wrapper. If your paste is too firm, warm it for a few seconds in the microwave.

  3. Pleating the Bun: Line your steamers with steamer paper.* Place the wrapper in one hand and scoop a heading tablespoon of filling into the center.  The filling should weigh around 30-40 grams. For beginners, start with a minimal amount of filling to help the pleating process. Flatten the filling with a spoon and follow the steps below. Swap hands if you are left-handed.
    - With your right forefinger and thumb, firmly pinch an edge of the wrapper to make the first fold. 
    - Continue pinching folds with your right index finger and thumb. Rotate the wrapper with your left hand as you go, pinching until the whole bun is pleated. While pleating, use your left thumb to press down the filling so the dough comes over the filling. Your right thumb should never leave the bun.
    - Seal the bun with a series of pinches to form the pointy top of the bun. Repeat with the remaining dough and filling. Place all pleated buns in the steamer.

  4. Second Rising*: Transfer your buns to the steamer, leaving 1-2 inches of space between the buns. Cover, and let them sit for 15-20 minutes. The 2nd rising will allow the buns to be pillowy and soft. You’ll know the buns are ready when they have expanded in size and are fluffy and light to the touch. 

  5. Steaming the bun: Over high heat, bring a pot of water to boil. Place the steamer on top and immediately turn the heat to medium. Steam for 12 minutes and let sit for 5 minutes before taking the lid off. This will ensure your buns do not deflate with the quick temperature change. Serve immediately, or let cool and refrigerate.

Cooking tips:

  1. I like to place pleated buns directly into the steamer. That way, you won’t have to move them after the second rising.

  2. You can find steamer liners at Asian shops. To make your own steamer liner — measure and cut a round parchment paper to fit inside your steamer. Cut holes in the parchment paper that are 1½ inches apart to allow steam to rise through.

  3. Place the buns over a warm pot of water to speed up the second rising. 10-15 minutes.

Pork and Tomato Steamed Buns

This is a favourite pork bun recipe inspired by my summer trip to Italy. The savoury sweetness of tomato brings a great depth to the flavour. If tomatoes are not in season — substitute with peeled canned tomatoes. I like this recipe with ground beef as well.

The pleating process.

Pleated buns, ready for a second rising.

Pork and Tomato Steamed Buns

Makes 16  buns, serves 4 people

INGREDIENTS

Meat Filling*

  • 1 lb (453 g)  lean ground pork

  • 2 medium (200 grams) tomatoes*

  • 1 tbsp soy sauce

  • 1 tbsp (10 g) ginger, peeled and finely minced

  • 1 tsp Sichuan peppercorn powder*

  • 1/2 tbsp salt

  • 3 spring onions, chopped

  • 2 tbsp sesame oil

1 Portion of Steamed Bun Dough

INSTRUCTIONS

  1. Make your dough: I like to make the filling while I wait for the dough to rise. You can prep the filling ahead to save time. 

  2. Prep the tomatoes: Over high heat, bring a small pot of water to boil. Drop in the tomatoes and stir gently. Cook for 2 minutes, drain, and let cool. Peel the skins off the tomato, squeezing as much tomato juice as you can into a separate bowl while reserving the pulp. Finely chop the tomato pulp. Set the juice and pulp aside. 

  3. Mixing the mince: Add the meat to a large mixing bowl. Gradually add in the tomato juice, stirring with chopsticks until well incorporated. The meat should start to look like a juicy paste. Add in the soy sauce, pepper powder, ginger, green onion, salt, and tomato pulp, stirring continuously. Lastly, add in the sesame oil and mix. The oil will prevent the mixture from becoming too watery. Set the filling aside until ready to use. 

  4. Rolling the wrapper: Refer to this steamed bun dough recipe. Flour your surface and flatten a morsel of dough with your palm. Using a rolling pin, roll the dough from the edge towards the center, without actually rolling the center of the dough. You want a thick center and thin edges on your wrapper. The wrapper should be 4-5 inches in diameter. Cover the wrappers while you work. 

  5. Pleating the Bun: Place the wrapper in one hand and scoop a heaping tablespoon of filling into the center.  The filling should weigh around 30-40 grams. For beginners, start with a minimal amount of filling to help the pleating process. Flatten the filling with a spoon and follow the steps below. Swap hands if you are left-handed and refer to the moving image above:

    - With your right forefinger and thumb, firmly pinch an edge of the wrapper to make the first fold. 
    - Continue pinching folds with your right index finger and thumb. Rotate the wrapper with your left hand as you go, pinching until the whole bun is pleated. While pleating, use your left thumb to press down the filling so the dough comes over the filling. Your right thumb should never leave the bun.
    - Seal the bun with a series of pinches to form the pointy top of the bun. Repeat with the remaining dough and filling.

  6. Second Rising: Line your steamer with steamer paper*. Transfer your buns to the steamer, leaving 1-2 inches of space between the buns. Cover, and let them sit for 15-20 minutes. The 2nd rising will allow the buns to be pillowy and soft. You’ll know the buns are ready when they have expanded in size and are fluffy and light to the touch. 

  7. Steaming the buns: Over high heat, bring a pot of water to boil. Place the steamer on top and immediately turn the heat to medium. Steam for 15 minutes and let sit for 5 minutes before taking the lid off. This will ensure your buns do not deflate with the quick temperature change. 

  8. Serve immediately, or let cool and refrigerate. To reheat, steam for 2-3 minutes in a steam or microwave with a wet paper towel covered on top. These buns will keep in the freezer for 2 months.
Cooking Tips:

  1. If you are making the filling ahead, reserve the spring onion and sesame oil until you are ready to pleat the buns. The raw filling will keep in the fridge for 2-3 days. 

  2. Alternatively, use canned peeled tomatoes.

  3. I buy whole Sichuan peppercorns and grind them in the spice grinder for freshness.

  4. To speed up the rising process. Place your dough or wrapped buns in the oven with a plate of boiling water underneath. The temperature should be around 38 C/100 F. Check the dough around the 25-30 minute mark. 

  5. For beginners, start with a minimal amount of filling to help the pleating process. No one starts out with good-looking buns so practice makes perfect.

  6. You can find steamer liners at Asian shops. To make your own steamer liner — measure and cut a round parchment paper to fit inside your steamer. Cut holes in the parchment paper that are 1½ inches apart to allow steam to rise through.

  7. Use any leftover meat filling for dumplings or meatballs

Steamed Bun Dough

Proofed dough with honeycomb textures

This steamed bun dough recipe makes 16 buns. You can halve or double the recipe, just keep an eye on the texture. The dough should feel soft and malleable, add more water if it’s too tough or flour if it’s too sticky. Add vegetable oil to your hands while working with the dough. It’ll ensure smooth and shiny buns.

I highly recommend using a scale for this recipe. Keep in mind that various flours will absorb water differently. Making good steamed buns come with time and experience. You’ll know how to “read” and work with the dough in time.

If you live in a colder climate like Canada — I like to rise the dough with a plate of hot water in the oven. It speeds up the process from 2 hours to 25 minutes. You’ll know the dough is ready when it expands 1-2 times in size. Honeycomb textures will appear when you pull the dough apart (see photo above).

Steamed Bun Dough

Makes 16 buns

INGREDIENTS

  • 1 cup (236 g) of lukewarm water

  • 1 tbsp (12 g) cane sugar

  • 2 tsp (5 g) active dry yeast*

  • 3 cups (420 g) all-purpose flour, plus extra for kneading and rolling*

  • 1/2 tsp (3 g) salt

  • 1 tsp (4 g) baking powder

  • 1 tsp (5 g) vegetable oil, plus extra for coating the bowl

INSTRUCTIONS

  1. Making the dough: In a small bowl, add the yeast, warm water, and sugar and stir to dissolve. Let sit for a few minutes to activate the yeast. The liquid should foam and look creamy. If not, your yeast is dead and you’ll have to try again.

  2. First Kneading: In a large mixing bowl, add the flour and make a well in the center. Sprinkle the baking powder around the outer ridges of the bowl so it will incorporate later. Gradually stream in the yeast mixture to the flour, mixing with a pair of chopsticks as you go. The dough should come together into a loose mound. When there are no dry patches left, add the vegetable oil and knead for 10 minutes. You’ll know that the dough is ready when it has “Three Shines or 三光” — Shiny hands, bowl, and dough. The dough should be smooth and soft like a baby's bottom.  If the dough is too sticky, add flour or vegetable oil. If the dough is too tough, add water to your hands and continue kneading. 

  3. First rising*: Place the kneaded dough in a well-oiled bowl. Cover and let sit in a warm spot for 1-2 hours until it has doubled in size. The time will depend on the temperature in your home so keep an eye on it. To check if the dough is ready — pull the dough away from the edge of the bowl. There should be strands of airy, honeycomb-like textures. 

  4. Second Kneading: Using well-oiled hands, transfer the risen dough onto a pastry board. Knead vigorously for 8-10 minutes, popping as many air bubbles as you can. This will ensure smooth and shiny buns.

  5. Prepping the dough: Halve, and divide the dough into 16 morsels. I use a scale to ensure even portions. Knead each morsel into a sphere and flour generously to prevent sticking. Cover the dough morsels while you work so they don’t dry out. 

  6. Rolling the wrapper: Flour your surface and flatten a morsel of dough with your palm. Using a rolling pin, roll the dough from the edge towards the center, without actually rolling the center of the dough. You want a thick center and thin edges on your wrapper. The wrapper should be 4-5 inches in diameter. Cover the wrappers while you work.

Cooking Tips:

  1. If you are using instant yeast, substitute the same amount, skip the proofing step, and add the yeast directly to the dry ingredients. 

  2. For tender, softer buns — use 280 grams of all-purpose flour and 140 grams of cake flour. The dough will be less chewy and softer to work with.

  3. To speed up the rising process. Cover your dough and place it in the oven with a plate of boiling water underneath. The temperature should be around 38 C/100 F. The dough should be ready in around 25-30 minutes. 


Kabocha Steamed Buns

When I think about steamed buns — I think about lining up for these, piping at hot breakfast shops 早餐店. Enjoyed with a cup of fresh soy milk. In Taipei, steamed bun shops line every alleyway, serving every kind of savoury and sweet filling you can think of. There is nothing like trying these buns handmade, straight from a steamer to your plate. 

We never had to learn how to make these back home as they are sold everywhere — made by people that have been cooking them for generations.  I love how working on these recipes made me think of home. Many have asked how I ended up working in food photography and here it is — food is truly a bridge between worlds and a love language for all cultures. My peaceful and delicious protest against long dreary winters in Canada.  

Here is my take on sweet buns, bao or baozi as you call it. Featuring my favourite kabocha squash and a dough dyed with carrot juice. For beginners, steamed buns are just as intimating to make as sourdough. But once you get into the process, it’s super rewarding. I hope you all have a chance to try a handmade bun, there is nothing quite like it!

Kabocha Steamed Buns

Serves 10

INGREDIENTS

Kabocha Filling*

  • 350 g kabocha, around ½ a medium-sized kabocha

  • ¼ cup (60g) sugar, or to taste

  • ¼ cup (50 g) butter

  • 1 tsp (4 g) vanilla extract 

Dough* (for carrot dough, see notes)

  • 1/2 cup (150 g) of lukewarm water 

  • 1½ tbsp (20 g) sugar

  • 2 tsp (5 g) active yeast

  • 2 cups (250 g) all-purpose flour

  • 1 tsp (3 g) baking powder

  • 1 tsp (5 g) vegetable oil

INSTRUCTIONS

For the Filling

  1. Halve the kabocha and scoop out the seeds with a spoon. Peel and chop the kabocha into 2-inch pieces. Transfer the kabocha to a steamer and steam for 10-15 minutes. The kabocha is done when it is soft and easily pierced with a chopstick. 

  2. Transfer the kabocha to a pot and add the sugar and butter. Heat over low heat, stir and mash the mixture with a spatula until everything comes together into a paste. Set aside and let cool. This filling should keep for 2-3 days in the fridge if made ahead.

For the Dough

  1. Make the dough: In a small bowl, add the yeast, warm water, and sugar and stir to dissolve. Let sit for a few minutes to activate the yeast. The liquid should foam and look creamy. If not, your yeast is dead and you’ll have to try again.

  2. First Kneading: In a large mixing bowl, add the flour and make a well in the center. Sprinkle the baking powder around the outer ridges of the bowl so it will incorporate later. Gradually stream in the yeast mixture to the flour, mixing with a pair of chopsticks as you go. The dough should come together into a loose mound. When there are no dry patches left, add the vegetable oil and knead for 10 minutes. You’ll know that the dough is ready when it has “Three Shines or San Guang 三光” — Shiny hands, clean bowl, shiny dough. The dough should be smooth and soft like a baby's bottom.  If the dough is too sticky, add flour or vegetable oil. If the dough is too tough, add water to your hands and continue kneading. 

  3. First rising*: Place the kneaded dough in a well-oiled bowl. Cover and let sit in a warm spot for 1-2 hours until it has doubled in size. The time will depend on the temperature in your home so keep an eye on it. To check if the dough is ready — pull the dough away from the edge of the bowl. There should be strands of airy, honeycomb-like textures. 

  4. Second Kneading: Using well-oiled hands, transfer the risen dough onto a pastry board. Knead vigorously for 8 minutes, popping as many air bubbles as you can.

  5. Prepping the dough: Halve, and divide the dough into 10 morsels. I use a scale to ensure even portions. Knead each morsel into a sphere and flour generously to prevent sticking. Cover the dough morsels while you work so they don’t dry out.

  6. Rolling the wrapper: Flatten a morsel of dough with your palm. Hold the edges of the dough in one hand and roll the edges from the outside in with a rolling pin, rotating as you go. You want thin edges and thick centers on your wrapper. The wrapper should be 4-5 inches in diameter. 

  7. Pleating the Bun*: Place the wrapper in one hand and scoop a heading tablespoon of filling into the center. The filling should weigh around 30-40 grams. For beginners, start with a minimal amount of filling to help the pleating process. Flatten the filling with a spoon and follow the steps below. Reserve hands if you are left-handed. Refer to the moving image above.

    • With your right forefinger and thumb, firmly pinch an edge of the wrapper to make the first fold. 

    • Continue pinching folds with your right index finger and thumb. Rotate the wrapper with your left hand as you go, pinching until the whole bun is pleated. While pleating, use your left thumb to press down the filling so the dough comes over the filling. Your right thumb should never leave the bun.

    • Seal the bun with a series of pinches to form the pointy top of the bun. Repeat with the remaining dough and filling.

  8. Second Rising:  Line your steamer with parchment paper*. Transfer your buns to the steamer, cover them, and let them sit for 15-20 minutes. The 2nd rising will allow the buns to be pillowy and soft. You’ll know the buns are ready when they have expanded in size and are fluffy and light to the touch. 

  9. Steaming the buns: Over high heat, bring a pot of water to boil. Place the steamer on top and immediately turn the heat to medium. Steam for 12 minutes and let sit for 5 minutes before taking the lid off. This will ensure your buns do not deflate with the quick temperature change. 

  10. Serve immediately, or let cool and refrigerate or freeze. To reheat, steam for 2-3 minutes in a steam or microwave with a wet paper towel covered on top. 

Cooking Tips:

  • Carrot Dough: Blend ½ of a medium carrot with one cup of water in a powerful blender. Strain the pulp and use the liquid in place of the lukewarm water in the dough recipe. Omit the sugar in the dough recipe since carrots are naturally sweet.

  • To speed up the rising process. Place your dough or wrapped buns in the oven with a plate of boiling water underneath. The temperature should be around 38 C/100 F. Check the dough around the 25-30 minute mark. 

  • For beginners, start with a minimal amount of filling to help the pleating process. No one starts out with good-looking buns so practice makes perfect. 

  • You can find steamer liners at Asian shops. To make your own steamer liner — measure and cut a round parchment paper to fit inside your steamer. Cut holes in the parchment paper that are 1½ inches apart to allow steam to rise through.

  • Alternatively, you can use pumpkin instead of kabocha. If using canned pumpkin, you’ll have to boil down the puree until no liquids remain. The filling should be a paste, not a sauce.


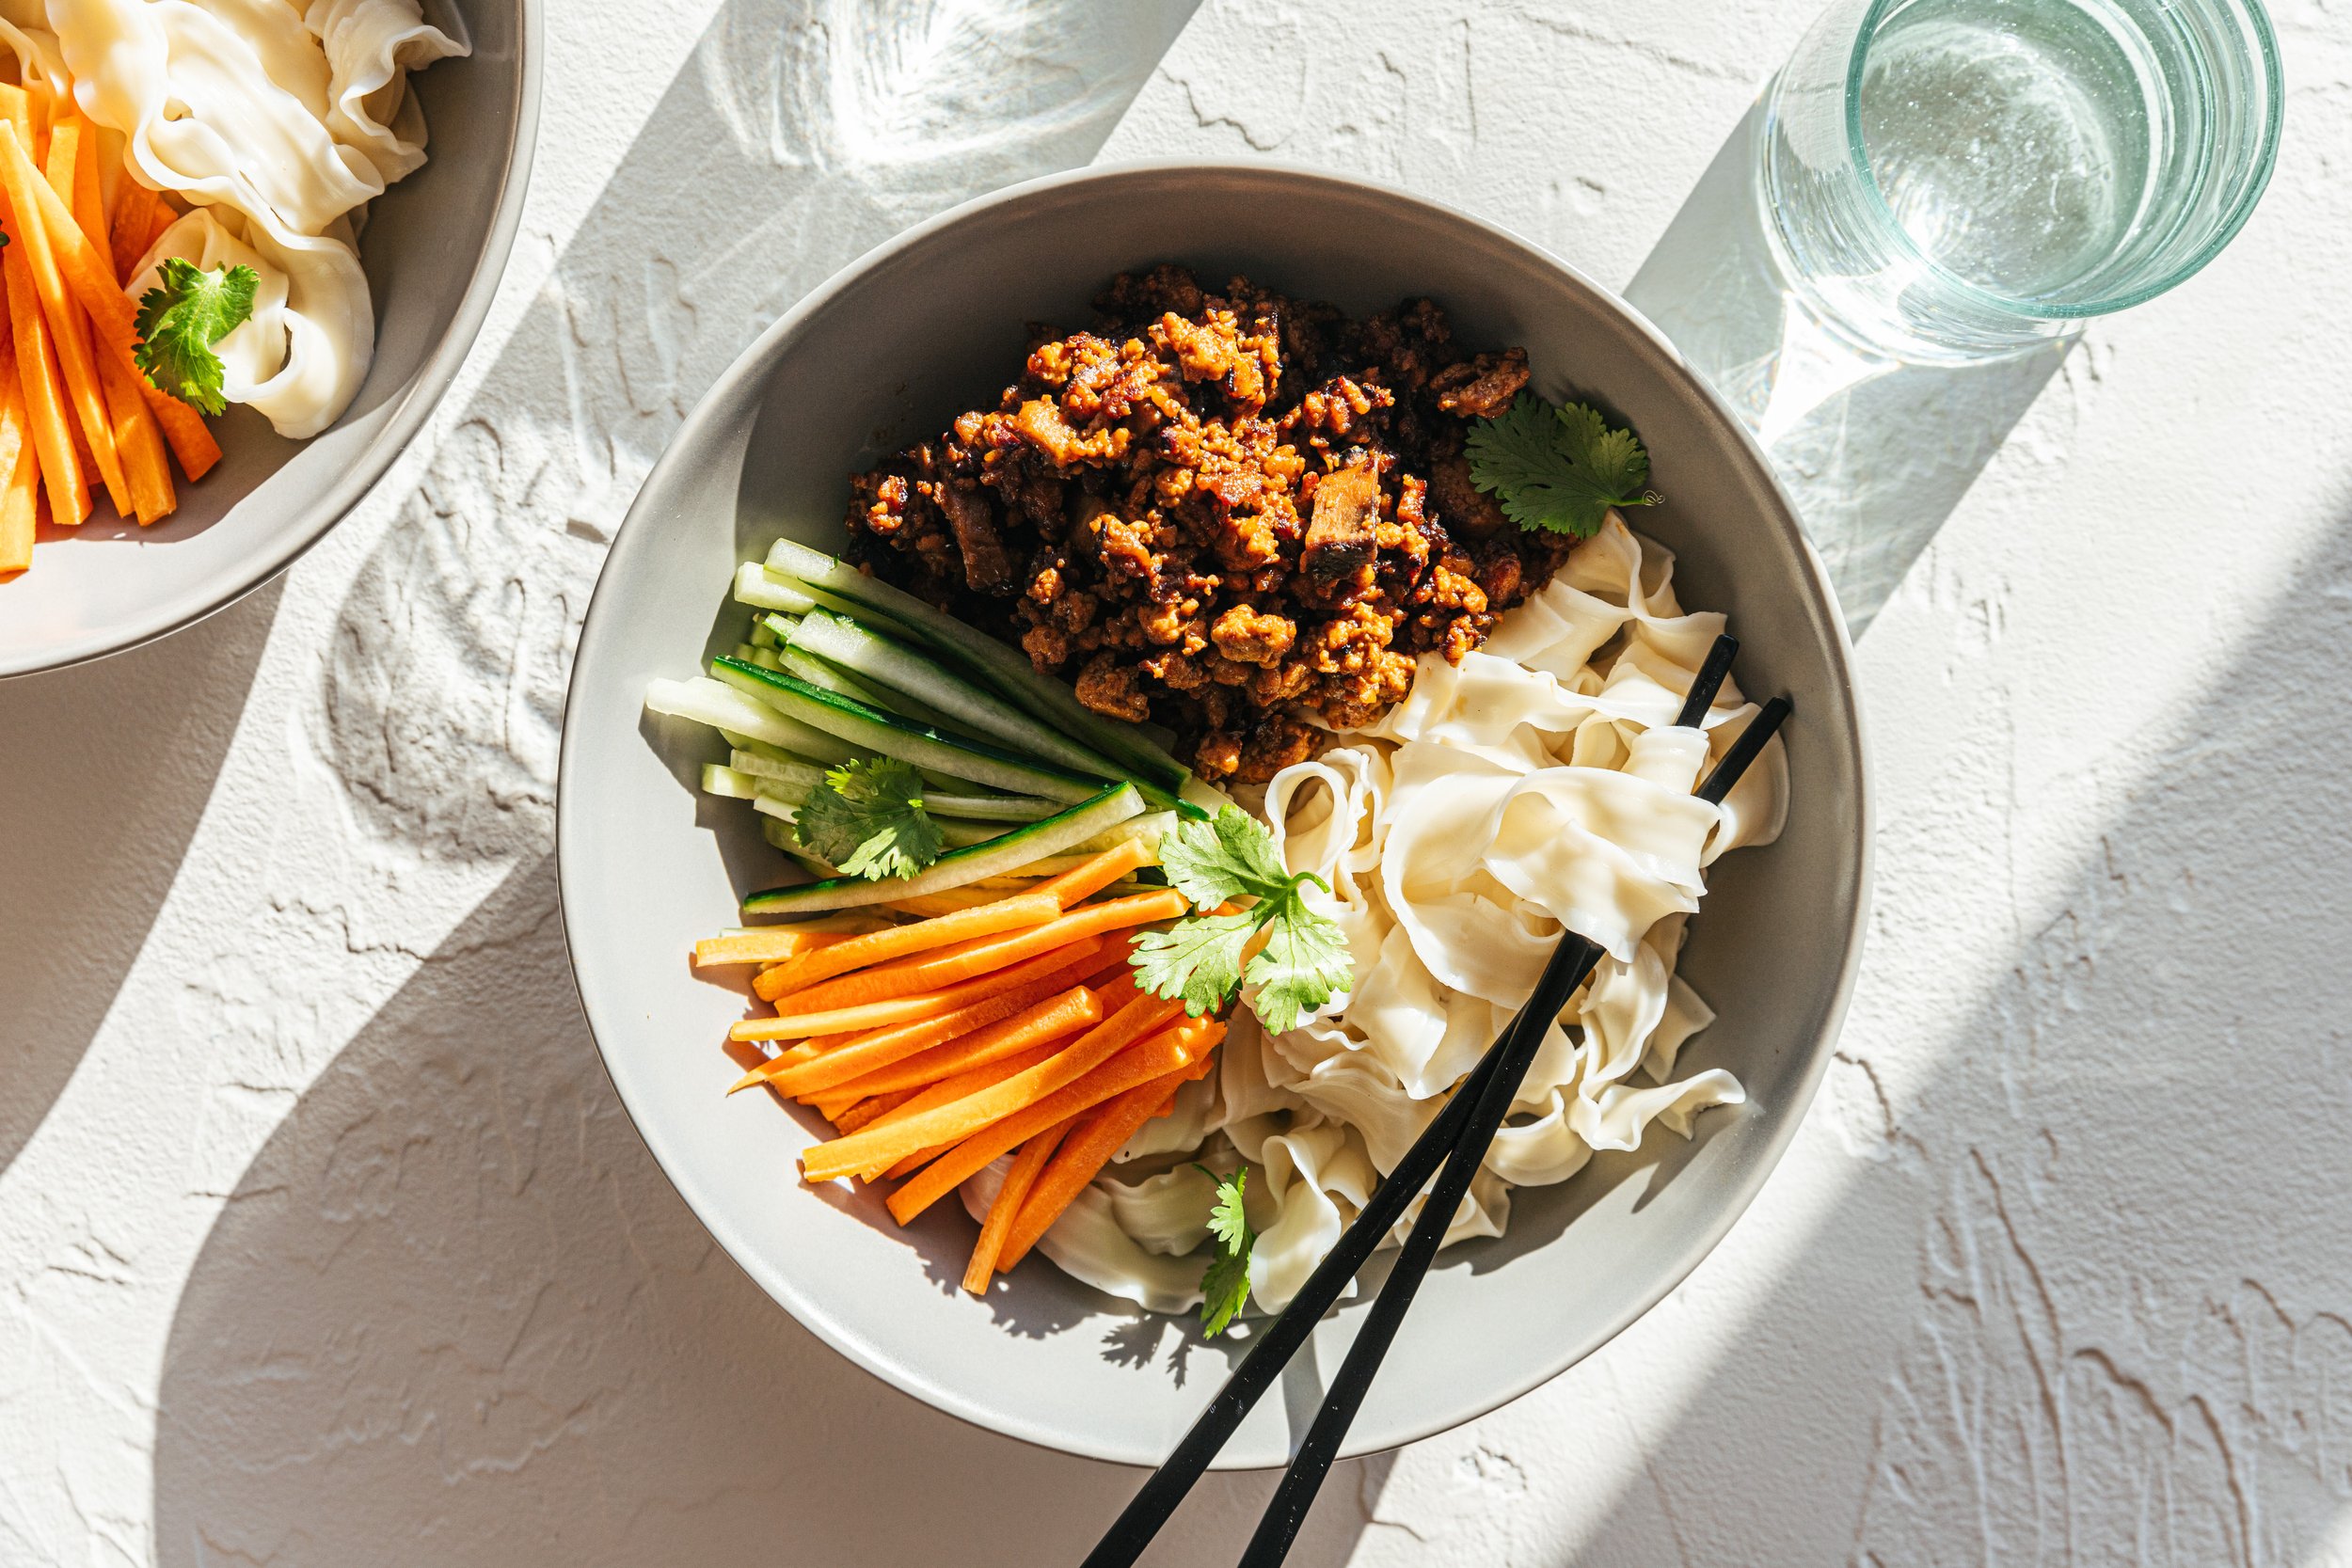
Vegan Zha Jiang Noodles

I love these vegan black bean noodles. Known as Zha Jiang Mian (炸醬麵) in China or Taiwan and even Korea. These are great for summer when the heat is too intense for soups. Traditionally, Zha Jiang Mian is made with pork. I love this vegan version made with tofu — you really don’t miss the meat here! I’ve made it for western friends and they all love the black bean sauce.

If you’re new to bean sauces, they come in spicy, sweet, and salty variations. It can be intimidating but also forgiving if you buy the wrong kind. Just adjust the seasoning to taste. The brands I used for this recipe is pictured below.

Black bean paste, sweet bean paste and my favourite knife cut noodles.

Vegan Black Bean Zha-Jiang Noodles (炸醬麵)

Serves 2-3

Ingredients

Sauce

  • 2 tablespoons salty bean paste (or Soybean Paste / Dou ban Jiang豆瓣醬)*

  • 6 tablespoons of sweet bean paste (Tian Mian Jiang 甜麵醬)

  • ½ cup Shaoxing wine, rice wine, or sherry

  • 1 tablespoon sugar

  • 1.5 cup (120 grams) chopped mushrooms (I use white button or king oyster mushrooms)

  • 1 package (285 grams) of firm tofu, patted dry and crumbled into pieces

Fragrant Oil *

  • ½ cup oil

  • 1 onion cut into 8 wedges

  • 1 green onion, chopped coarsely

Other Ingredients

  • Noodles of choice*

  • Shredded cucumber and carrot

  • Chopped cilantro or green onions (optional)

Instructions

  1. Place all the bean pastes in a large mixing bowl, add the Shaoxing wine, and mix until well combined. Set aside.

  2. Using a large non-stick pan, add ½ cup of oil, the chopped onion, and green onion. Cook over medium-low heat until the onions turn brown and crispy, around 8-10 minutes. Use a slotted spoon to discard or save the onions for other dishes.

  3. In the same pan, add the crumbled tofu and fry until golden brown. stirring continuously. Add in the mushrooms, and cook until softened and aromatic.

  4. Stir in the bean sauce and turn the heat to low. Stirring constantly until the sauce evaporates into a chunky mixture. Adjust with sugar or salt to taste.

  5. Cook noodles as directed and set aside.

  6. To serve, spoon sauce over noodles and top with shredded cucumber, carrot, green onions, or cilantro (optional). Serve warm.

Cooking notes:

• If you’re new to bean sauces, they come in spicy, sweet, and salty variations. It can be intimidating but also forgiving if you buy the wrong kind. Just adjust the seasoning to taste.

• The black bean paste is very salty! Go easy on it if it’s your first time cooking with it.

• Substitute the fragrant oil with different flavored oils like shallot oil.

• I like to double the portions for leftovers. The sauce is very good served with summer vegetables over a salad.

Beef Dumplings

Here’s a recipe for one of the most iconic Chinese dishes. If you’re yet to try handmade ones — they make all of the difference. It is a time-consuming recipe but one that brings everyone around the table, pulling their weight and sharing deliciousness. Dumplings skins are super accessible from the shops but if you have the time, hand-kneaded dough makes all the difference.

Most of my memories of dumpling nights start with a bowl of fillings. My mom will mix the meat and seasonings, and hand me a pair of chopsticks to do the rest. The longer you mix, the tastier the filling. I seriously believe that good Chinese food is rooted in time, effort, and acceptable forms of child labor. For me — the prep, the process, and the smell of sesame oil are fundamental to a good dumpling night.

If you’re new to dumpling-making, don’t be intimidated. Experiment and have fun. There are multiple ways to fold dumplings and they all work as long as the fillings stay tucked in. It all comes down to practice and you’re lucky enough — an experience dumpling master to guide you.

Beef Vegetable Dumplings

Serves 2, double this recipe to serve 4-5

INGREDIENTS 

  • 1/2 pound (230 grams) fatty ground beef

  • 1 tbsp soy sauce

  • 1 tbsp rice wine (or Shaoxing wine or dry sherry)

  • 2 tsp ginger, grated

  • 1 tsp salt

  • 1/4 tsp white pepper

  • 1 tbsp sesame oil

  • 4 green onions, stems removed and chopped

  • 1 large carrot, peeled and finely chopped

  • 20 store-bought or homemade dumpling wrappers

INSTRUCTIONS

Making the Filling

  • Add ground beef to a large mixing bowl. Add the soy sauce, rice wine, ginger, salt, and sesame oil. Using a pair of chopsticks, mix thoroughly until the liquids are absorbed. Cover with a plastic wrap and let marinate while you prep other ingredients. The filling will last up to 2 days in the fridge.

  • (Optional) Start making dumpling dough now if you’re planning to use homemade dumpling wrappers.

  • Grate or chop the carrots and green onions in a food processor until finely chopped. Mix, cover, and set aside.

    When you’re ready to make the dumplings, add the chopped green onion and carrot into the meat mixture. Stir until combined.

    Folding the Dumplings

  • Prepare a small dish with water. Place a dumpling wrapper in one hand — scoop about 1 to 1.5 tablespoons of dumpling filling and place it in the center of the wrapper. Wet the upper rim of the dumpling wrapper and fold the wrapper in half. Pinch and seals the edges before folding, starting from one side to the other.

  • After folding, press the fold tight again to seal well. You can use any folding technique as long as the dumplings stay sealed.

  • Freeze the dumplings if you are not cooking them. Place them onto a baking tray and seal with a plastic wrapper. You can store the dumplings in the freezer for up to 1 month. Once the dumplings are completely frozen, you can transport them to an airtight bag to save freezer space.

    Cooking the dumplings

  • Bring a large pot of water to a boil. Gently drop in 12-15 dumplings and bring to a boil again. The dumplings are ready when they puff and float to the surface. To check if they are done — scoop out a dumpling and cut it in half. The meat should no longer be pink.

  • Serve immediately with dumpling soy dipping sauce and pickled garlic cloves (optional). I like this soy, vinegar, and maple syrup sauce.

Cooking tips:

  • Double this recipe for gatherings of 4-5 people.

  • I like to prep my dumpling fillings ahead and let them chill in the fridge. This will make the meat filling easier to handle.

  • For those new to making dumplings — start with less filling in your wrapper for easy success.

  • Always assign a dumpling pincher/overseer for quality control. This will prevent the dumplings from opening during the cooking process. You don’t want a soggy dumpling.

This recipe is adapted from Xinshipu and Omnivore’s cookbook.

Sweet and Spicy Dipping Sauce

This is a spin on the traditional soy and vinegar dipping sauce. Great for dumplings, scallion or potato pancakes, and most Northern-style Chinese pastries 北方麵食. I love the sweet, sour tang it adds to pastry. I find that rice vinegar or apple cider vinegar make great substitutes for black vinegar.

Sweet and Spicy Dipping Sauce

Ingredients

  • 2 tbsp apple cider vinegar (or rice vinegar or Chinese black vinegar)

  • 1 tbsp soy sauce

  • 1 tbsp maple syrup

  • 1 tsp chili oil (or sesame oil)

  • Ginger threads or chopped green onions (optional)

Instructions

  1. Mix everything together and serve in a sauce dish. This keeps in the fridge for a 3-4 days.

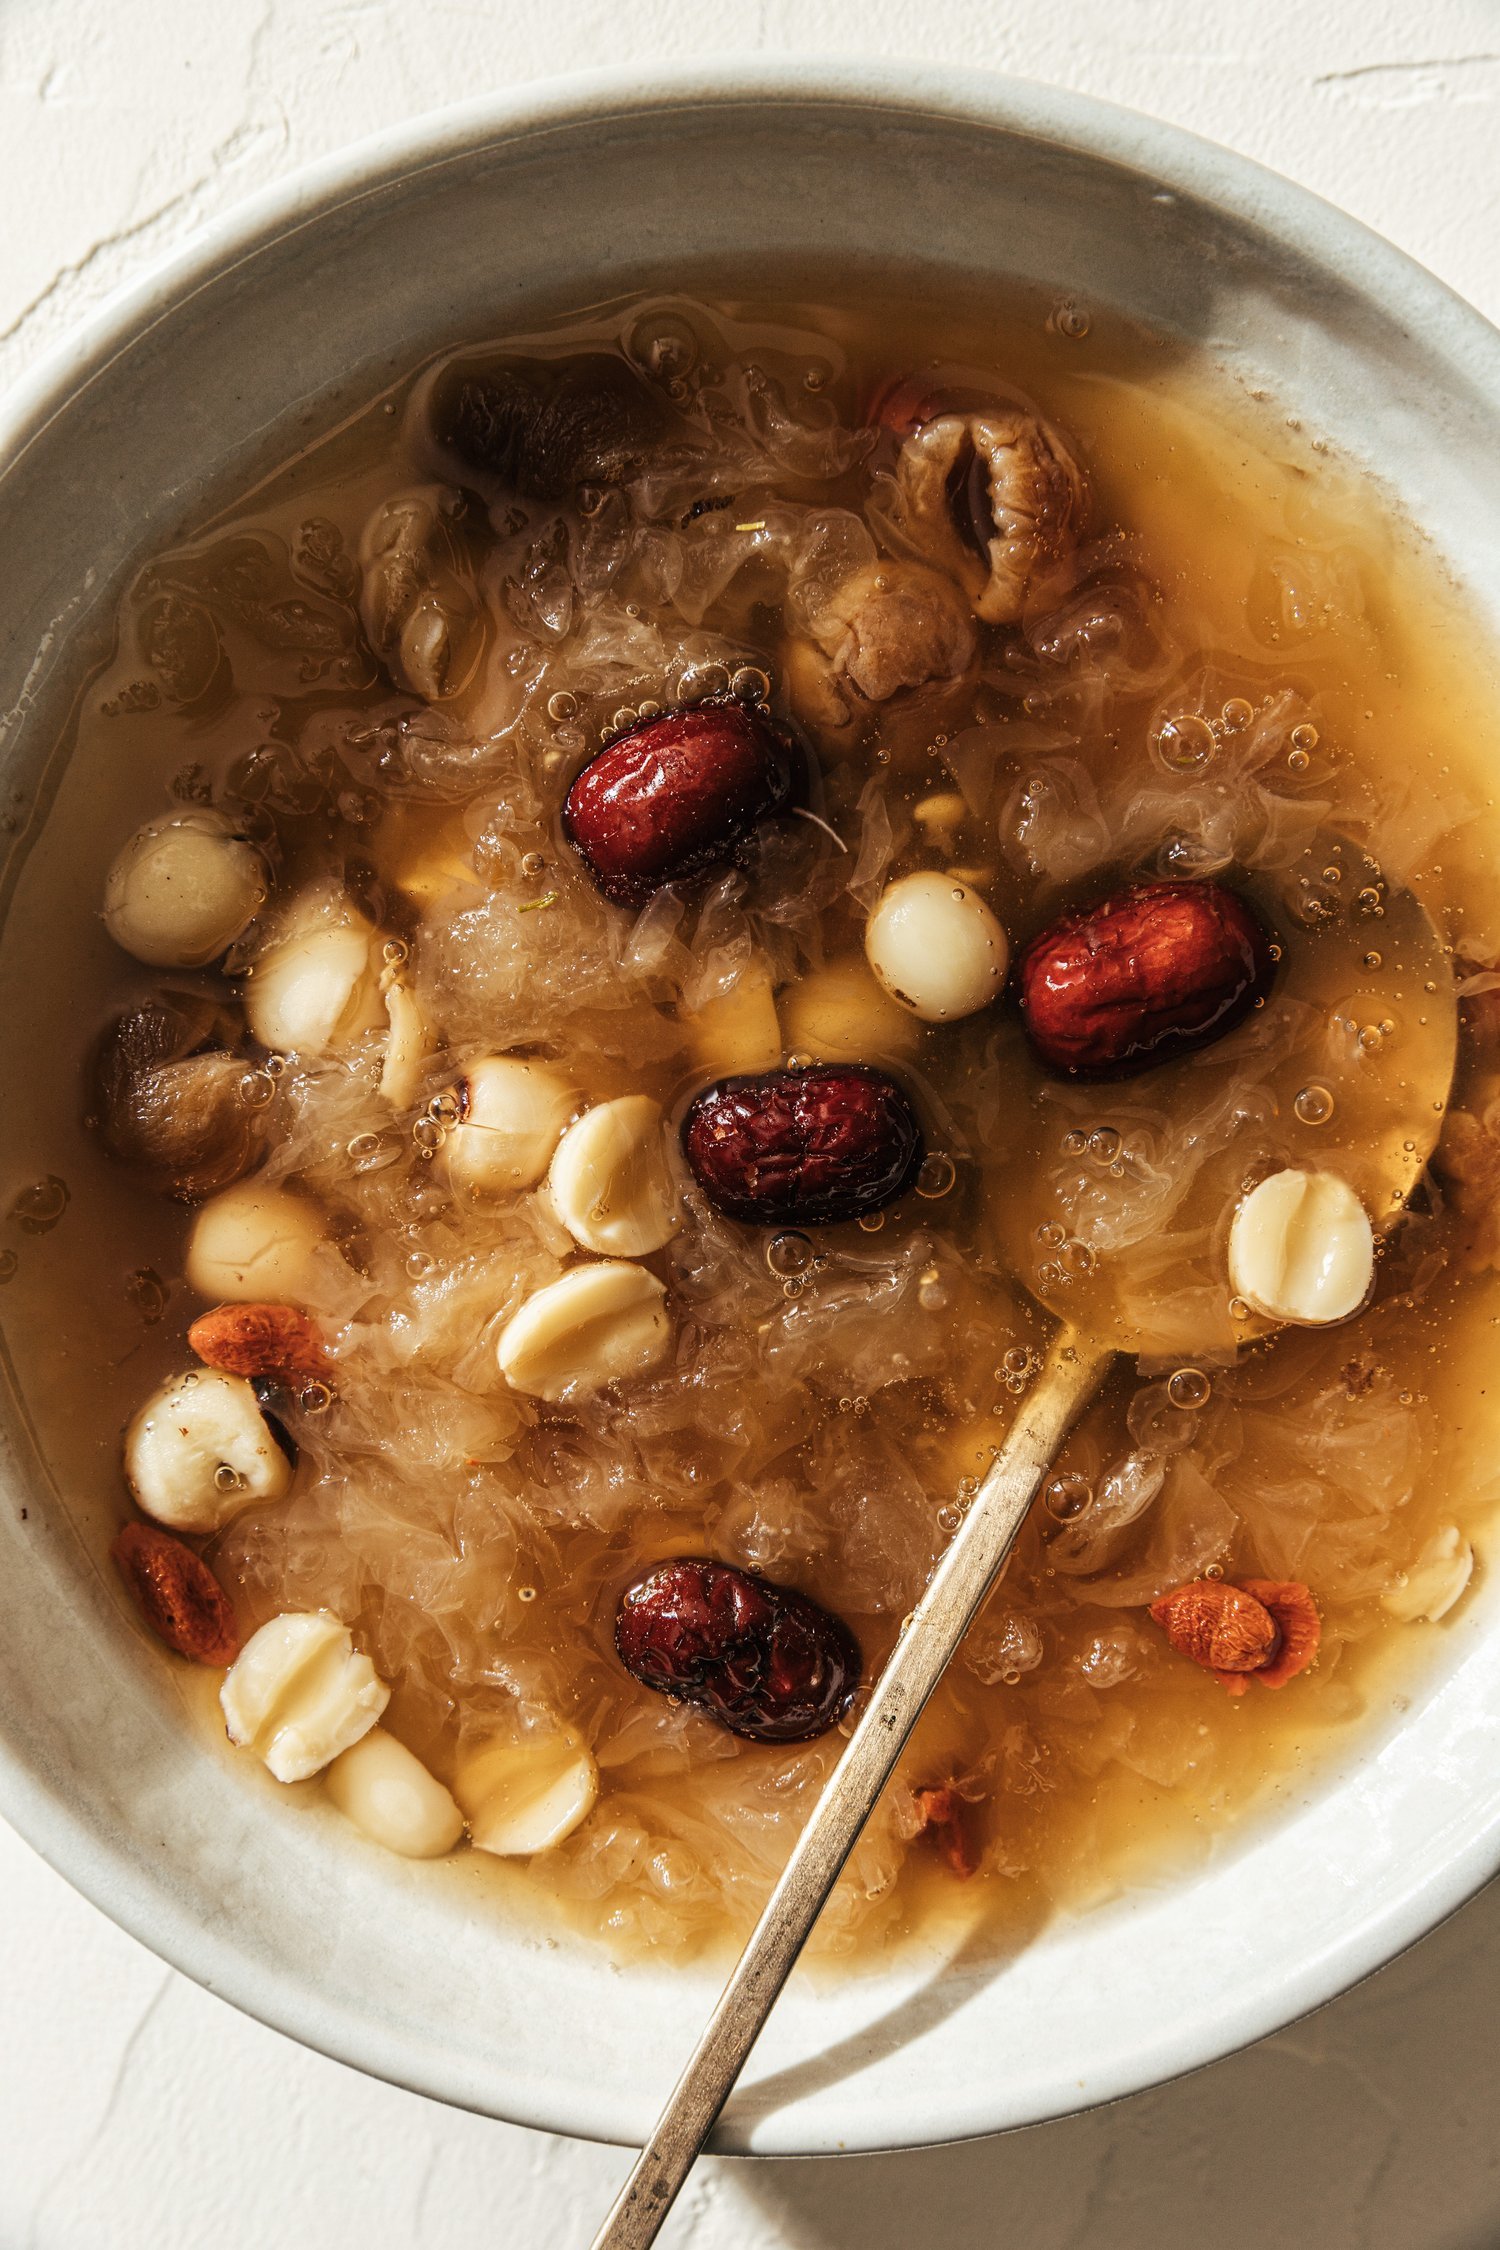
Snow Fungus Dessert Soup

This is an incredibly healthy + nourishing sweet soup we eat in Asia all year round. It’s served from street-side dessert shops to high-end buffet places as a light dessert after a big feast. The nutritional benefits of this soup are endless. To those who have never tried snow fungus — it’s also known as Silver Ear Mushroom. The name is a lot more intimidating than the taste, which resembles and soft jelly. You can pick it up at Asian grocery stores in dried packets. Look for snow fungus that is yellow in color, as the white ones might have been bleached.

Snow fungus is full of Vitamin  D and collagen that gives you plump skin. Red jujube (dates) is the most popular beauty fruit for Asian women. When I lived in China — I had friends who would religiously eat eight per day!

Benefits from these ingredients include:

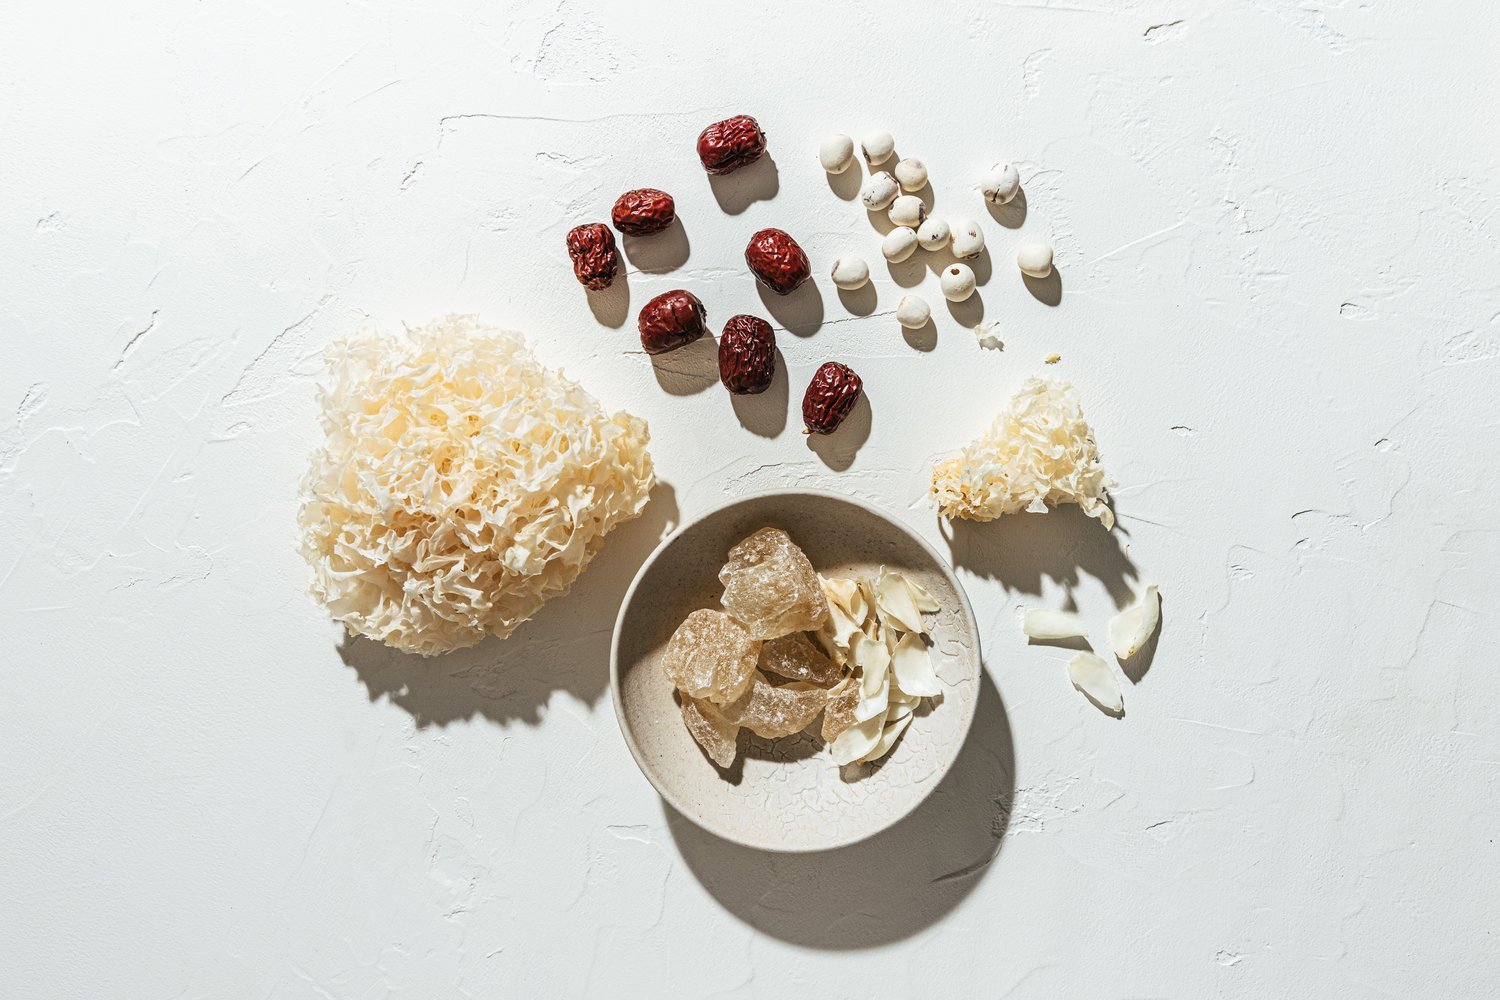
  • Red Dates — lots of vitamin C, iron, and minerals. Great for your immune system

  • Rock Sugar — good for healthy lungs, soothing to the stomach

  • Dried Longan — warming, builds an appetite, helps with insomnia, and is great for your skin

  • Lily Bulb — detoxes your body, good for blood flow and immune system

  • Lotus Seeds — Lowers blood pressure and is good for your heart

  • Dried snow fungus and ingredients

Dried snow fungus and ingredients

Snow Fungus with Lotus Seed Soup 冰糖银耳莲子湯

Serves 6 | prep time: 30 mins | cooking time: 2-hours stove top, 30-mins instant pot

Ingredients

  • 30 grams dried snow fungus 

  • 80 grams Lotus seeds 

  • 50 grams Red dates

  • 30 grams Lily bulb (optional)

  • 20 grams dried Longan (optional)

  • Rock sugar or any mild sugar of choice, to taste

Instructions

  1. Soak the snow fungus, lotus seeds, and lily bulb for 1 hour or overnight. Remove the stem and tough parts of the snow fungus and cut them into small pieces. If there are lotus hearts in the lotus seeds – remove them as they are bitter in taste.

  2. Rinse the red dates, goji berries, and set aside.

  3. In a pot over medium-high heat, add water, snow fungus, lotus seeds, and goji berries. After the soup comes to a boil, lower the heat to a gentle simmer and cook for 1-2 hours.* The snow fungus will soften and the soup will become gelatinous and jelly-like. If the snow fungus tastes crunchy, continue cooking until it softens.

  4. Add the rock sugar to taste and stir to dissolve. Serve straight away or chilled.

Cooking notes:

  1. For Instant Pot, add everything into the pot, seal, and set on high for 30 minutes. Let the pressure release naturally.

  2. For winter, I added a small handful of dried longan to add heat to the soup. You can add it in step 3 with all of the ingredients.

Stir-fried Tomato and Egg / 番茄炒蛋

Amongst all my memories of delicious childhood dishes — this is by far my favorite + most classic of all. Everything Chinese family has a version. My dad makes it, my grandma makes it, all the lunch bento spots we ate at as students make it. It’s ridiculously comforting and easy to make with minimal ingredients. The sweet-sour tang of tomatoes makes the dish so full of umami flavor and brings depth to a simple egg dish. A classic away-from-home dish to make during my years as a college student and while living abroad.

Ripe juicy tomatoes, a handful of eggs, green onions and cornstarch is all you need. Let’s get cooking

Note: If I am making this dish for one— I halve the recipe.

Tomato Fried Egg

Serves 2–3, recipe adapted from Adam Liaw

Ingredients
3 ripe medium-sized tomatoes, roughly chopped
1/2 cup water
2 tbsp vegetable oil
½ tsp salt
¼ tsp sugar
2 spring onions, cut into 5cm lengths
½ tsp cornstarch, mixed with a little cold water
5 eggs, beaten

Instructions

  1. Heat a medium pan over medium-high heat and add a tablespoon of oil. When the oil is hot, add the tomatoes and fry until they are soft around 2 minutes.

  2. Add the salt, sugar, 1/2 cup water, and green onions. When the green onions soften, slowly add the cornstarch mixture, stirring as you go. The tomato mixture will thicken into a saucy slurry. Taste and add more salt or sugar as desired. Remove the tomato mixture from the pan and rinse the pan.

  3. Return the pan to heat and add the remaining tablespoon of oil. Add the beaten eggs and stir every 15 seconds until the eggs resemble the texture of a loose omelet. Add the tomato mixture to the eggs and stir to combine. Taste and adjust seasoning, garnish with more green onions if desired. Serve immediately.

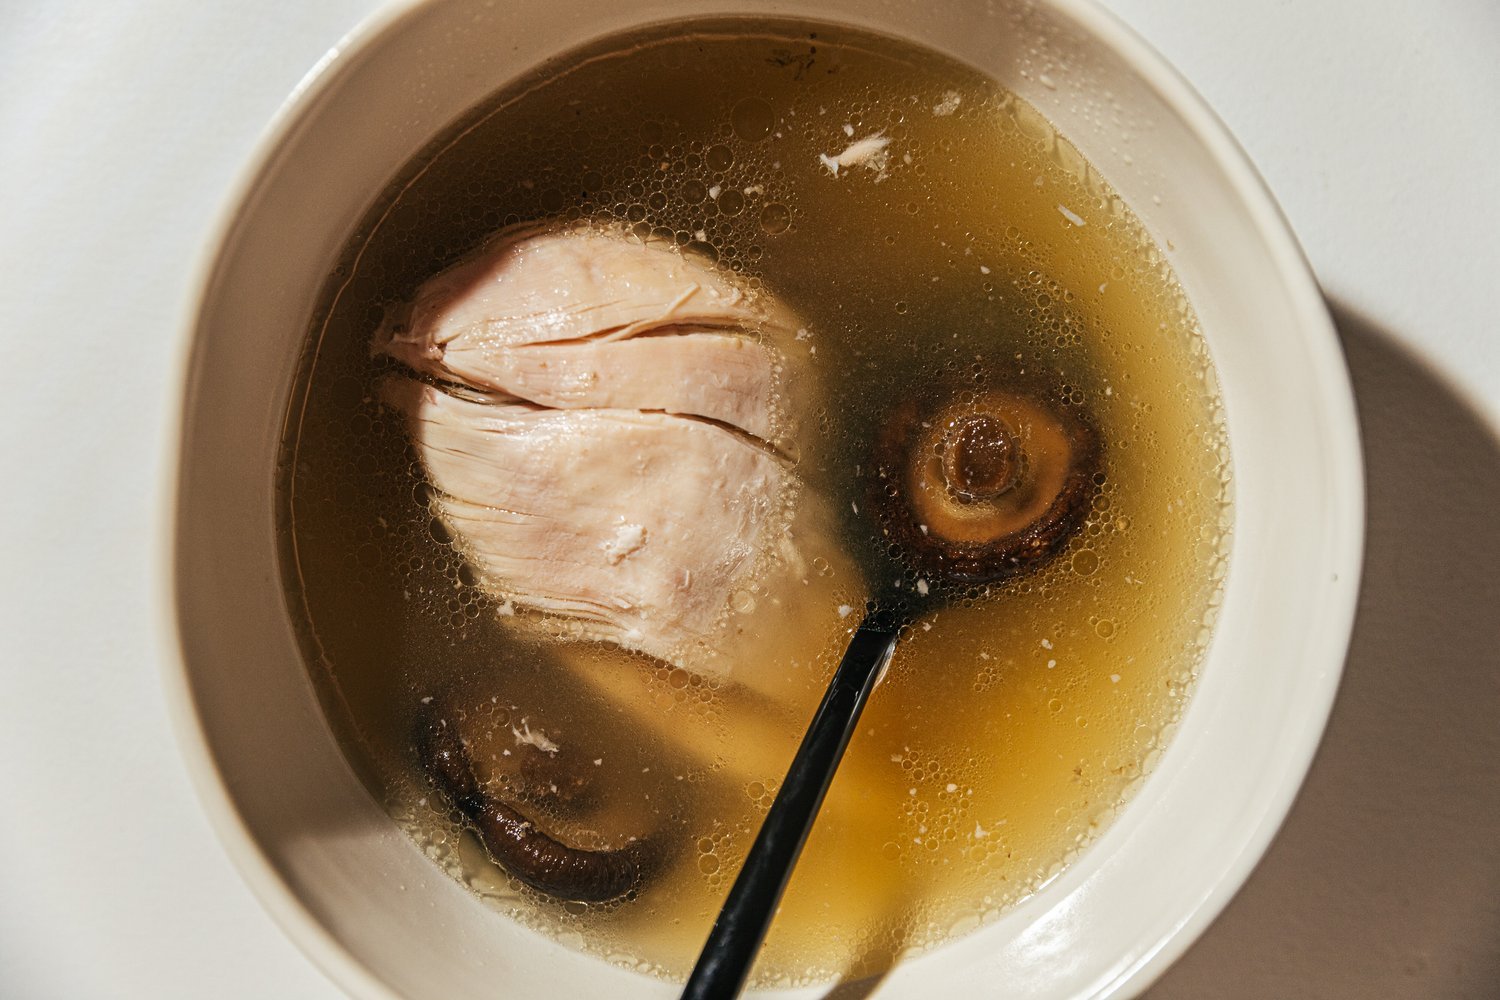
Easy Whole Chicken Mushroom Soup 全雞香菇湯

This chicken mushroom soup with 4-ingredients is deliciously simple and tastes like a warm hug. My dad made it for me with his pressure cooker and I was able to recreate the recipe with a slow cooker. If you’re into the fragrant flavor of shiitake mushrooms — this hearty and light soup is something you don’t’ want to miss. Dad used only two ingredients — chicken and mushrooms, I’ve adapted it to include ginger and a splash of rice wine.

I used a slow cooker for this recipe but it can be made with a pressure cooker, instant pot, or stovetop. Though you’ll get the soup to gel and that tasty bone broth with longer cooking hours.

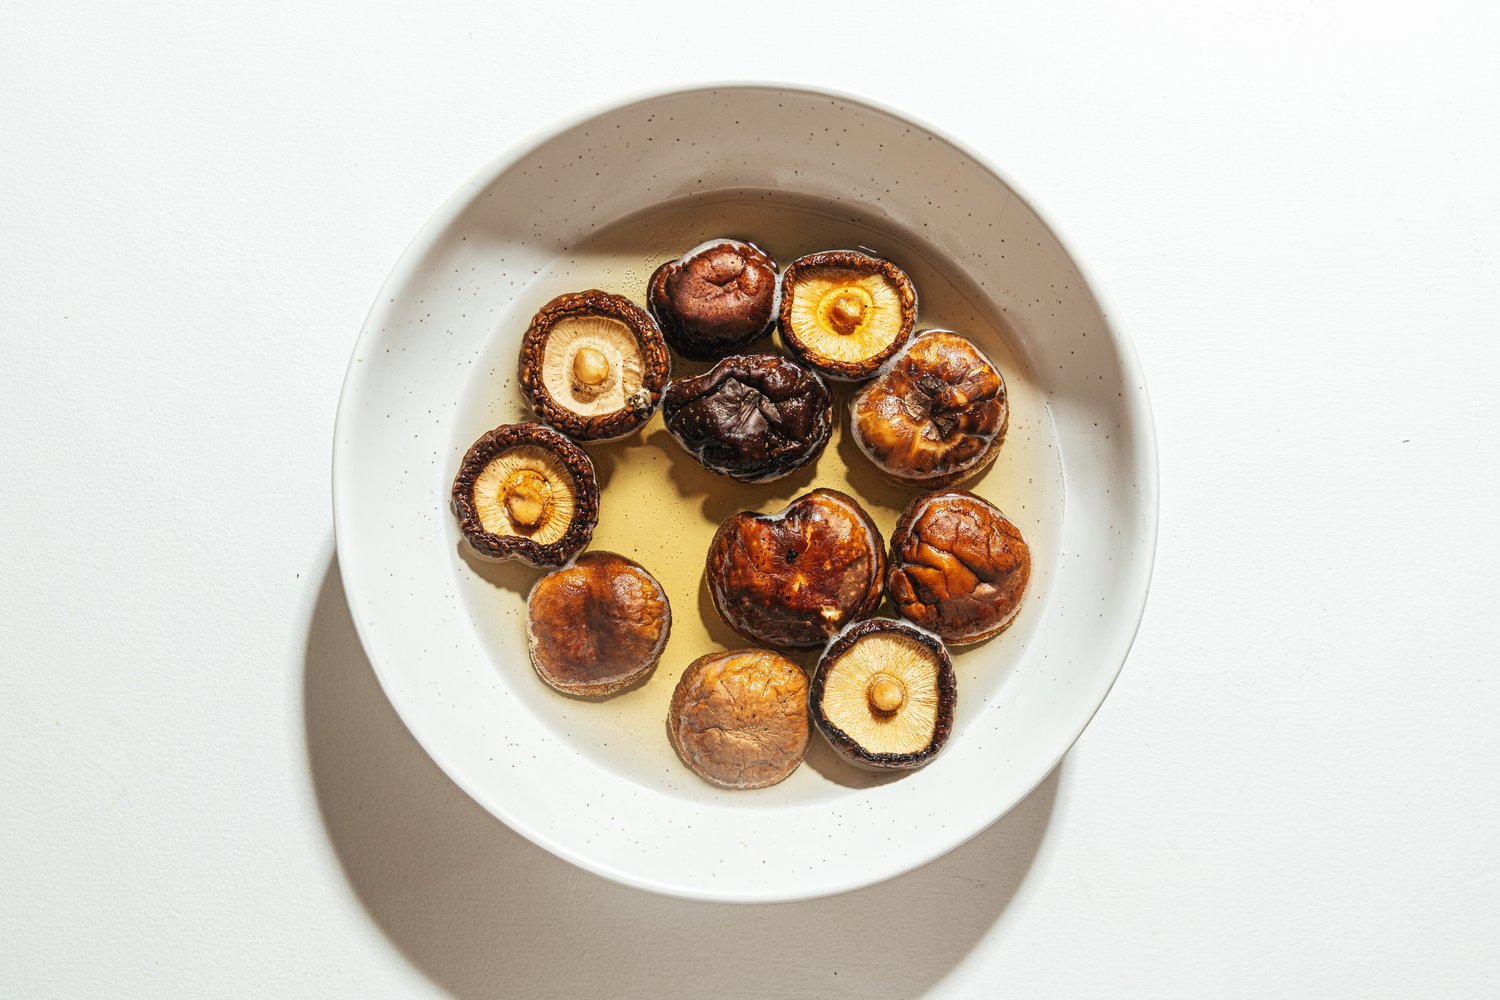
Shiitake mushrooms soaking in all their glory

Flavourful and hearty and light with simple ingredients. My favourite kind of cooking

Shiitake mushrooms soaking in all their glory

Flavourful and hearty and light with simple ingredients. My favourite kind of cooking

Whole Chicken Mushroom Soup

Ingredients

  • 1 whole organic chicken (buy the best quality chicken you can get)

  • 8–10 dried shiitake mushrooms

  • 3-inch knob of organic ginger, sliced into thin pieces

  • 1/4 cup rice wine (Mijiu / Chinese cooking wine)

  • 5 Chinese red dates (optional)

  • Salt, to taste

Slow Cooker Instructions

  1. Soak the shiitake mushrooms in water until soft. If you’re in a time pinch, soak the mushrooms in hot water. Reserve the mushroom water for the broth.

  2. Take the chicken out of the package. Rinse it thoroughly and pat dry. Using both hands, generously rub salt all over the chicken — under the wings, and inside the cavity. Let sit for 10 minutes and rinse again.

  3. Add the brined chicken to the pot along with shiitake mushrooms, mushroom water, ginger, and dates (if using). Fill the pot with water until the chicken is submerged (around 10 cups of water).

  4. Cook on low for 8-hours. Add the rice wine, taste, and salt if needed. You can take the chicken out, debone before serving, or serve straight from the pot. Enjoy!

Cooking notes:

  • Some recipes suggest boiling the chicken in hot water before adding the soup but you’ll lose a lot of flavors that way. If you prefer a clearer broth — strain the finished soup before serving.

  • Red dates are optional in this recipe, the flavor is subtle but it’s really good for you.

  • This soup can be made with a pressure cooker, instant pot, or stovetop. Though you’ll get the soup to gel and that tasty bone broth with longer cooking hours. Let me know how it goes if you do.

    If you enjoyed making this recipe, tag it with #sophiahsinkitchen. I’d love to see it and reshare it

Basic Chinese Congee

This is a basic Stovetop recipe for Chinese congee. One thing to remember is the 1:10 rice to water ratio. For a thicker consistency — use 8 cups of water. For runnier congee, use 12 cups. I like something in between :)

Ingredients

  • 1 cup white rice (I prefer jasmine, but any short grain rice will do), rinsed until the water runs clear

  • 10 cups water, chicken, or vegetable stock 

  • 1/2 teaspoon kosher or sea salt, plus more for seasoning

  • One-inch knob of ginger, peeled and sliced thin

  • Two whole cloves of garlic, peeled

Instructions

  1. In a large pot over medium heat — add stock, rice, and ginger. Bring the mixture to a boil, then reduce the heat to a low simmer. Stirring occasionally so that the rice doesn’t burn at the bottom.

  2. Simmer the congee for about 1 hour or until the congee is thickened and creamy. Add salt to taste. Serve straight from the pot.

Note: Congee thickens as it cools. If not consuming all at once, add additional stock or water to create the desired consistency.

Topping ideas

I like mine with a simple fried egg in the mornings. Soy sauce, pickled vegetables, savoury dishes. Sliced green onions are also great. 

Roasted Sichuan Peppercorn Salt

This is yet another recipe from the cookbook China Moon by Barbora Tropp. According to an interview, peppercorn salt was one of the condiments Barbara craved during the last few months of her life battling cancer. I am ever so grateful to discover her work during this period of time. Such is the power of food to bring back memories of adventure in china — eating coloured dumplings in famous dumpling houses, and discovering hole-in-the-wall baozi shops that I would revisit if I were to visit Northern China again.

Read More

Yunan Spicy Potato Pancakes

spicy-potato-pancakes-recipe-6.jpg

Most days, after long hours of cooking and photographing food — there are few things I look forward to than potatoes with a dash of olive oil, salt and pepper. The comfort of carbs and refreshment for the over-stimulated taste buds.

This potato pancake requires a fair bit of arm work, a trusty grater, and a passion for spicy Chinese food. In this case — cuisine from the mountainous province of Yunnan. All at once, Yunnan is known for its scenic views, mountains and rivers that run throughout the province. Mushrooms, flowers, fresh river fish, rice noodles (Mi Xian) are key to Yunnan cuisine.

My memories of Yunnan cuisine consist of sensational hot pots I had in Beijing — a visual meal filled with mushrooms of every kind, carnation petals, sesame sauce, jasmine flowers marinated in vinegar and rice wine served in bamboo flasks. Then there was my auntie’s Yunnan restaurant in Taipei — I can still recall the array of fresh fish, red chilis and fungi served with every meal. In Vancouver — the closest conversations I have around Yunnan food are with my designer friend Lisa, whose family hails from the rivers and mountains of Yunnan.

These potato pancakes are an adaptation to a local snack served at street markets in Yunnan. The egg in this recipe was added by Lisa’s grandmother for nutritional purposes. The potato starch that seeps from salted potatoes acts as a natural binding agent. It’s a great side dish for dinner and something I look forward to eating for breakfast. The recipe is adapted (and tested four times) by yours truly, with Lisa suggesting to dip it in a sauce made of vinegar, soy sauce and Yunnan chilli flakes.

Lisa and a potato pancake feast

Lisa and a potato pancake feast

Potato starch separating from potato water.

Potato starch separating from potato water.

The only spicy, sweet and sour dipping sauce you need (recipe below).

The only spicy, sweet and sour dipping sauce you need. Recipe here

spicy-potato-pancakes-recipe.jpg

Yunnan Potato Pancakes

Serves 2 (1 potato makes one pancake)
You will need a box grater or mandolin, two large mixing bowls, and a nonstick frying pan

Ingredients

  • 2 medium-large russet potatoes

  • 1 1/2 teaspoon salt

  • 1/4 teaspoon black pepper

  • 1 teaspoon soy sauce

  • 1 teaspoon sesame oil

  • 1/2 teaspoon chili flakes

  • 2 eggs

  • Green onions, sliced (optional)

Instructions

1. Grate the potatoes into a large mixing bowl. Add 1 1/2 teaspoons of salt and mix thoroughly. Allow the potatoes to sit for 15 mins (or as long as 30 mins) for the water to separate out from the potatoes. Squeeze as much water as you can out of the potatoes into the bowl and transfer the potatoes to a second bowl. Leave the residue water in the original bowl.

2. Let the residue water sit until the potato starch sets in a layer at the bottom, 1-3 minutes. Discard the water on top, using hands or a spoon, and transfer the potato starch into the grated potatoes. This will help bind the pancake together.

3. Create a well in the potato mixture and crack in the eggs. Gently beat until the whites and yolk are mixed. Add the black pepper, soy sauce, and sesame oil to the egg and mix thoroughly.

4. Heat a medium frying pan until medium-high heat. Using a spatula, transfer a quarter of the potato mixture onto the frying pan and press gently to form a pancake. Turn the heat down to medium-low and fry for 4–5 minutes per side.

5. Serve straight from the pan with sweet & spicy dipping sauce. Garnish with green onions. Bon Appétit!

Cooking Tips

*Turning the heat down once potatoes are in the pan will ensure thorough cooking and a crispy outer layer without burning the pancake.


Chinese Egg Tarts Recipe (Whole Egg)

I had some leftover pastry shells in the freezer which I have been itching to put to use. Egg tarts. I never realized how easy it was to make these until I tried. All you need is egg, milk, sugar and some patience. This is a “whole egg” egg tart recipe so you don’t have to worry about coming up with creative ways to use your egg whites.

If you’ve ever been to a Chinese bakery, you’ll know that these are the stars of the show. A simplified version of the Portuguese egg tart — these tarts appear in breakfasts, dim sums, potlucks and brighten many faces with their yellow shade.

If you don’t have pastry shells on hand, the filling is great baked in ramekins as well. Make sure to pass some off to friends as soon as they’ve cooled to avoid eating one too many. My highest record is three a day.

Chinese Egg Tarts 全蛋蛋撻

*Makes 6 egg tarts

Ingredients

5 small pastry shells
5 eggs
80 ml milk
165 ml water
80 grams sugar (I used golden sugar)
1/2 tsp vanilla extract

Instructions

Heat oven to 390 F. In a small saucepan, add water and sugar over medium heat. Stir until the sugar dissolves and set aside to cool. In a large mixing bowl, whisk the eggs until the yolk and whites are combined. Add the milk, vanilla extract, sugar water and mix well. Filter the liquid through a sieve to remove chunky pieces of raw egg. Discard the chunky bits. Fill each shell up to 80%.

Bake for 15 minutes, then reduce heat to 350F and bake for another 10 minutes. Turn off heat, prop the oven door open and let the egg tarts sit for 5 minutes or so. Check on the tarts every so often to make sure the egg filling does not get overcooked. The filling should be soft with just the right amount of gooey in the center.